Salsa Verde & Slow Cooked Spicy Onions & Peppers
- At October 10, 2018
- By Sean Smith
- In Recipes, salsa, Tomatillo
 0
0
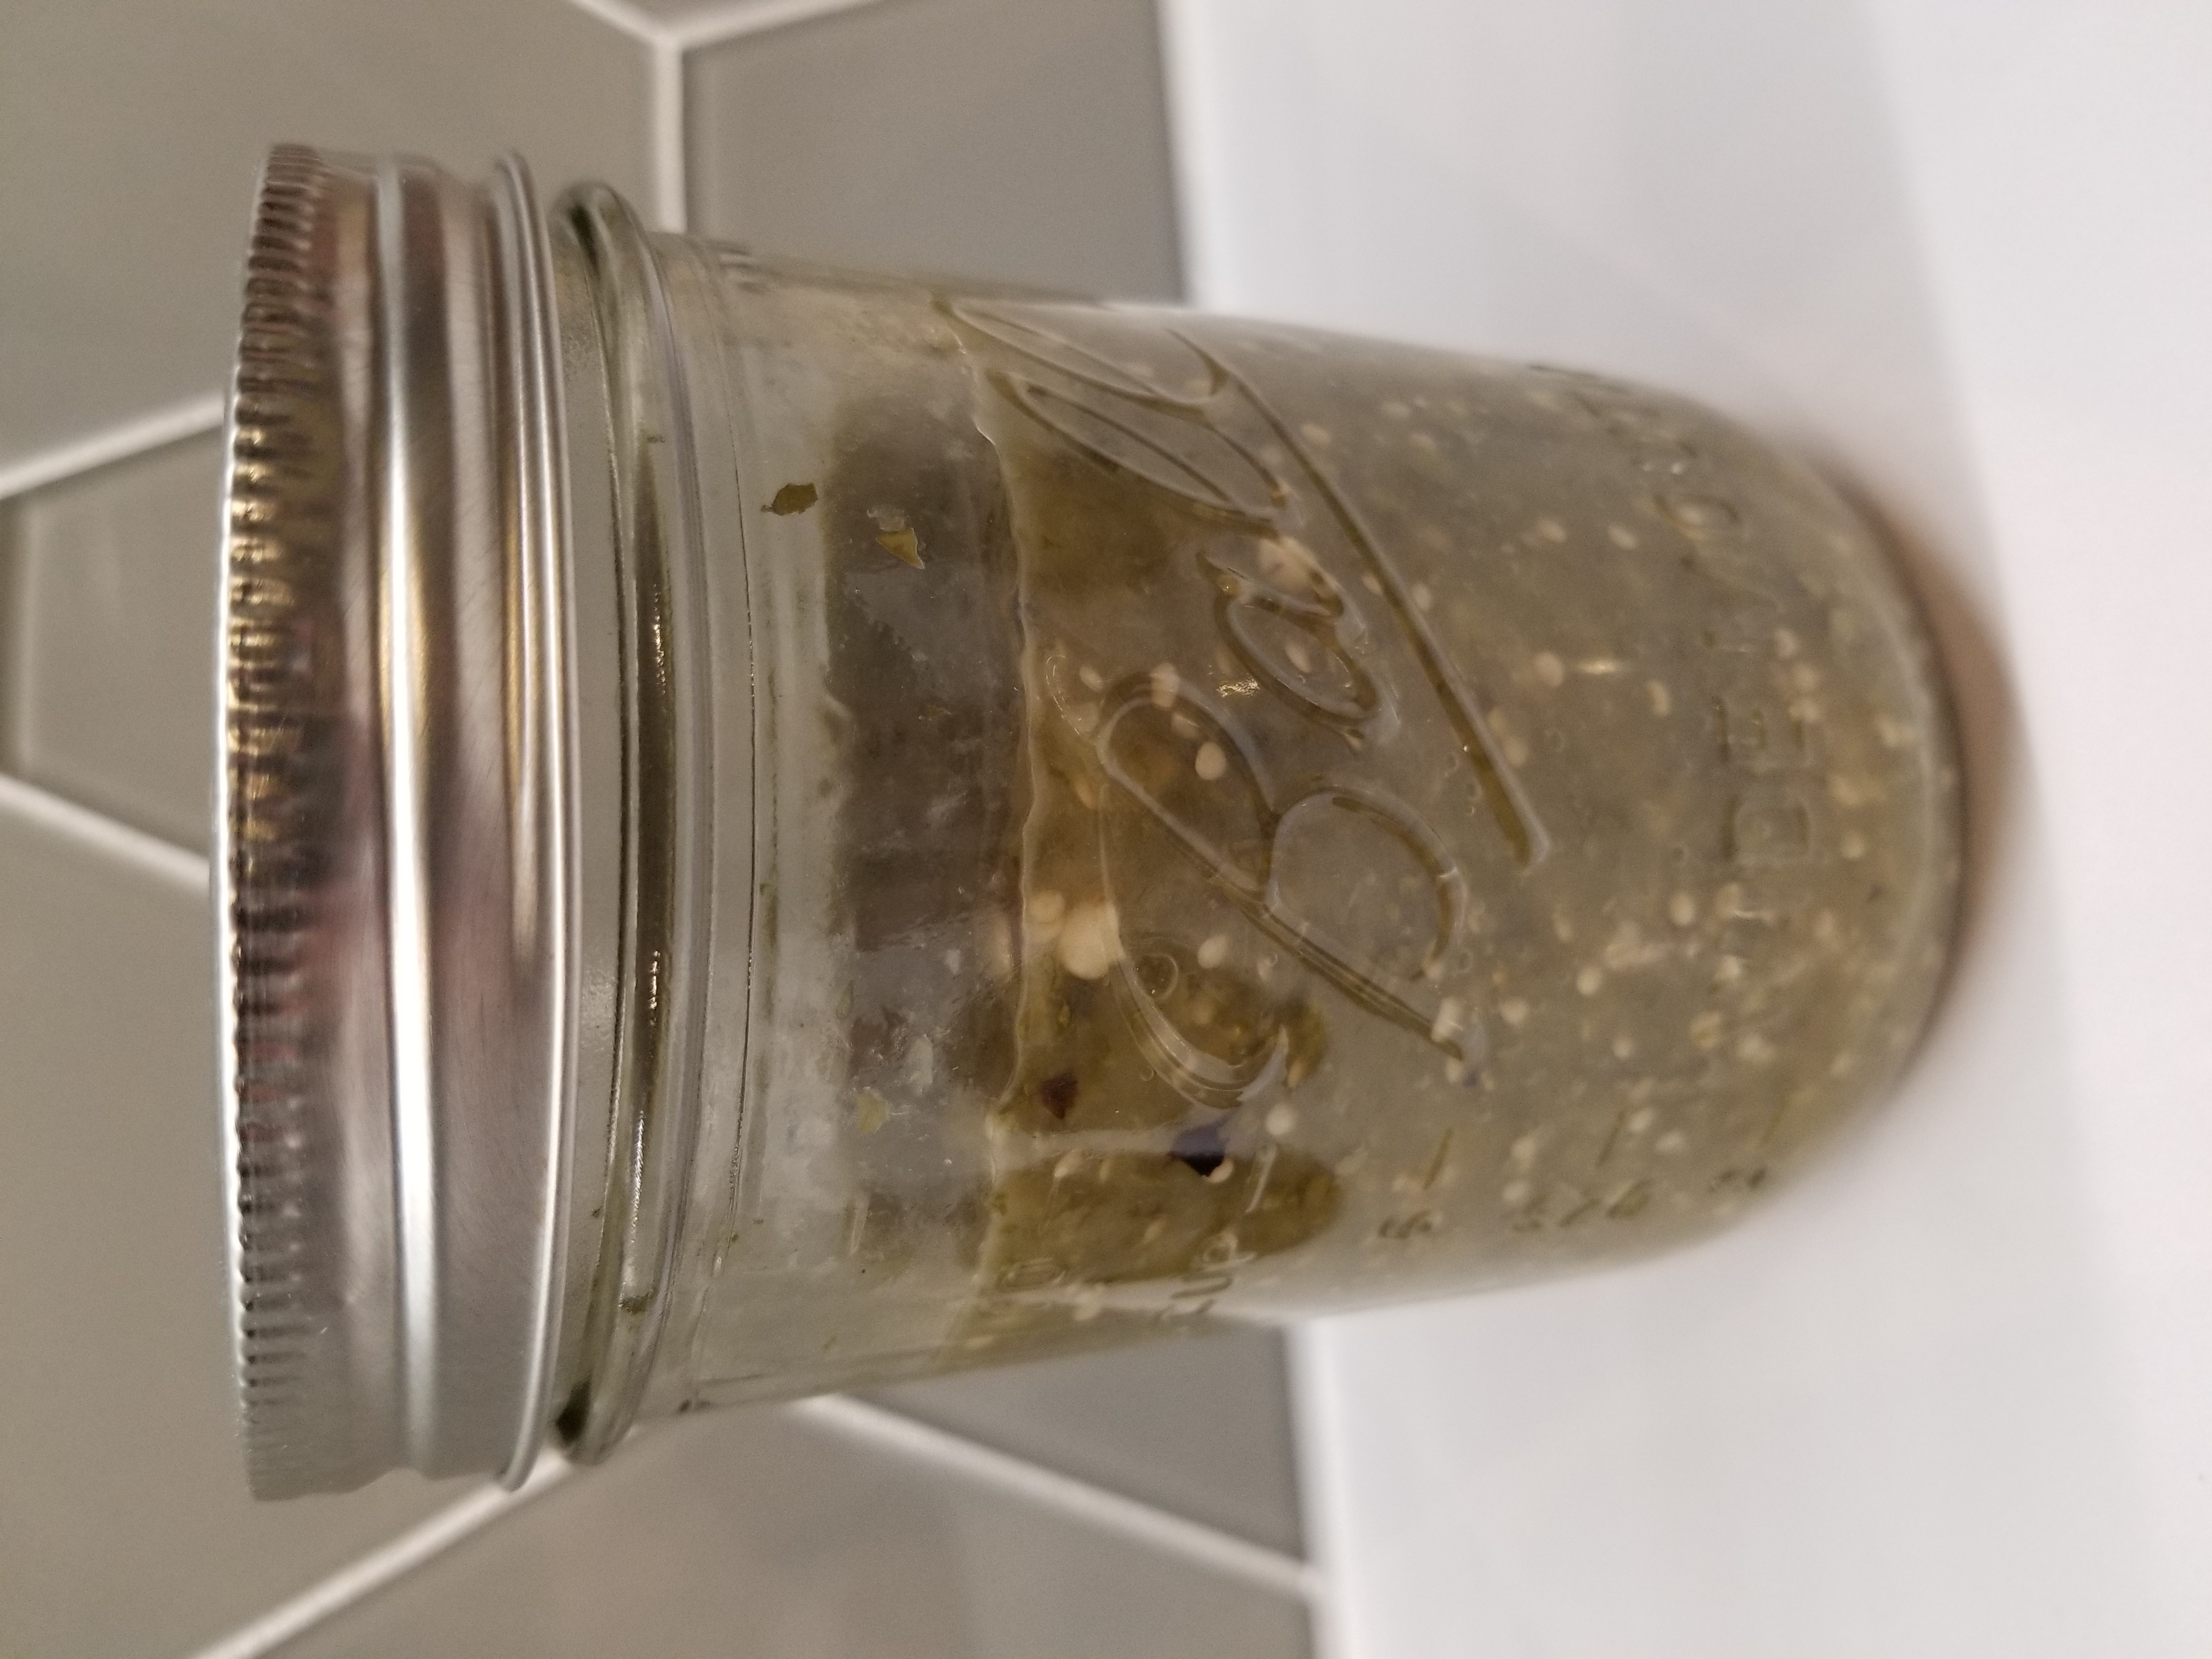
So today felt for the first time like a fall day. The sun was shining bright but had that slanted not so direct feel to it. It was warm but there was a brisk breeze blowing the leaves off the trees. I love this time of year but it is always bittersweet because I know the local farmers will soon be packing up their goods and won’t be seen again until spring. That said, there was a bumper crop of summer’s end peppers at the market. All kinds of sweet and hot peppers, running the gamut from green bell peppers to habañero. I, being the spicy fiend that I am, scooped up a ton of hot chillies. I also happened to come across some tomatillos which put a batch of Salsa Verde into motion. There are several ways of preparing this delicious sauce, you can grill the jalapeños and tomatillos, you can roast the garlic or you can keep it simple like my recipe does. In my opinion, simple is preferred because that way the Salsa Verde can be used for multiple dishes. With chips? Check. As a topping for roasted chicken? Check. Mixed into eggs for chilaquiles? Check and yes please!
SALSA VERDE
2 pounds tomatillos, peeled and washed
1 C chopped cilantro
5 cloves of garlic, smashed
1/4 cup fresh squeezed lime juice
16oz can of green chilies
Salt to taste
Combine tomatillos, cilantro, and garlic in a small pot. Barely cover with water and bring to a simmer. Cook until tomatillos have split their sides and transfer to a high powered blender.
Add in lime juice and pulse until chunky. Do not over-blend! Transfer to a mixing bowl and add chilies. Mix well to incorporate.
Now, a couple of side notes on this recipe. As I stated, this is keeping it easy peasey. Feel free to use this as a base and go from there. You can use canned chilies, or grill/roast your own! Poblanos would work well. Hatch would be where it’s at. The key part is not over pureeing that final product. It shouldn’t be chunky like a regular salsa but shouldn’t be smooth like say a tomato sauce.
I also was tasked with trying to help my mother-in-law who is an avid gardener, but sometimes grows things that she won’t necessarily consume. In this case it was jalapeños and anaheim peppers. So racking my brain trying to figure out how to tame the heat of those guys led me to create a recipe for those of us that like spicy and those of us that can only handle a little. Which led me to this…
SLOW COOKED SPICY ONIONS AND PEPPERS
2 Large Sweet Onions, julienned
2 Large Yellow Bell Peppers, julienned
6 Cloves Garlic, sliced
8-10 Jalapenos, seeded and rough chopped
3 Roasted Red Peppers, chopped
3 T Olive Oil
Salt to taste
In a medium sauce pan that has a lid that fits, heat olive oil over medium low heat. Add onions, bell peppers and garlic. Stir constantly to avoid getting any color. Once mixture begins to soften, reduce heat to low and cover. The lid I used has a setting to allow some moisture to escape, if yours doesn’t keep it slightly (!!) cracked. You want to keep the majority of moisture circulating in the pan. Stir the mixture frequently and when removing the lid, make sure the moisture that condensed on the lid drips back into the pan. Not only will that water help slow cook the veggies but now it’s infused with flavor. Cook for about 30 minutes, until the mixture has fully cooked down. The onions should be soft and stringy, the peppers should almost be mush. Add in jalapeños and roasted red peppers. Cook for another 15 minutes with the lid off, stirring frequently. You may have to add in a tablespoon of water here and there to make sure the mixture doesn’t brown. When most of the water from the additional peppers has cooked off, remove from heat and allow to cool to room temperature. Working in batches, add mixture to a food processor and pulse to a chunky consistency.
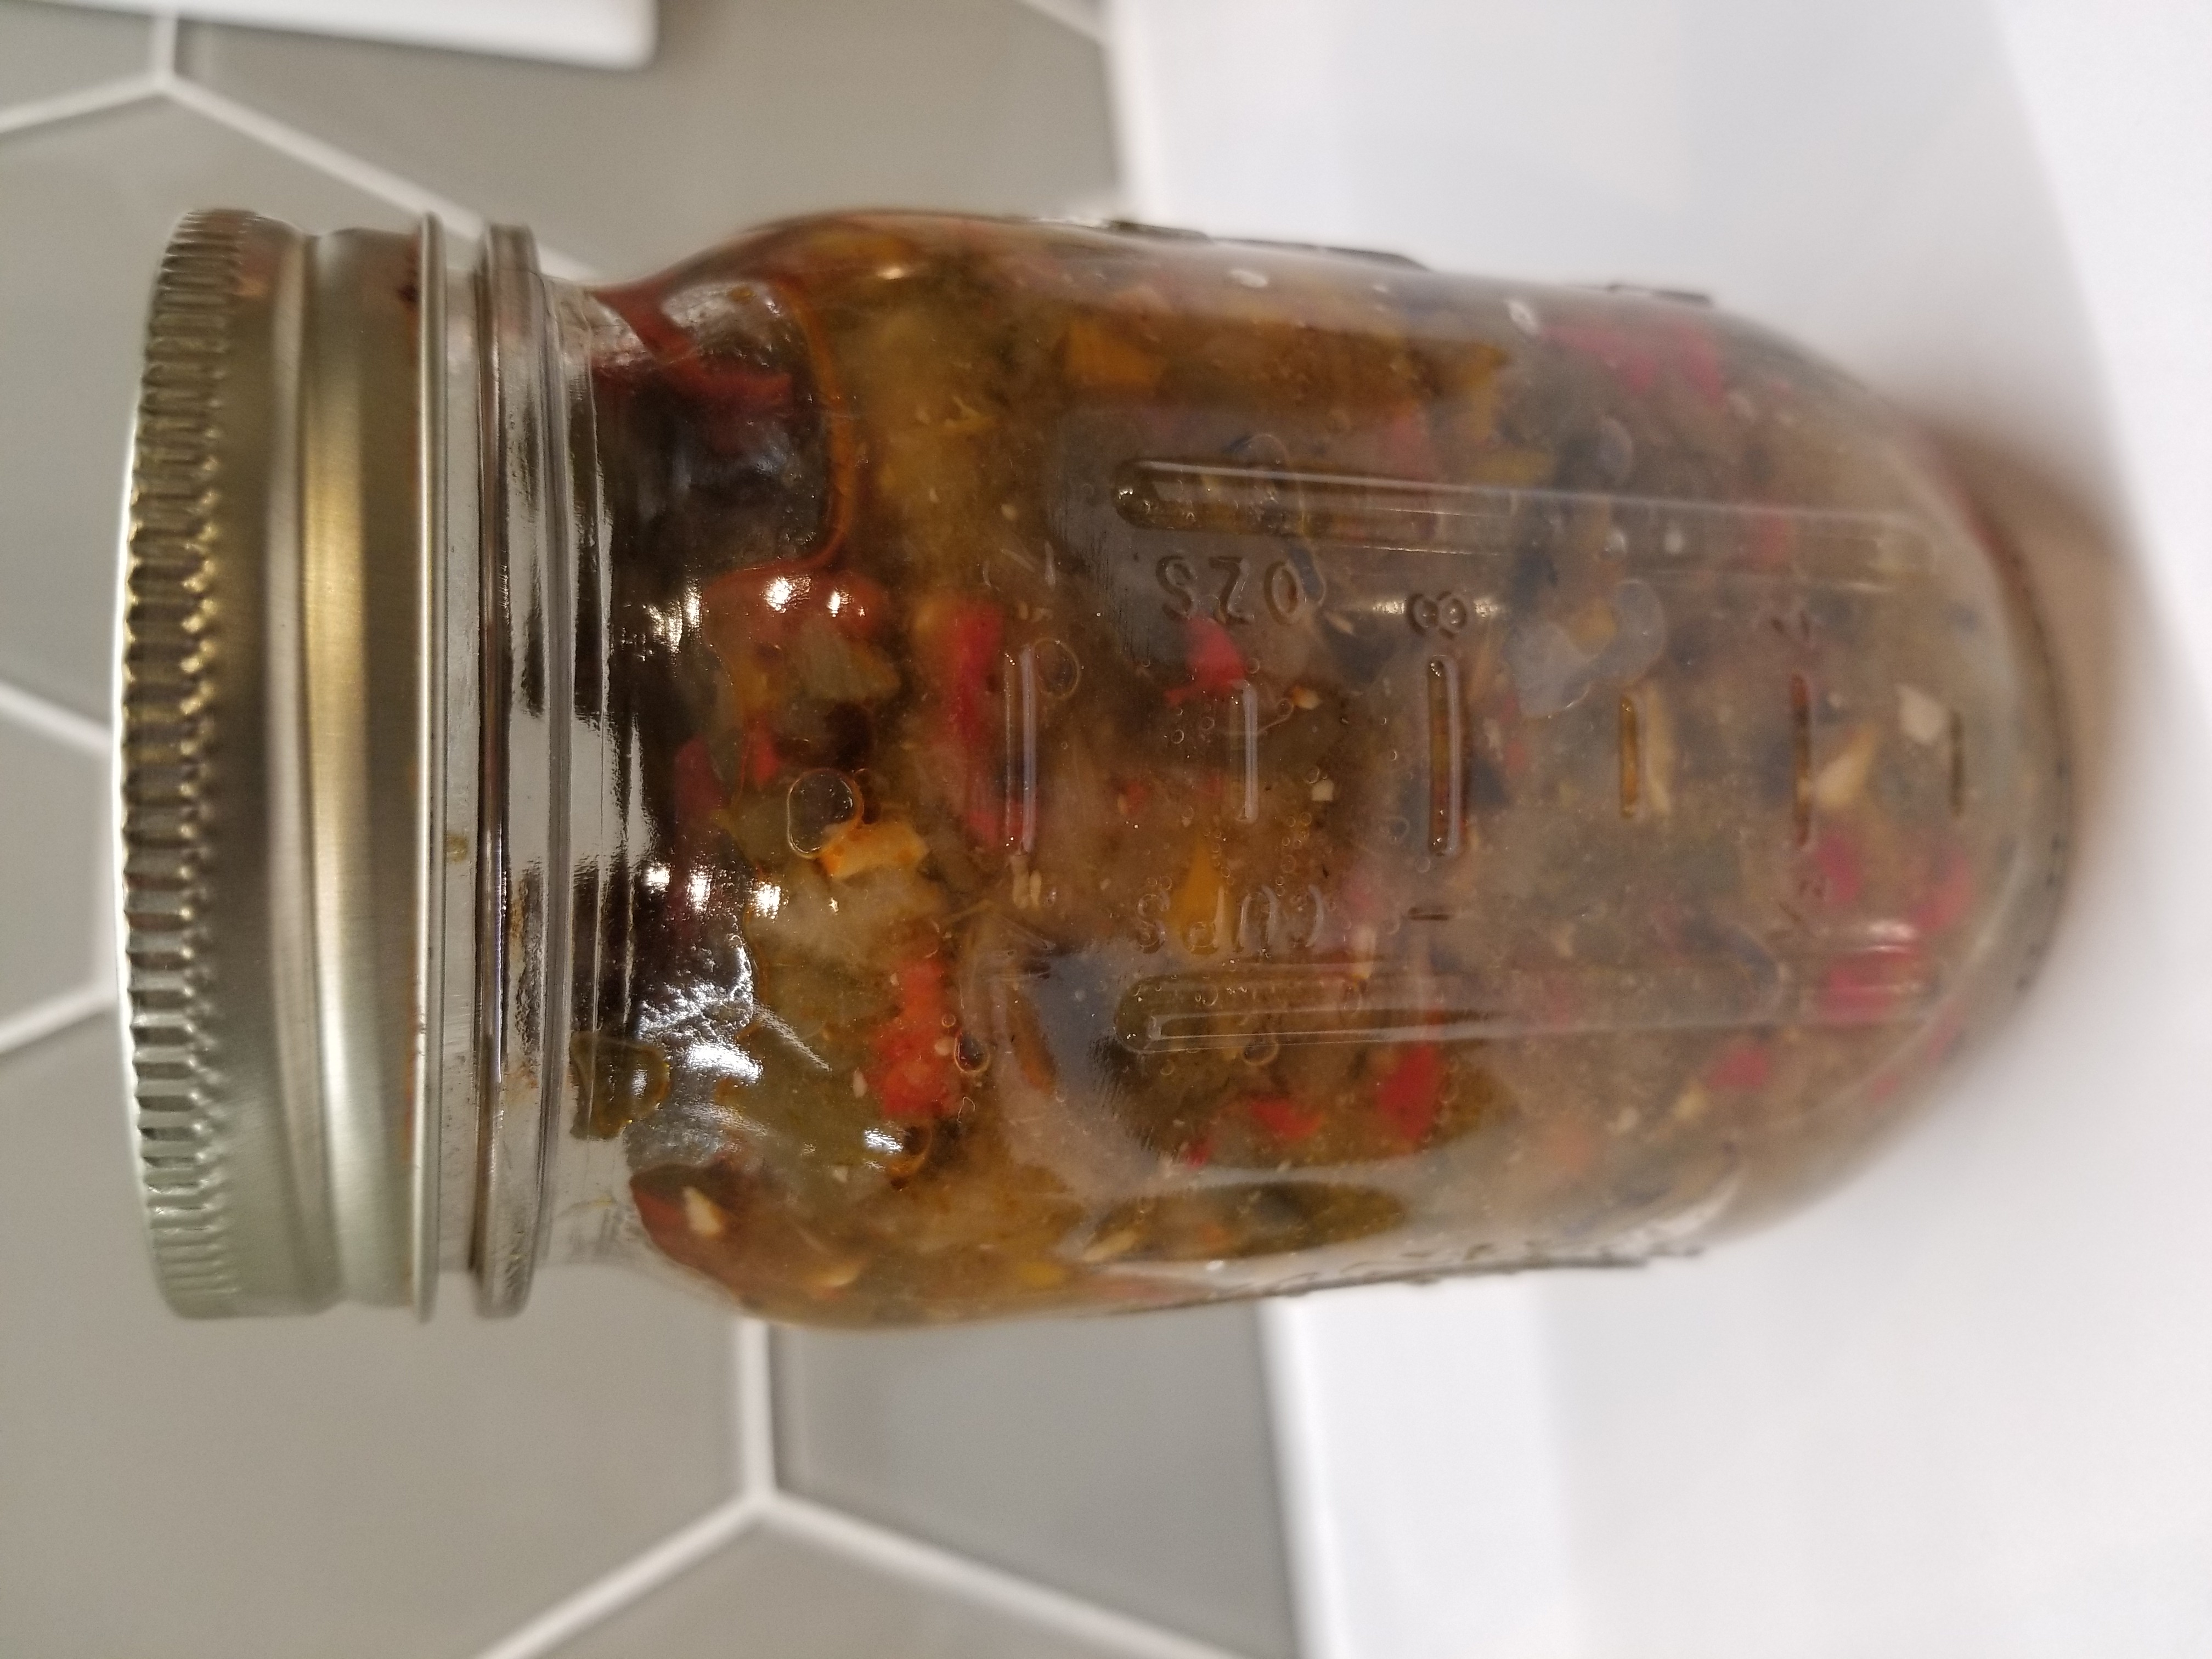
There are many ways to use this dish. You could smear it on bread as a little zesty snack, try adding some sharp cheddar for a mind bendingly good grilled cheese. As an additional condiment for Taco Tuesday. Or use it like a bouillon cube and add it in for a base to a soup or sauce. Really the world’s your oyster, or in this case your chili!
~Chef Sean
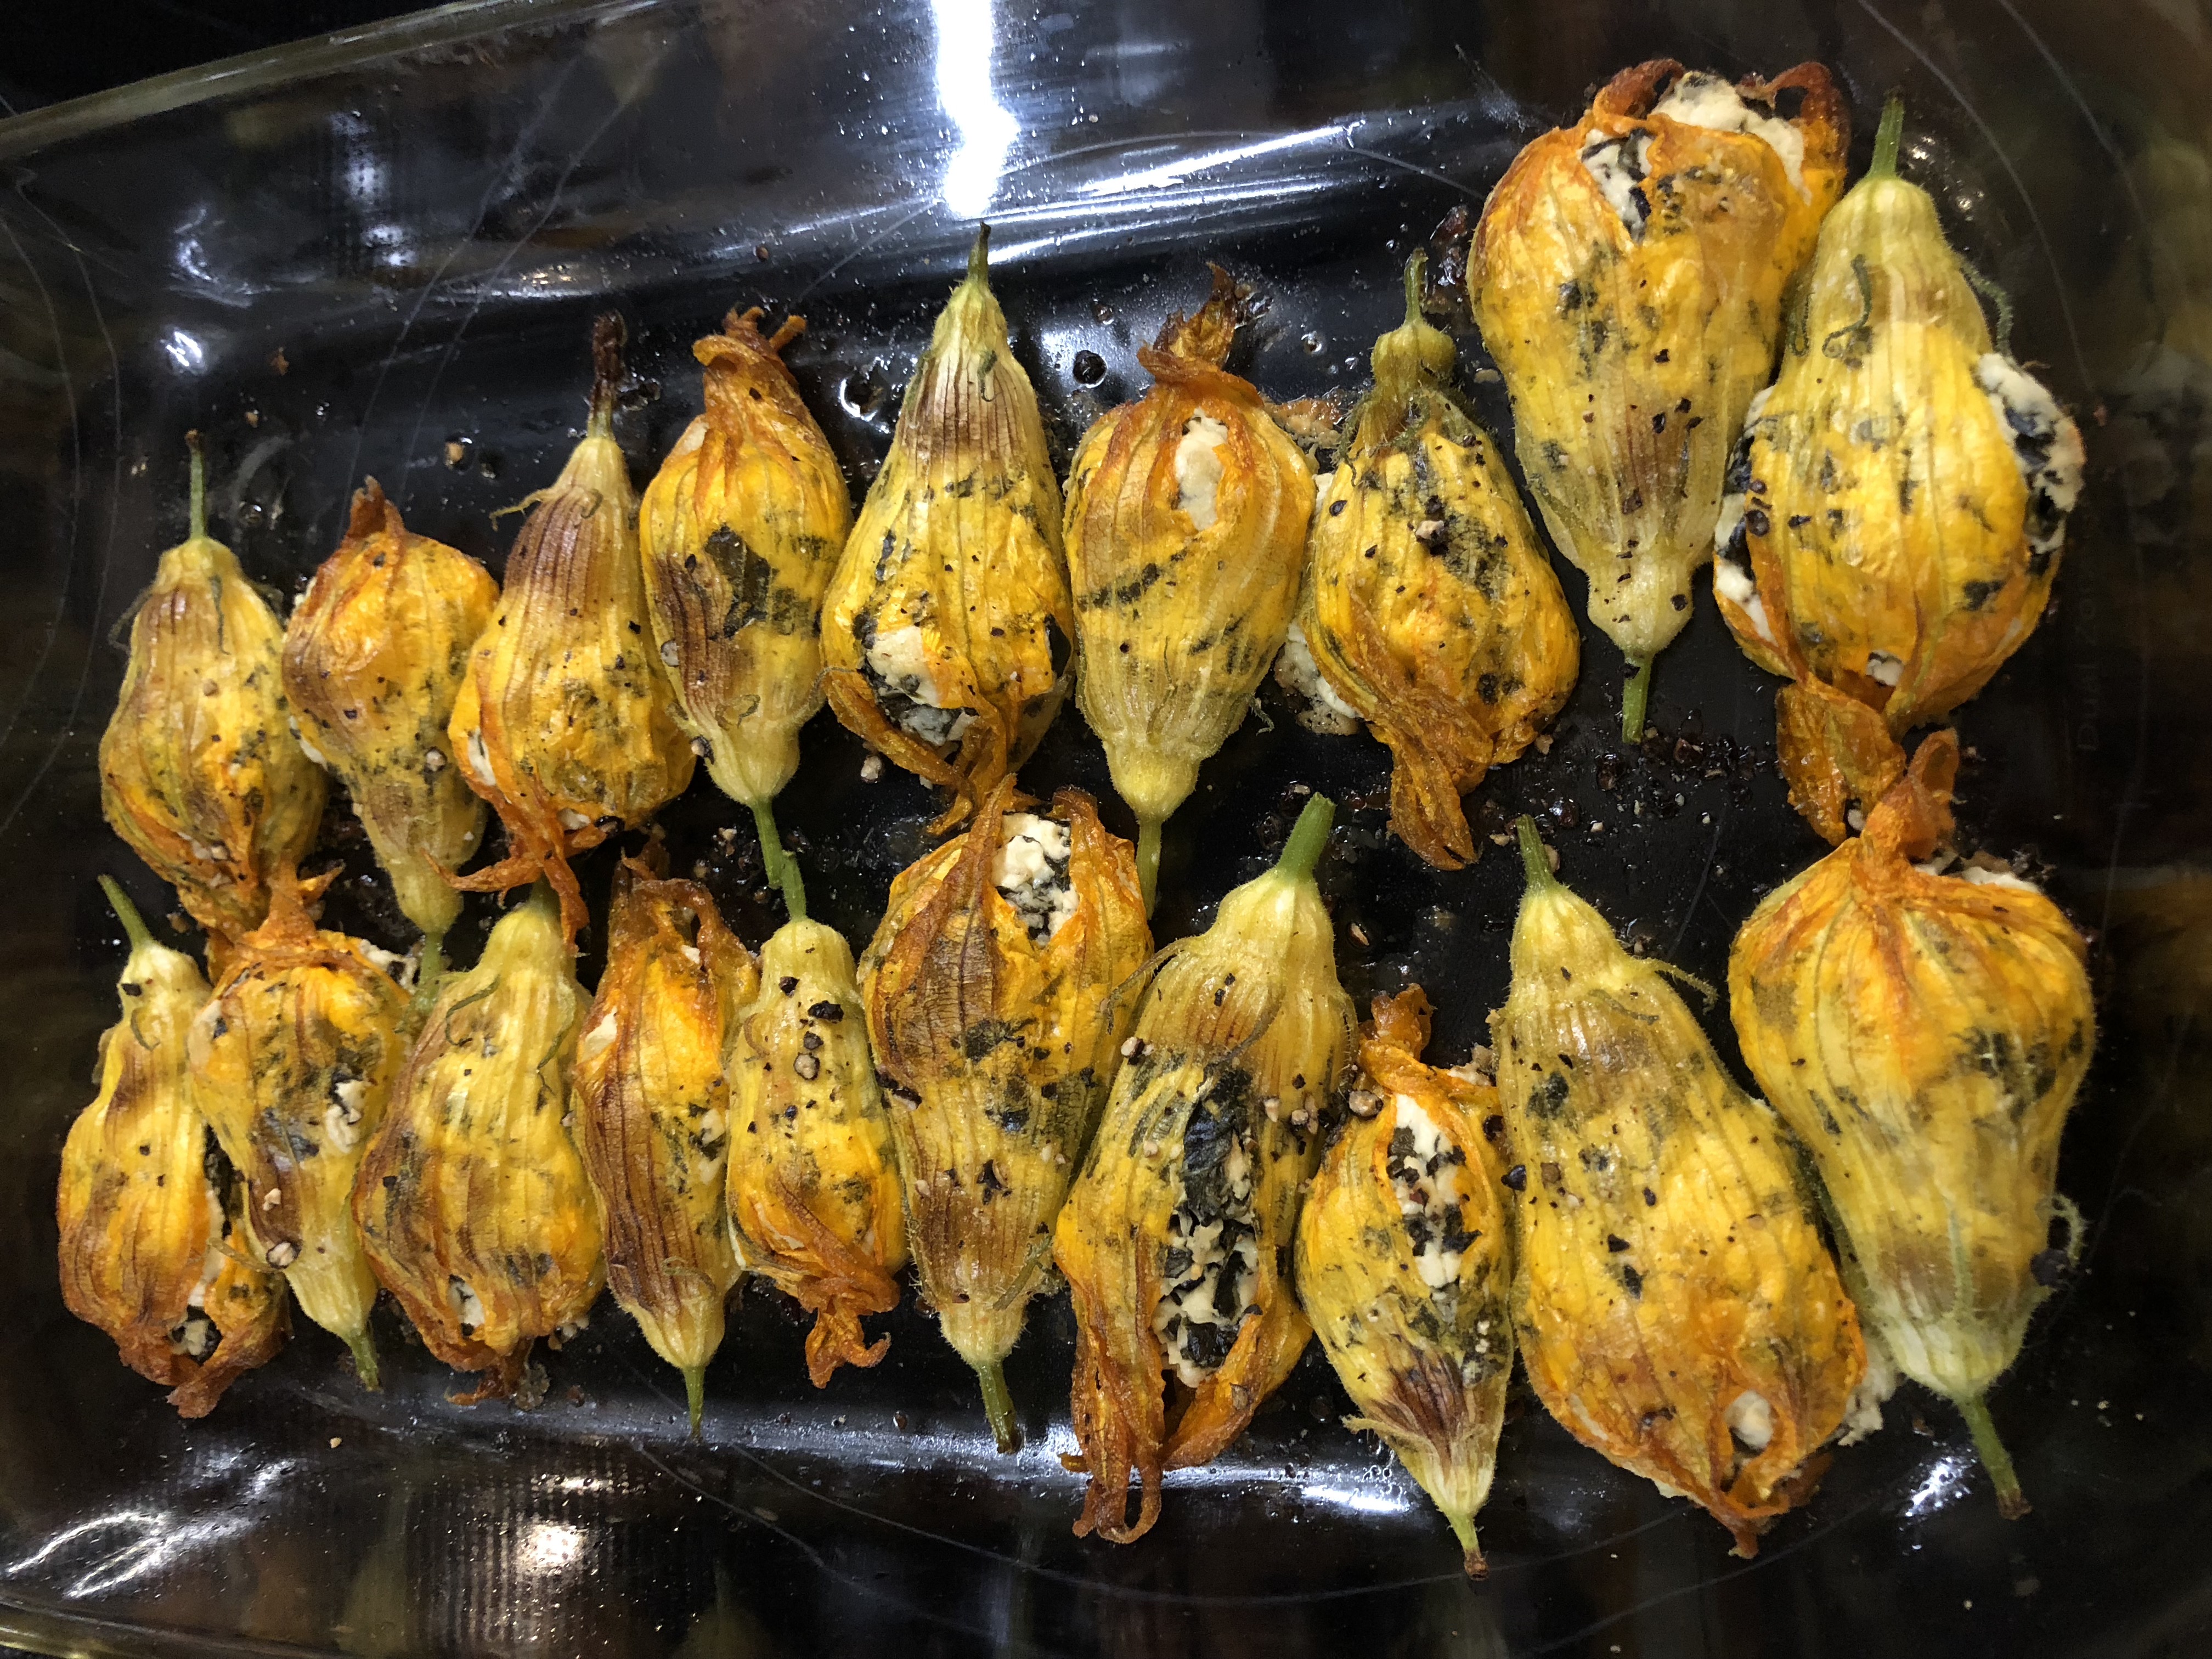
Kale and Goat Cheese Stuffed Squash Blossoms
Squash blossoms are a very special treat for me at the beginning of summer. Farmers pick some blossoms off of their plants and sell them for a pretty penny at farmers’ markets. Restaurants run a special featuring the golden flowers for a week or two as they have limited supply. They make great toppings on pizza, can be thinly chopped and added to salads, or my favorite- stuffed.
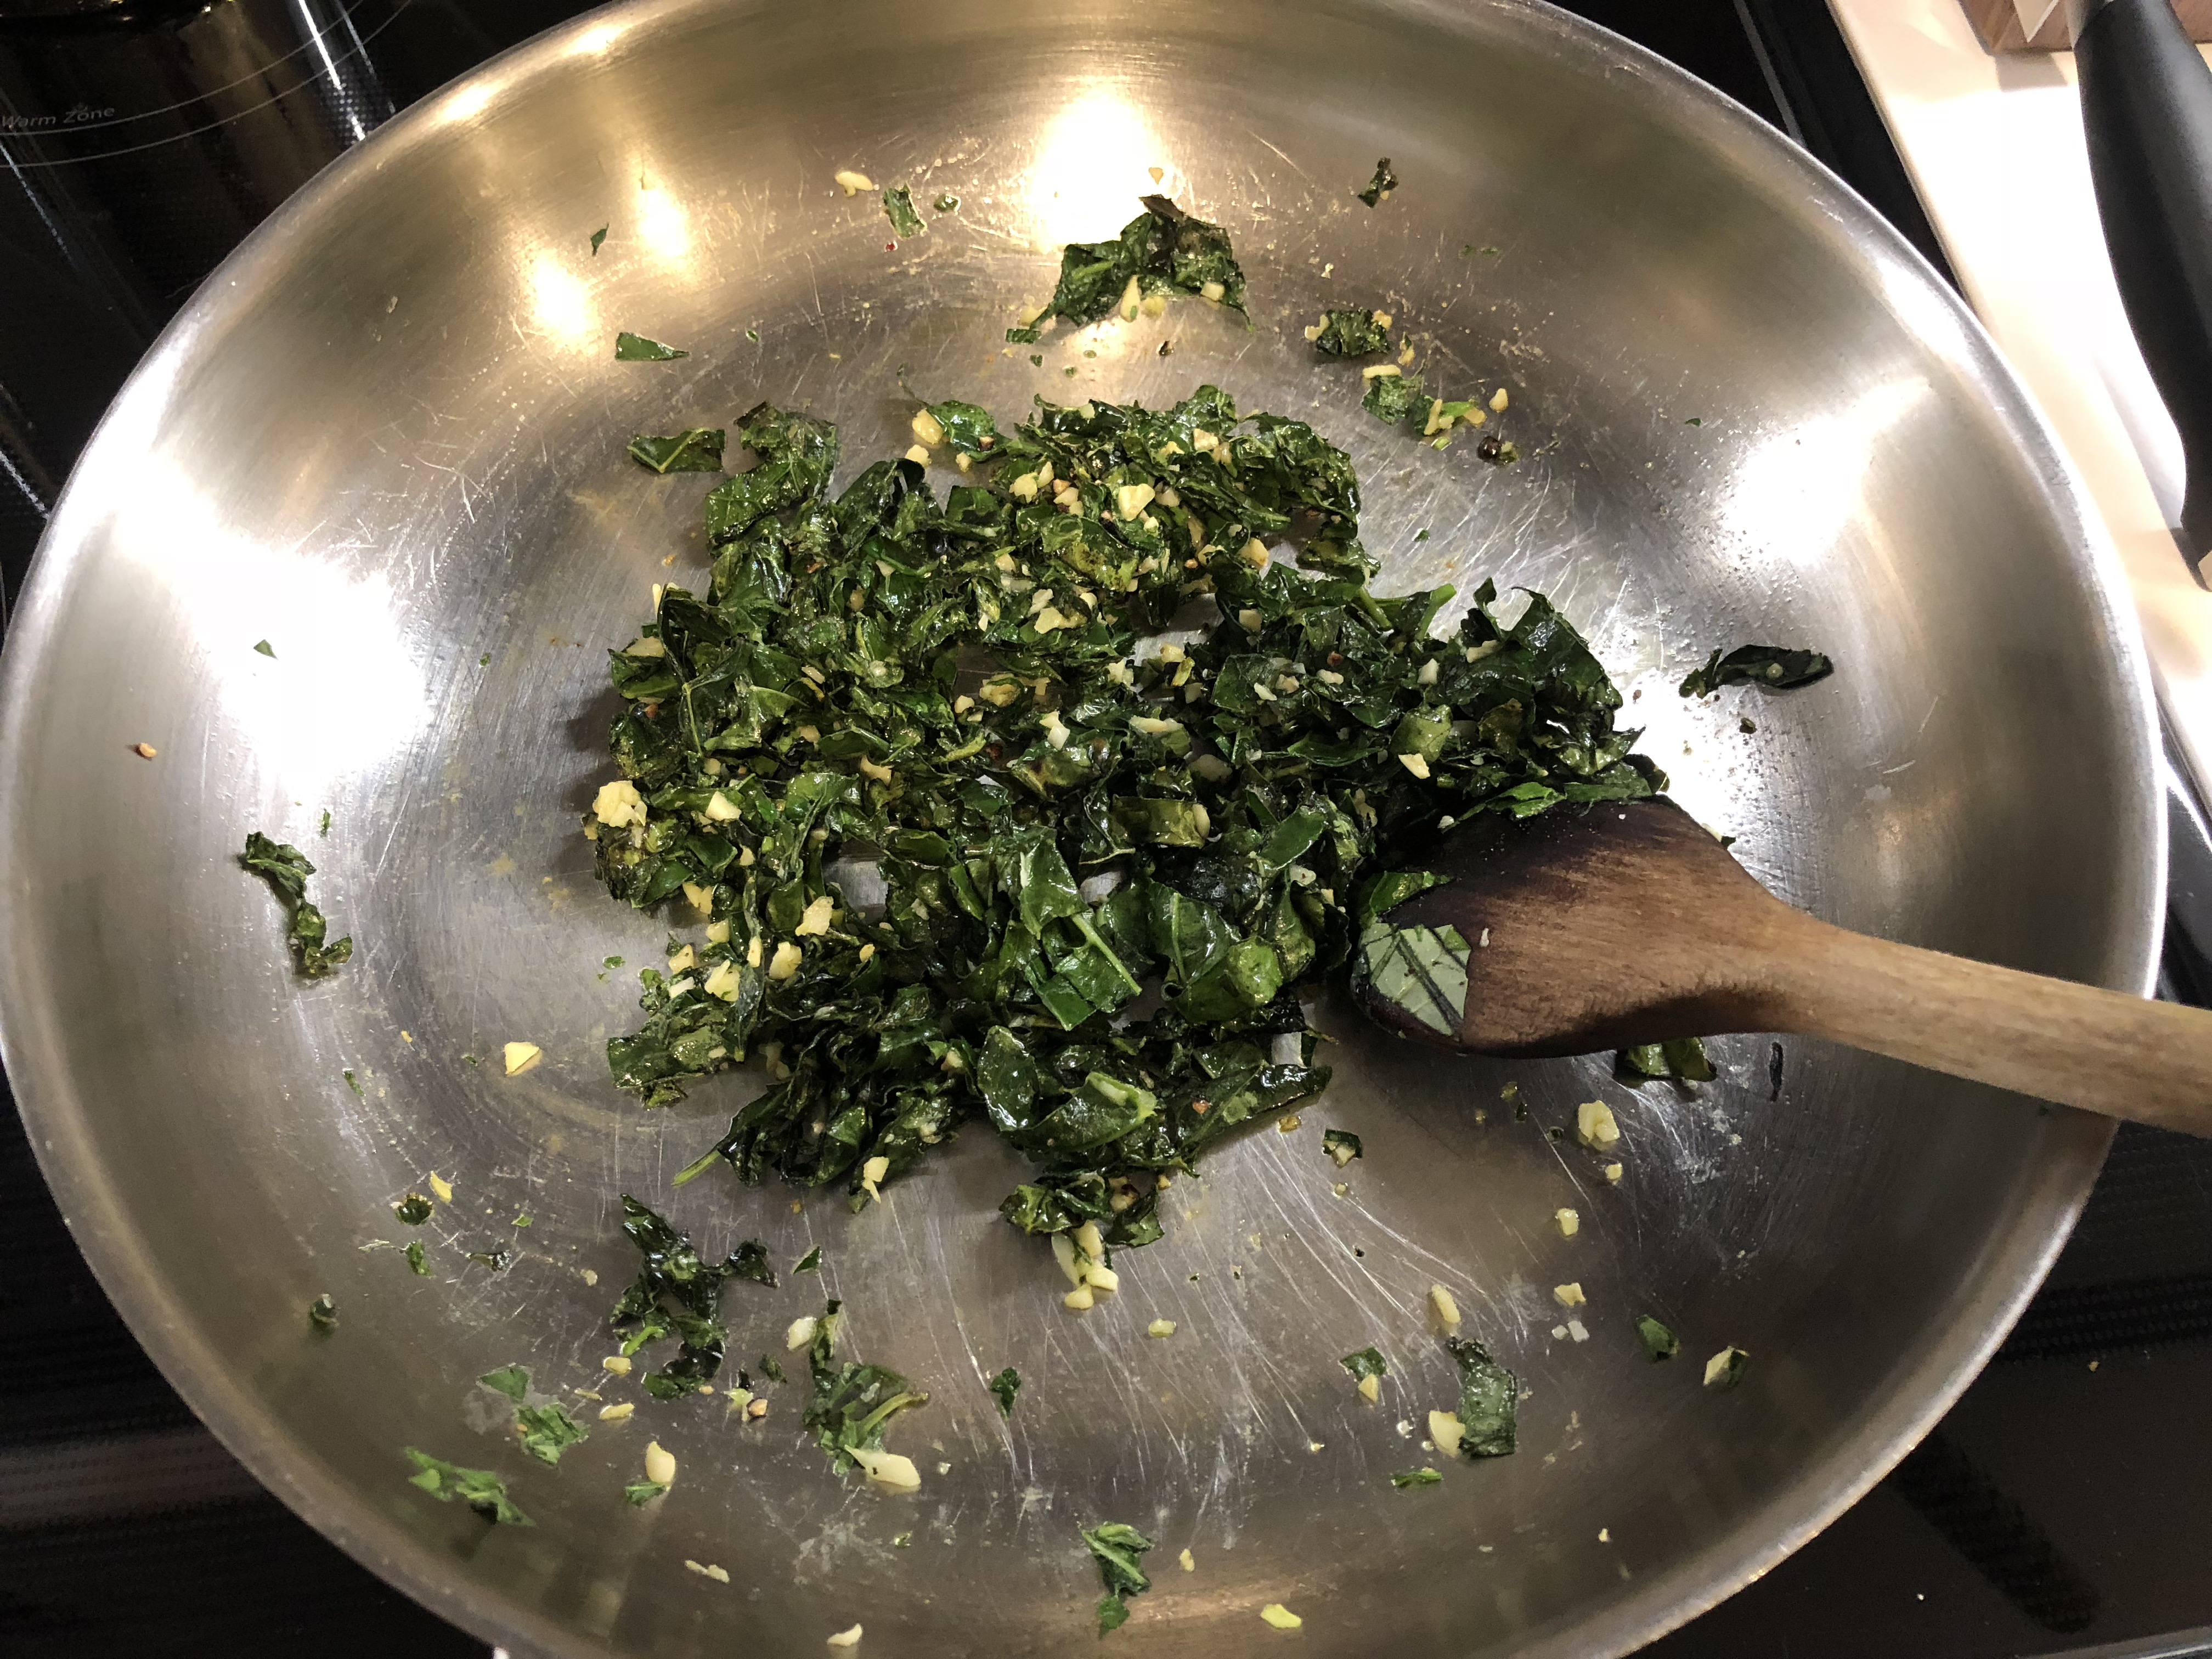
I picked up some local kale and cooked 1/2 of the bunch low and slow in a little olive oil with some garlic, salt, and pepper. When it cooled to room temperature, I mixed it with locally made goat cheese. And that’s it- the stuffing was ready.
Gently open the tips of the blossoms and stuff them with a tablespoon or so of the kale cheese mixture. Twist the ends to keep the filling inside, and start lining them up on an olive oiled baking tray or pan.
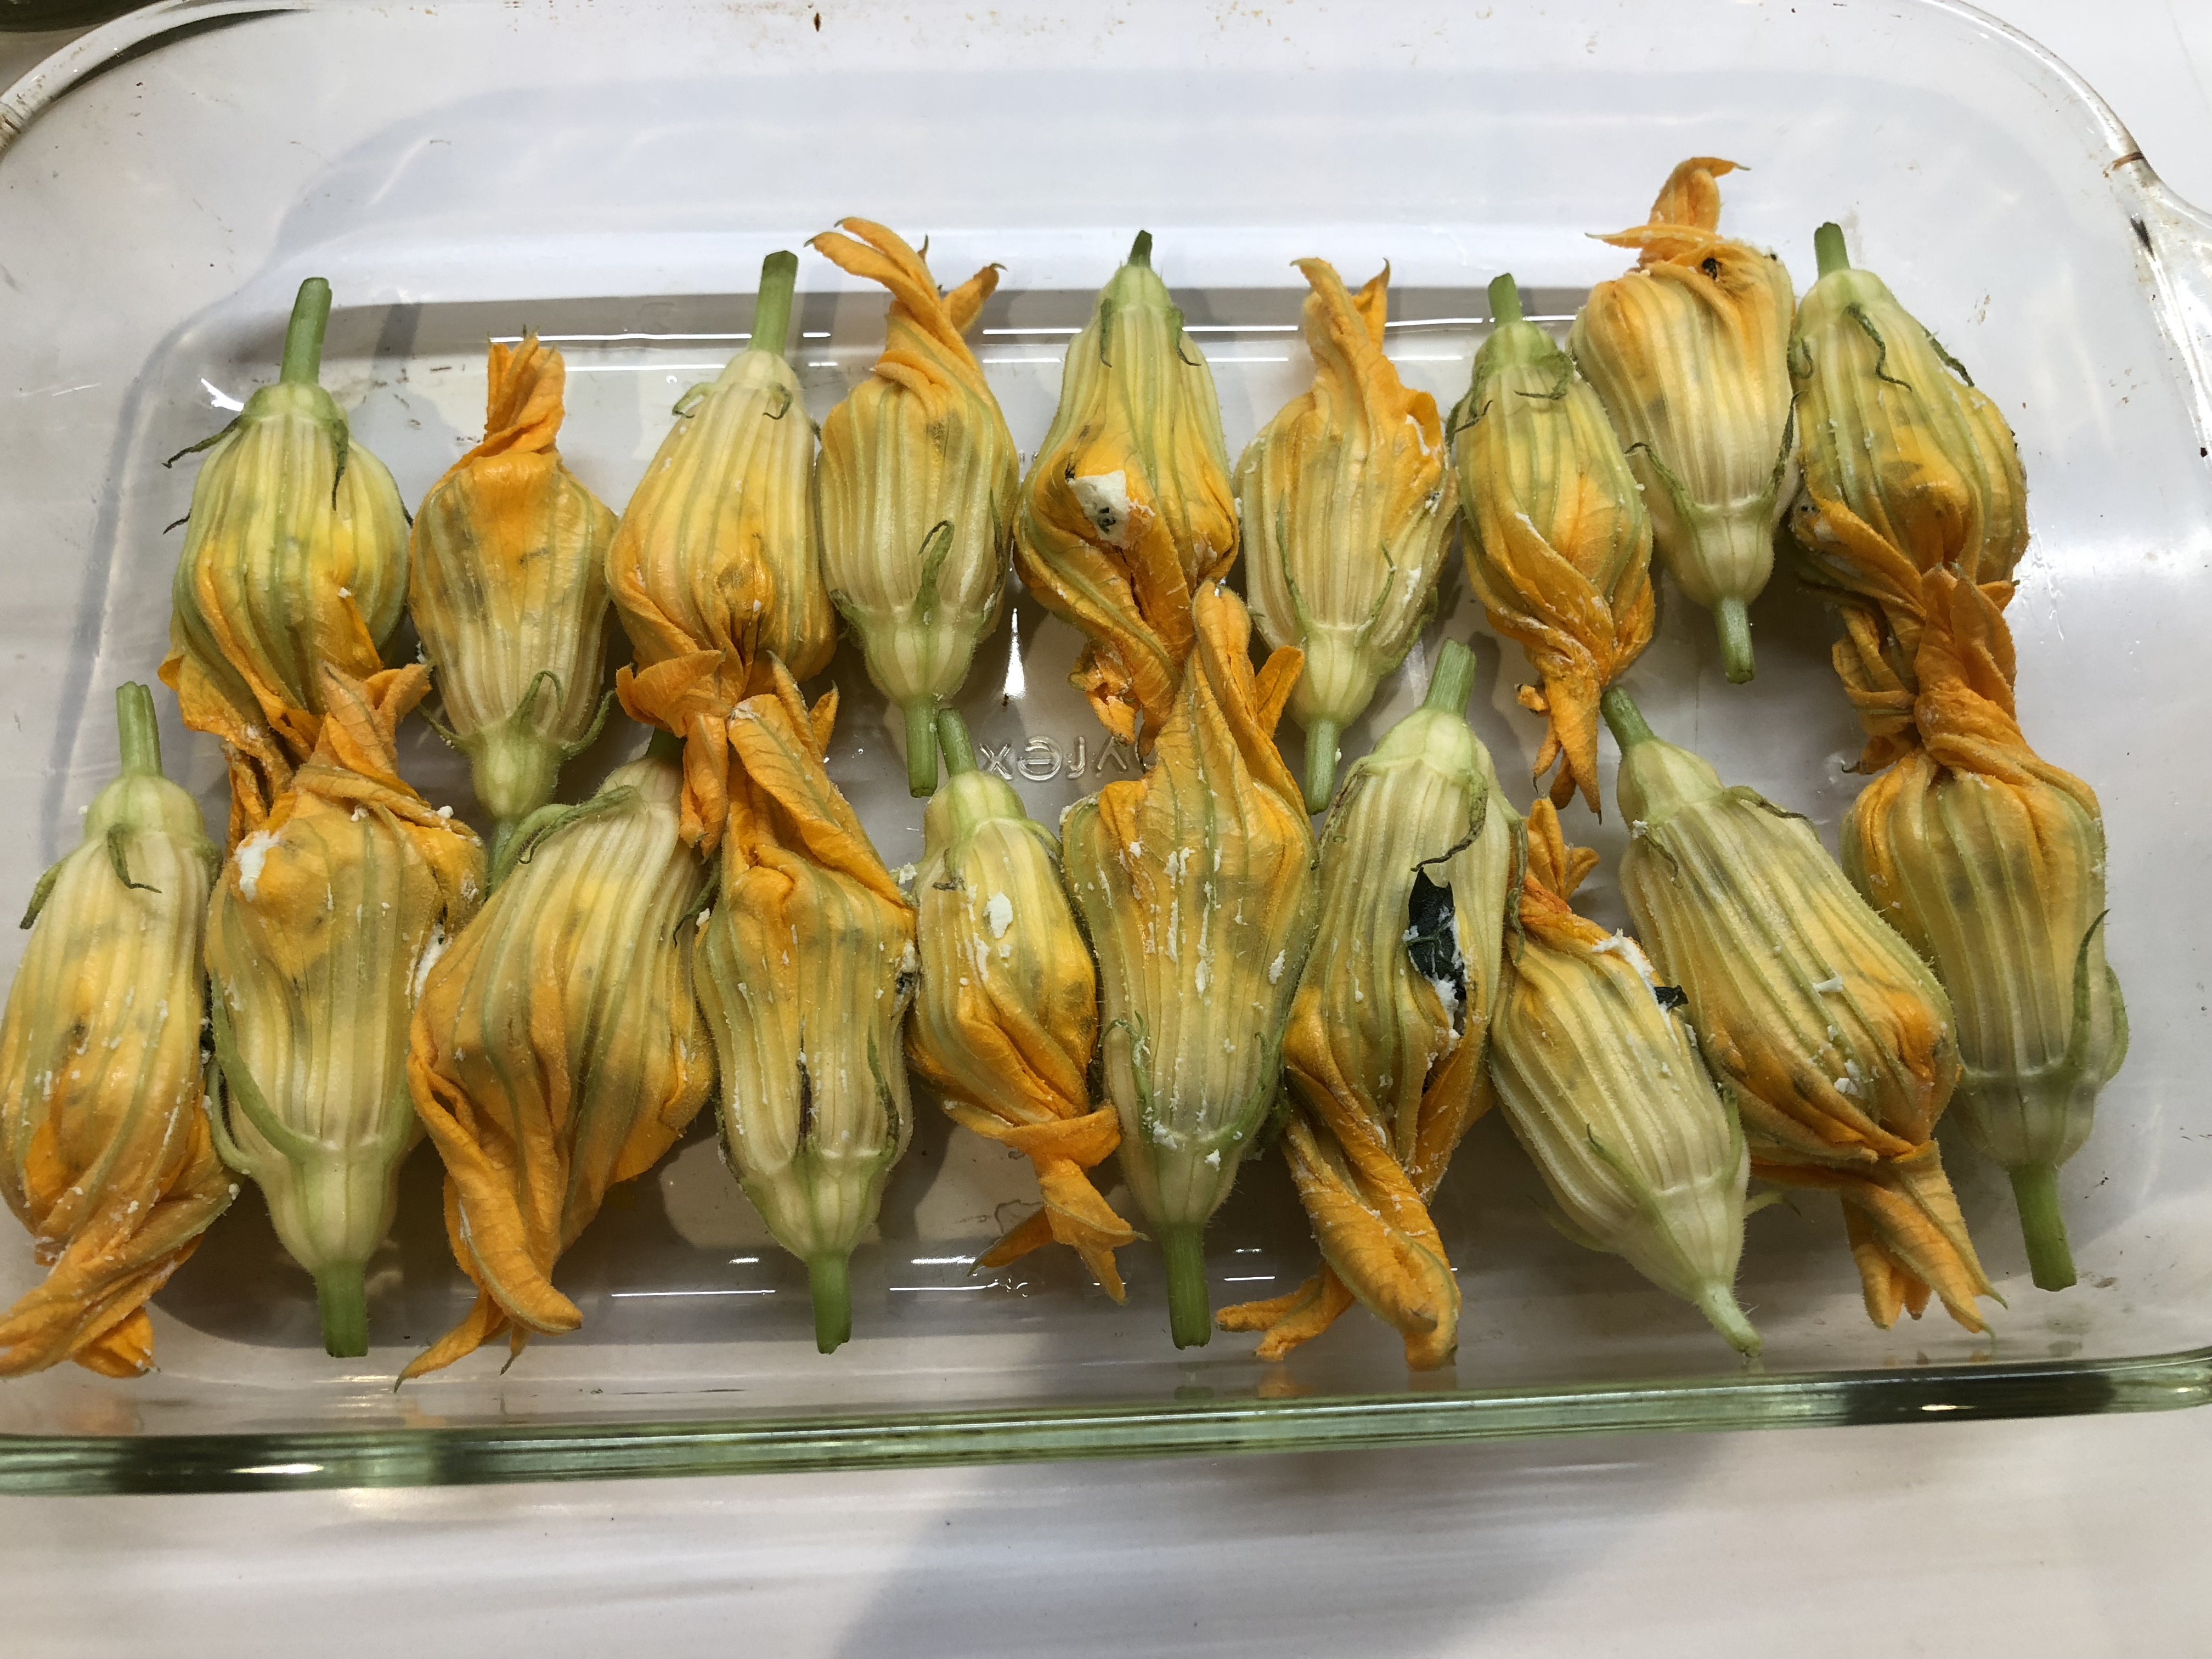
A lot of chefs will fry stuffed squash blossoms like a breaded and stuffed pepper, but I’m not looking for a calorie bomb in my home cooking. Let’s save that for special occasions!
Bake them at 375 until they start to brown a little and you hear them “talking.” That’s always the secret to whether food is done or not- Is it making a bubbling gurgling sound? If so, it’s likely cooked!
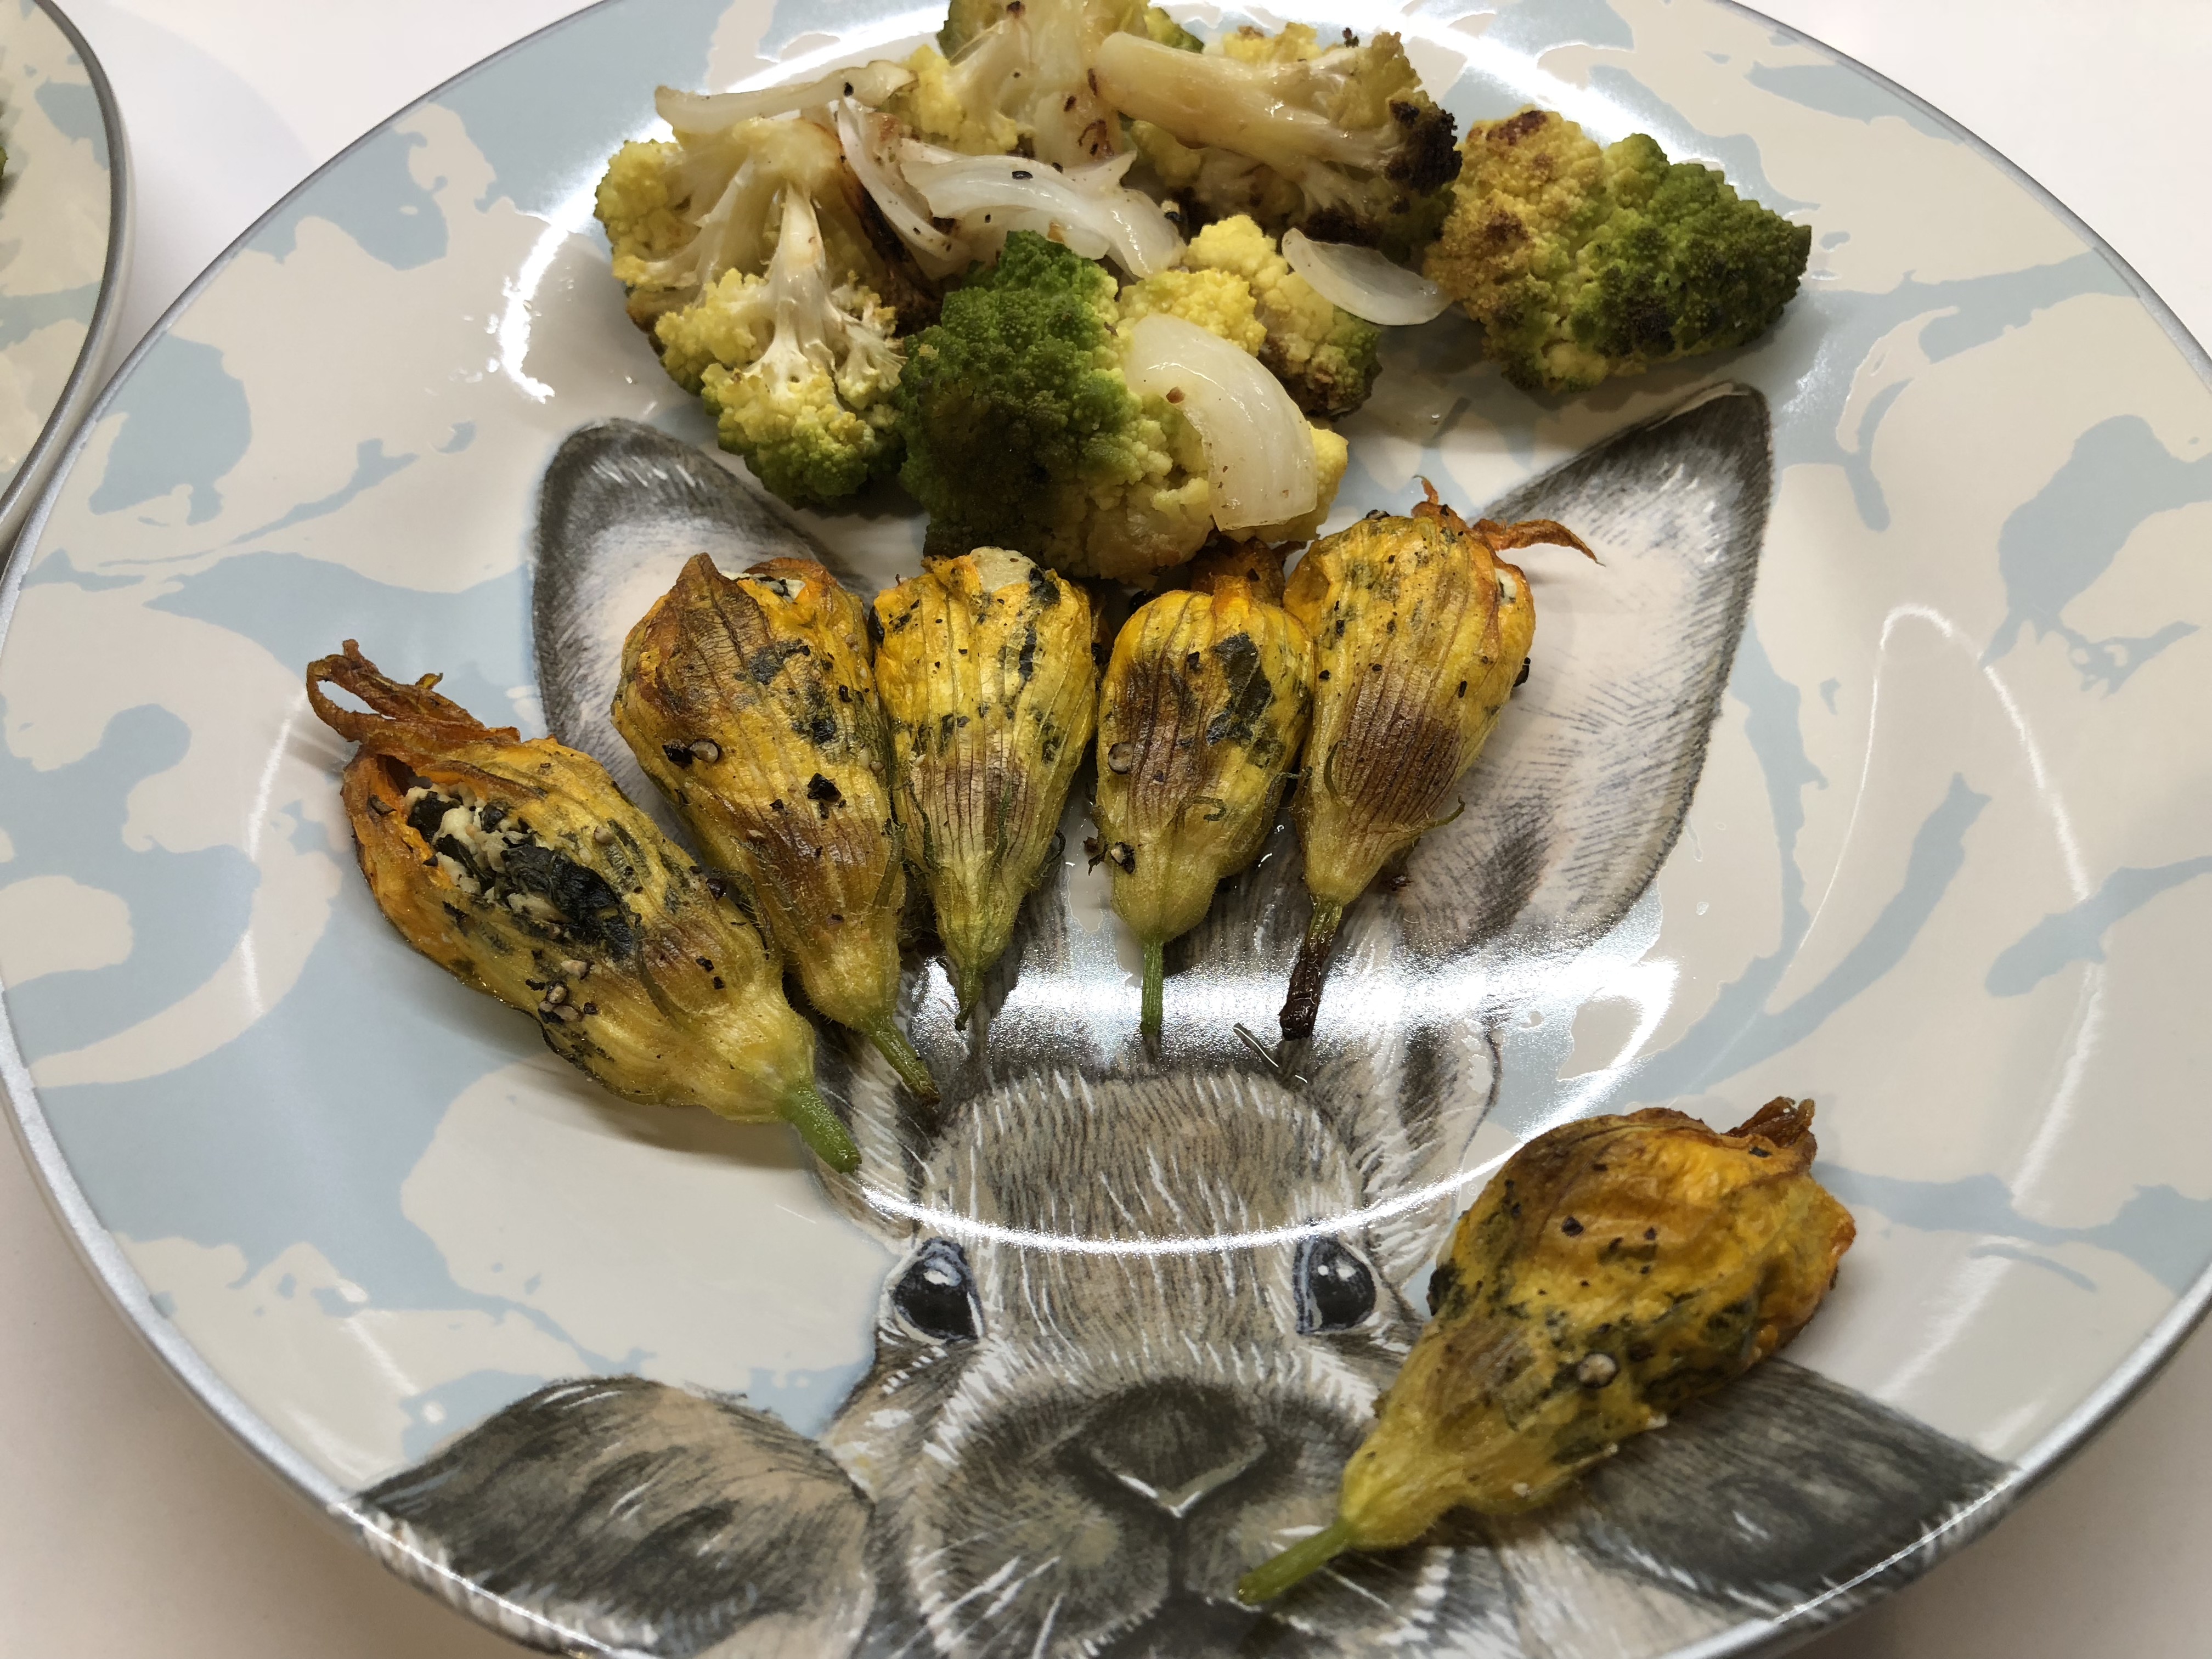
I served these on with some roasted veggies, and sure had a fun time arranging them on my plate!
White Derby Cake
- At June 16, 2018
- By megan
- In banana, cake, Party Planning, Recipes, strawberries
- 0
I was recently tasked with baking a birthday cake, and the plan was for a vanilla cake for a two-year-old’s taste buds. After going back and forth on the icing options, I recalled that as a child in New Jersey my mom would take my sister and me to La Bonbonniere Bake Shoppe and we’d get our cakes there for special occasions. My favorite had a whipped cream frosting with fresh fruit incorporated into it, but that’s where my memory faded. Good ole mom to the rescue! A quick text message later and I learned I always wanted a Brown Derby Cake- a chocolate cake with whipped cream and fruit covered in cocoa powder. A quick Google search, and thinking “white” as a substitute word since it was a vanilla cake I was looking to make, and sure enough, there’s a White Derby Cake.
This is a perfect dessert in my opinion. A classic vanilla cake with freshly whipped cream sweetened with a little maple syrup and topped with fresh fruit. It’s WAAAAY better (in the healthy sense) than buttercream frosting which is all butter and loads of sugar. Sure, whipped cream isn’t the best thing for your arteries, but it’s not full of excess sugar as it doesn’t need to be to satiate the taste buds. Whipped cream doesn’t linger on the tongue like buttercream frosting, so you can get away with using so much less sugar.
Ingredients for the vanilla cake-
- 2 sticks (1 cup) unsalted butter, softened
- 1.5 cups organic cane sugar
- 1 TBS aluminum free baking powder
- 1/2 tsp kosher salt
- 4 large eggs
- 1 cup whole milk
- 2 tsp vanilla extract
- 2 2/3 cups all-purpose flour
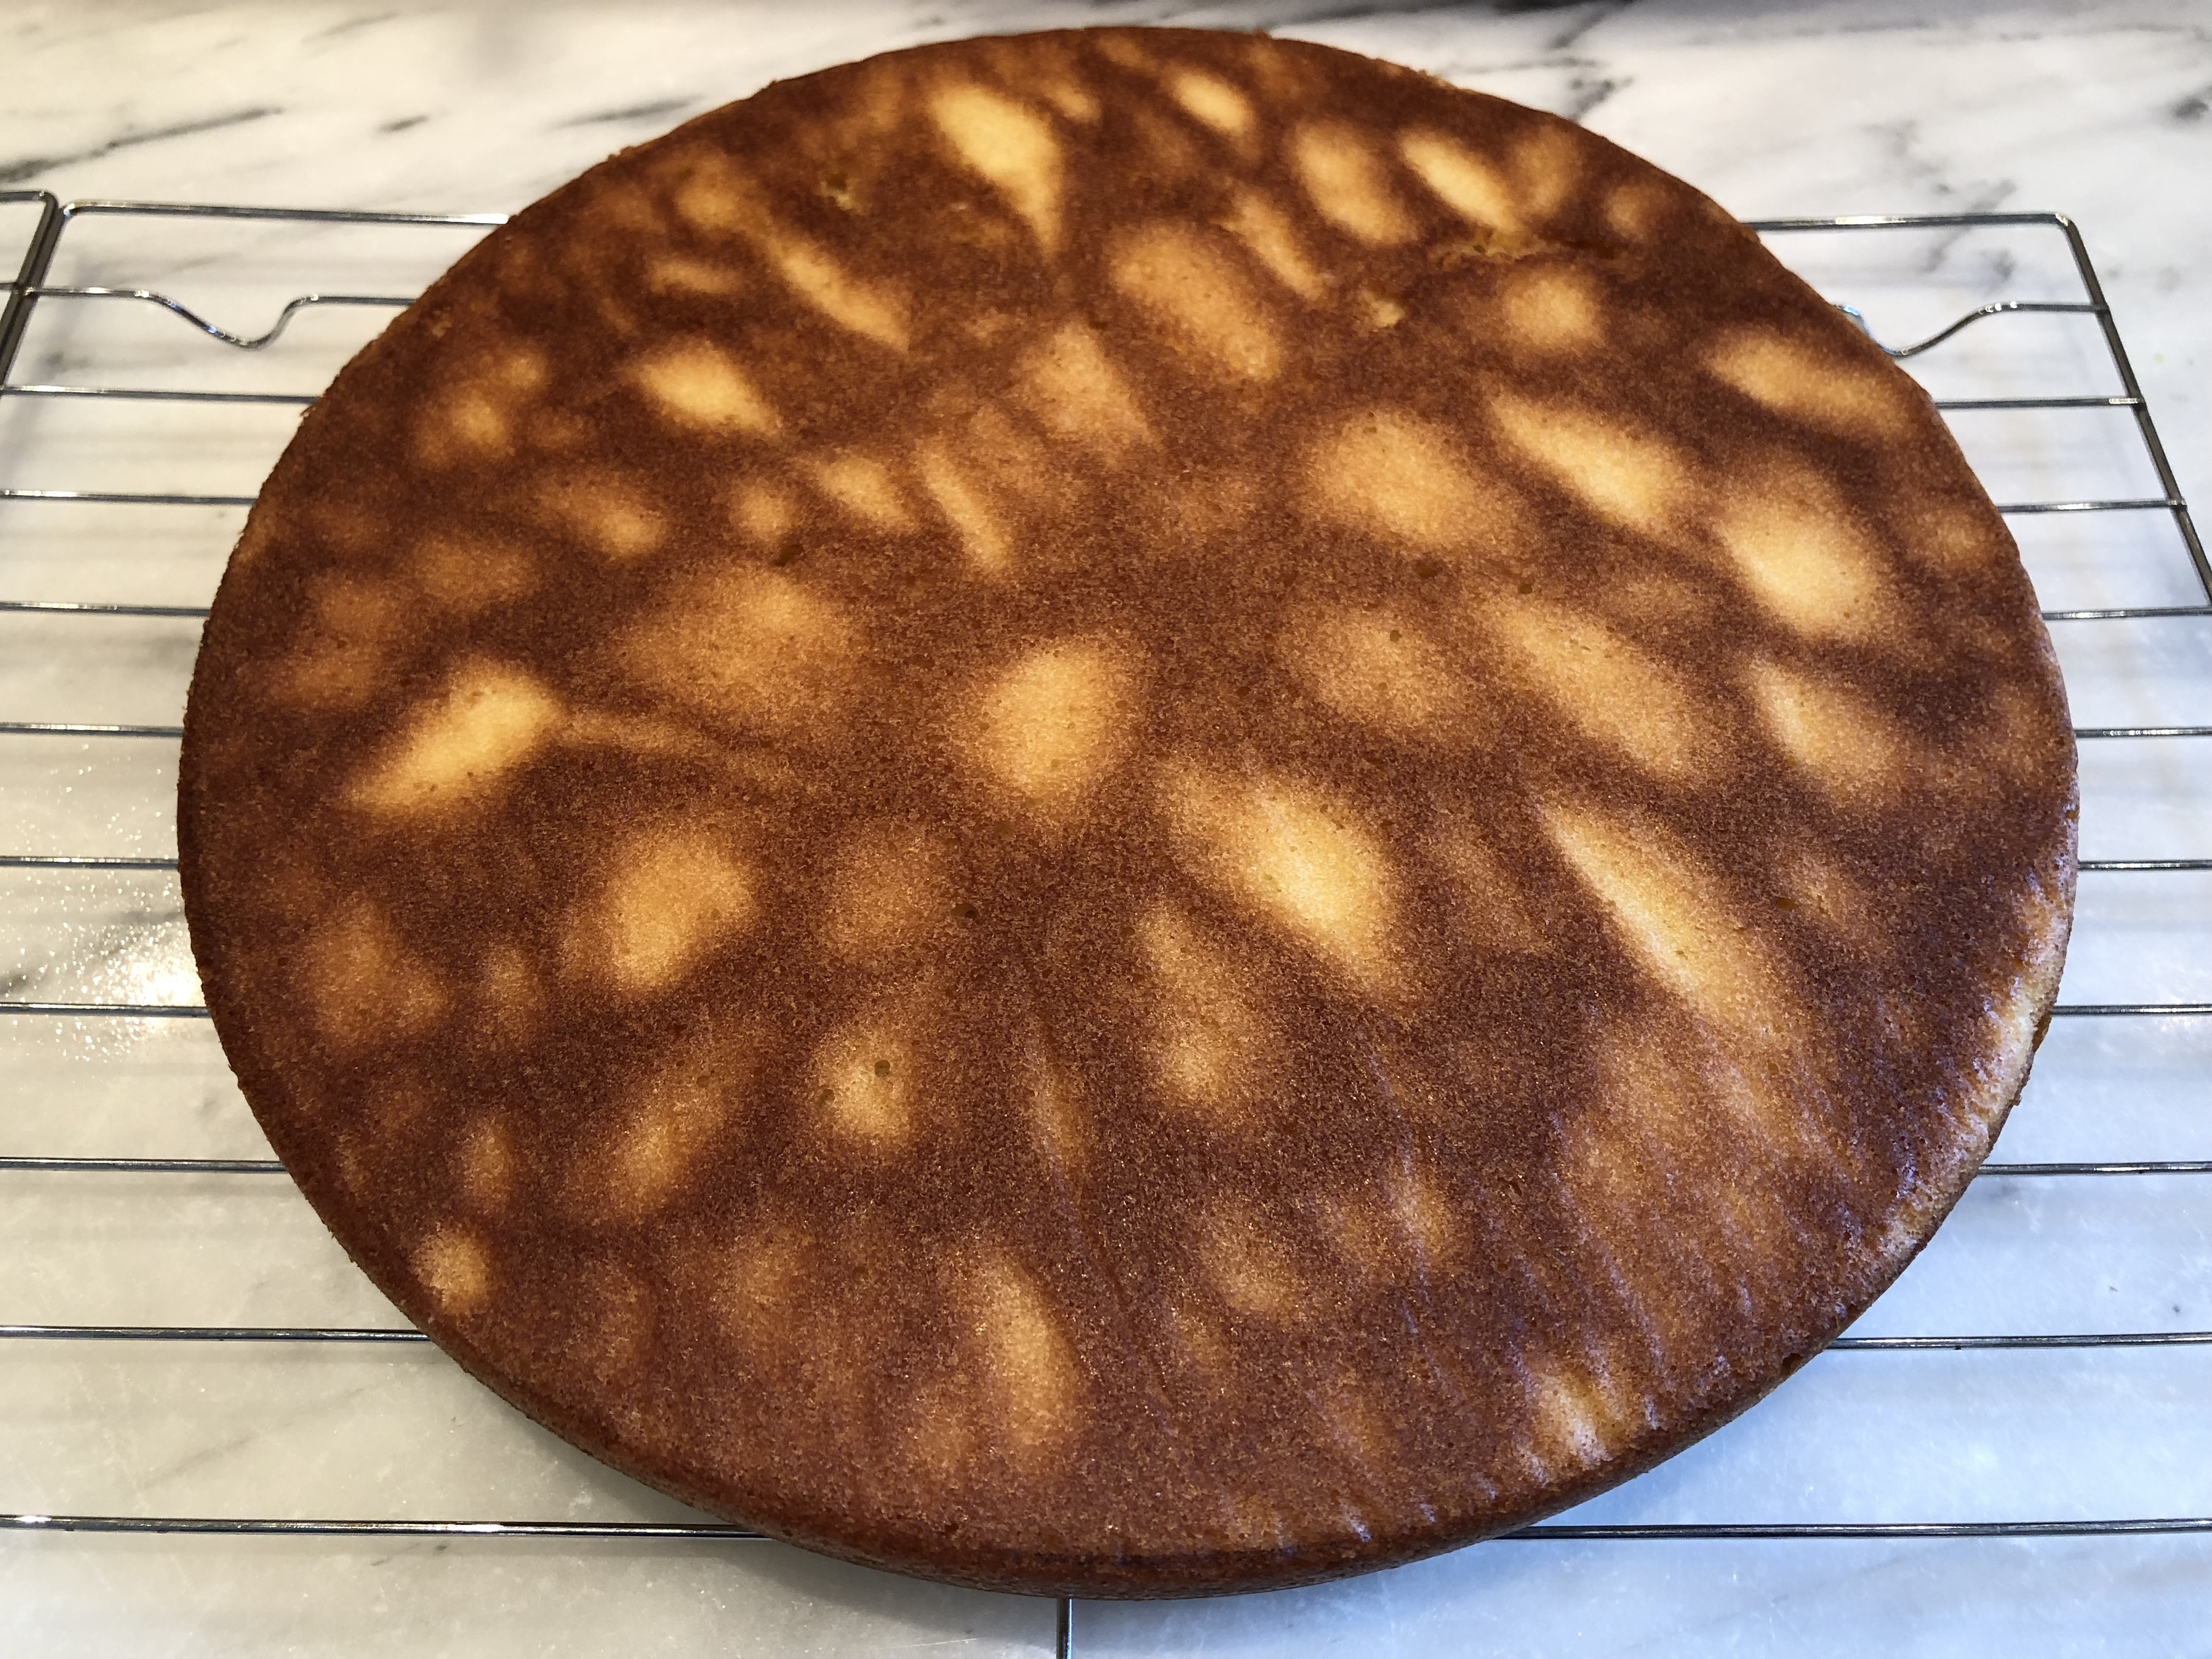
First, preheat the oven to 350 degrees F and lightly butter entiredly and then line with parchment paper the bottoms of two 8×2 inch round cake pans.
Next, in your KitchenAid stand mixer, cream together the butter, sugar, baking powder and salt. Add the eggs and beat until fluffy. Reduce the speed to low and beat in the milk and vanilla. It’s going to start looking curdled like cottage cheese, and that’s what you’re going for. Then, slowly add the flour until the batter is smooth.

Pour evenly into the prepared pans and bake for 30-35 minutes until a toothpick inserted in the middle comes out clean.
Cool the cakes on wire racks for ten minutes before running a small knife around the edges and flipping them out of the pans onto the wire racks to completely cool.
I made the cake the day before the party and let both cake layers cool completely before wrapping them in parchment paper and then plastic wrap to keep them moist over night.
A few hours before the party I prepared the filling- strawberry whipped cream with bananas.
I stopped by the local farmers market for strawberries, which I cut up into somewhat smaller pieces, mixed them with a tablespoon of sugar, and let them macerate for an hour or so. I had purchased two pints of heavy whipping cream, and used 2/3 of one to make the portion for the filling, which was then mixed with the macerated strawberries so it would turn pink and be sweetened by the berries.
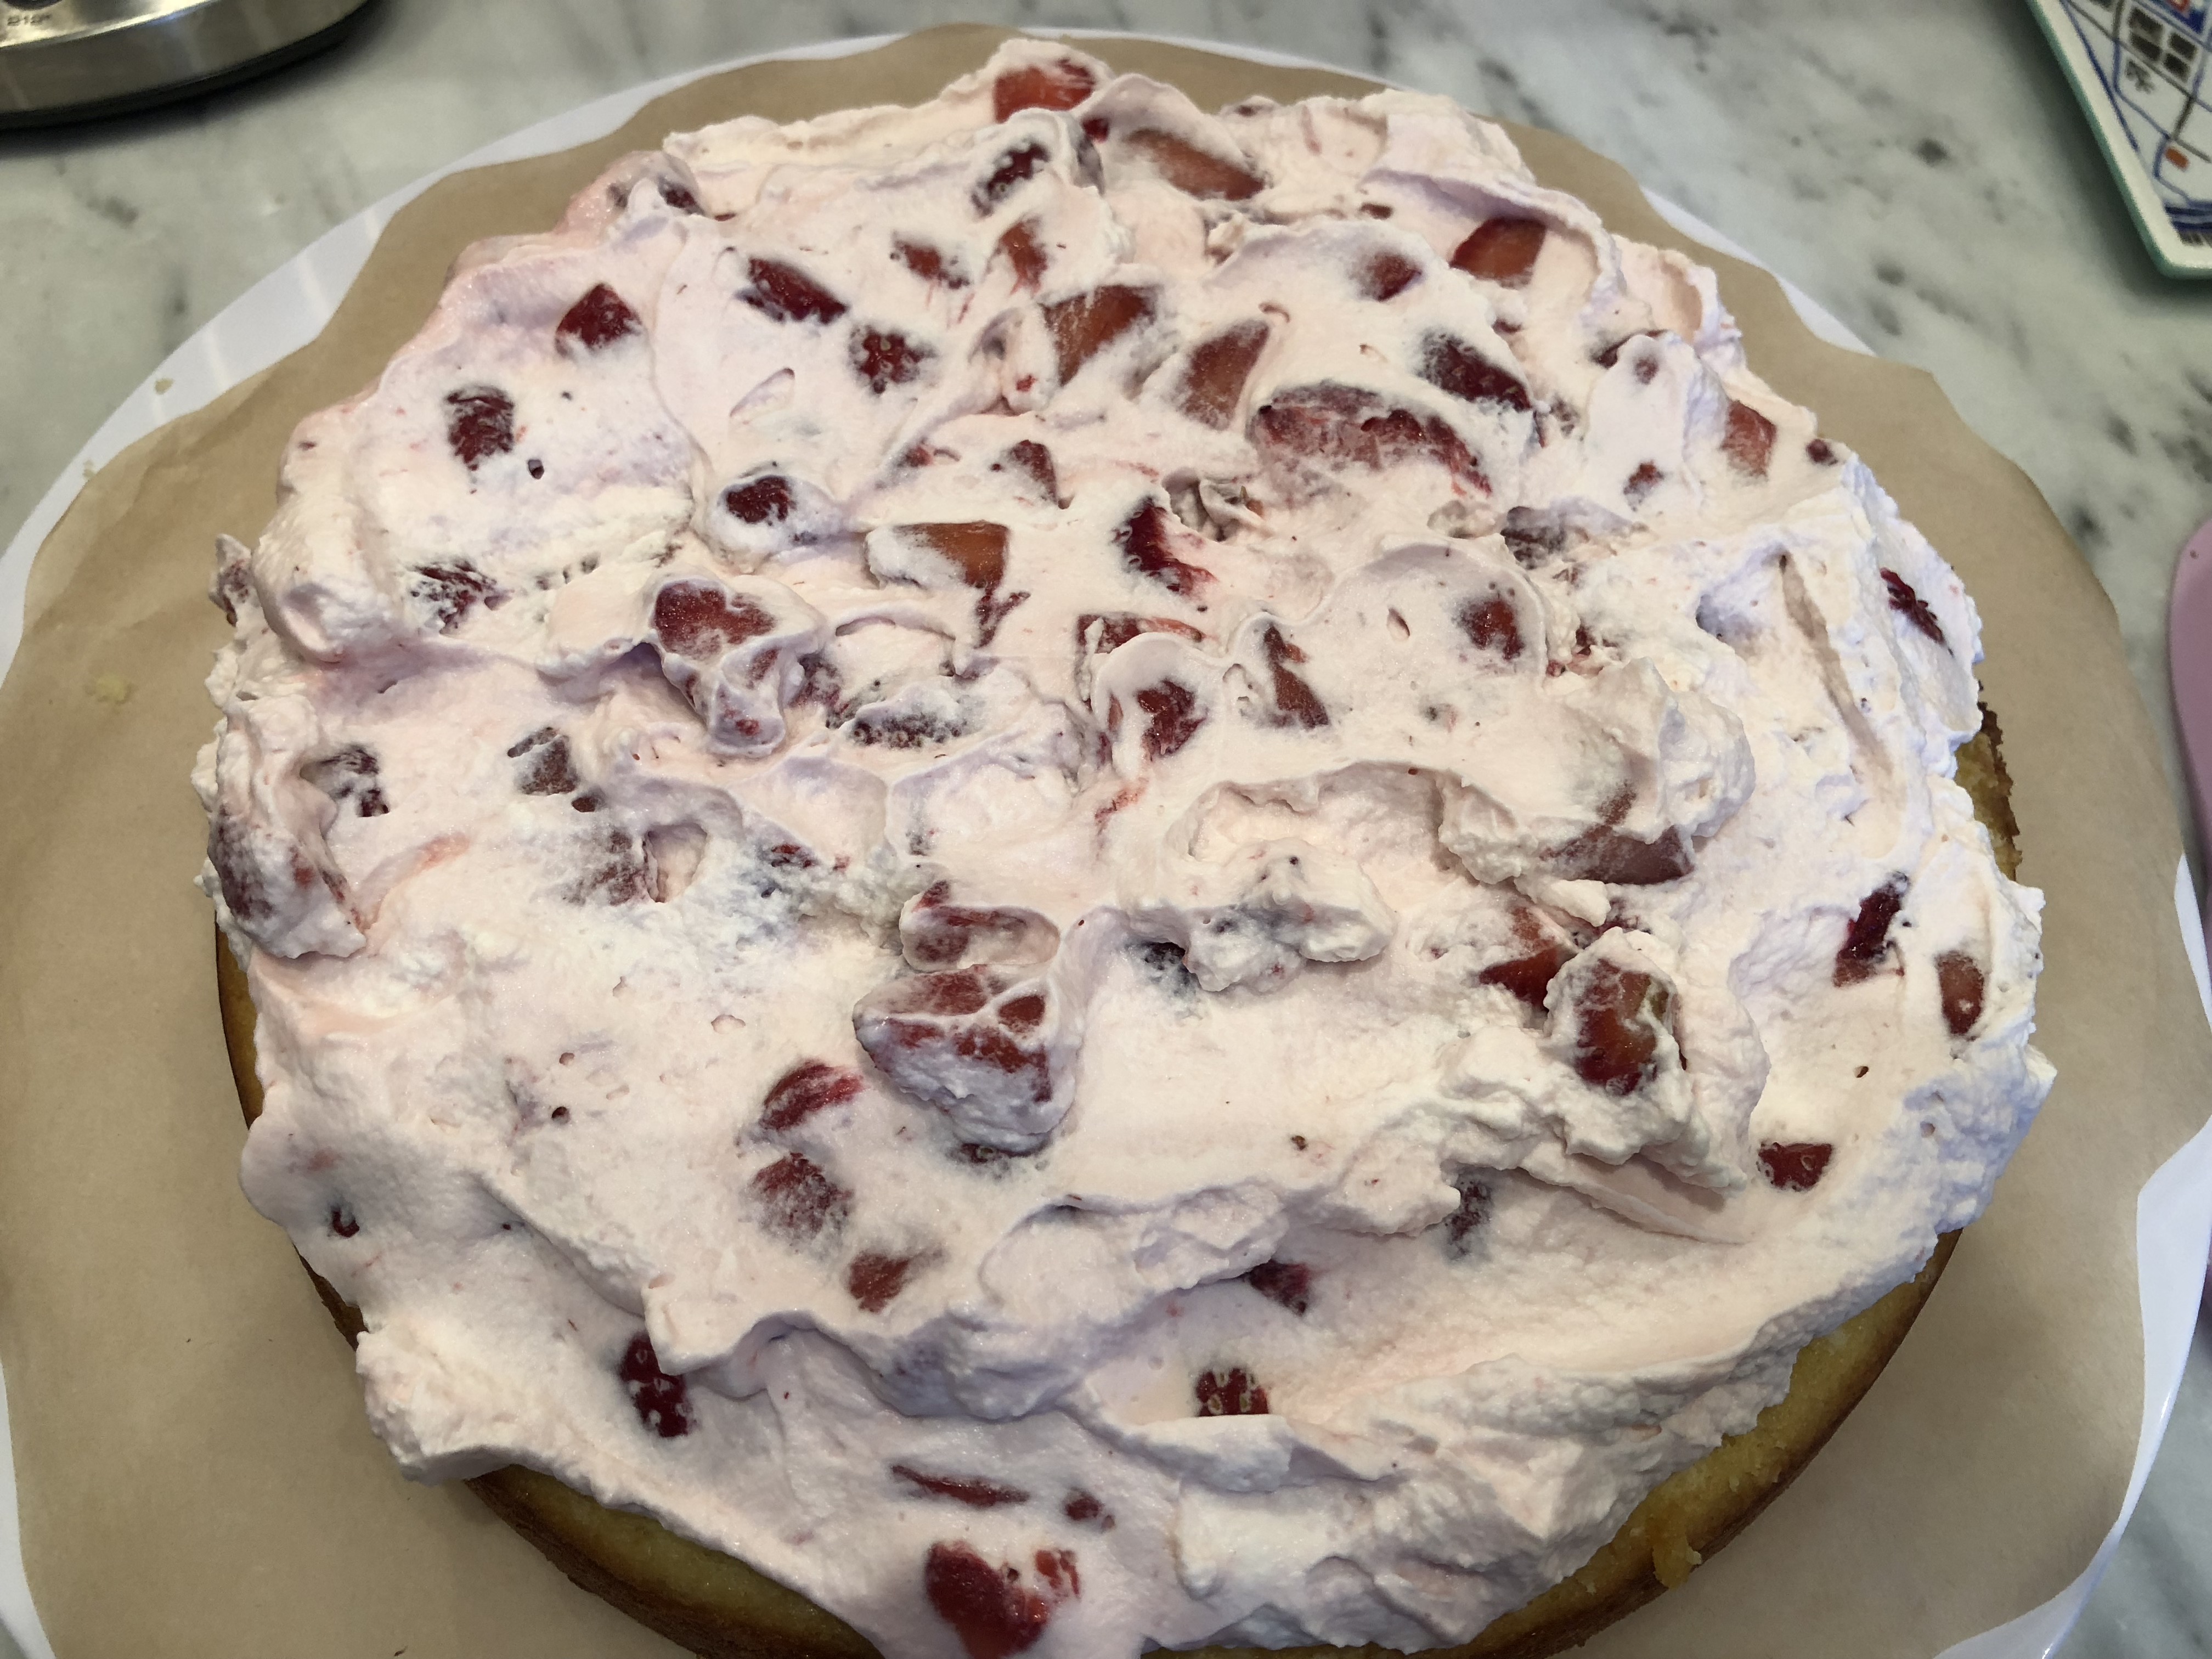
Then I topped this layer with thinly sliced bananas.
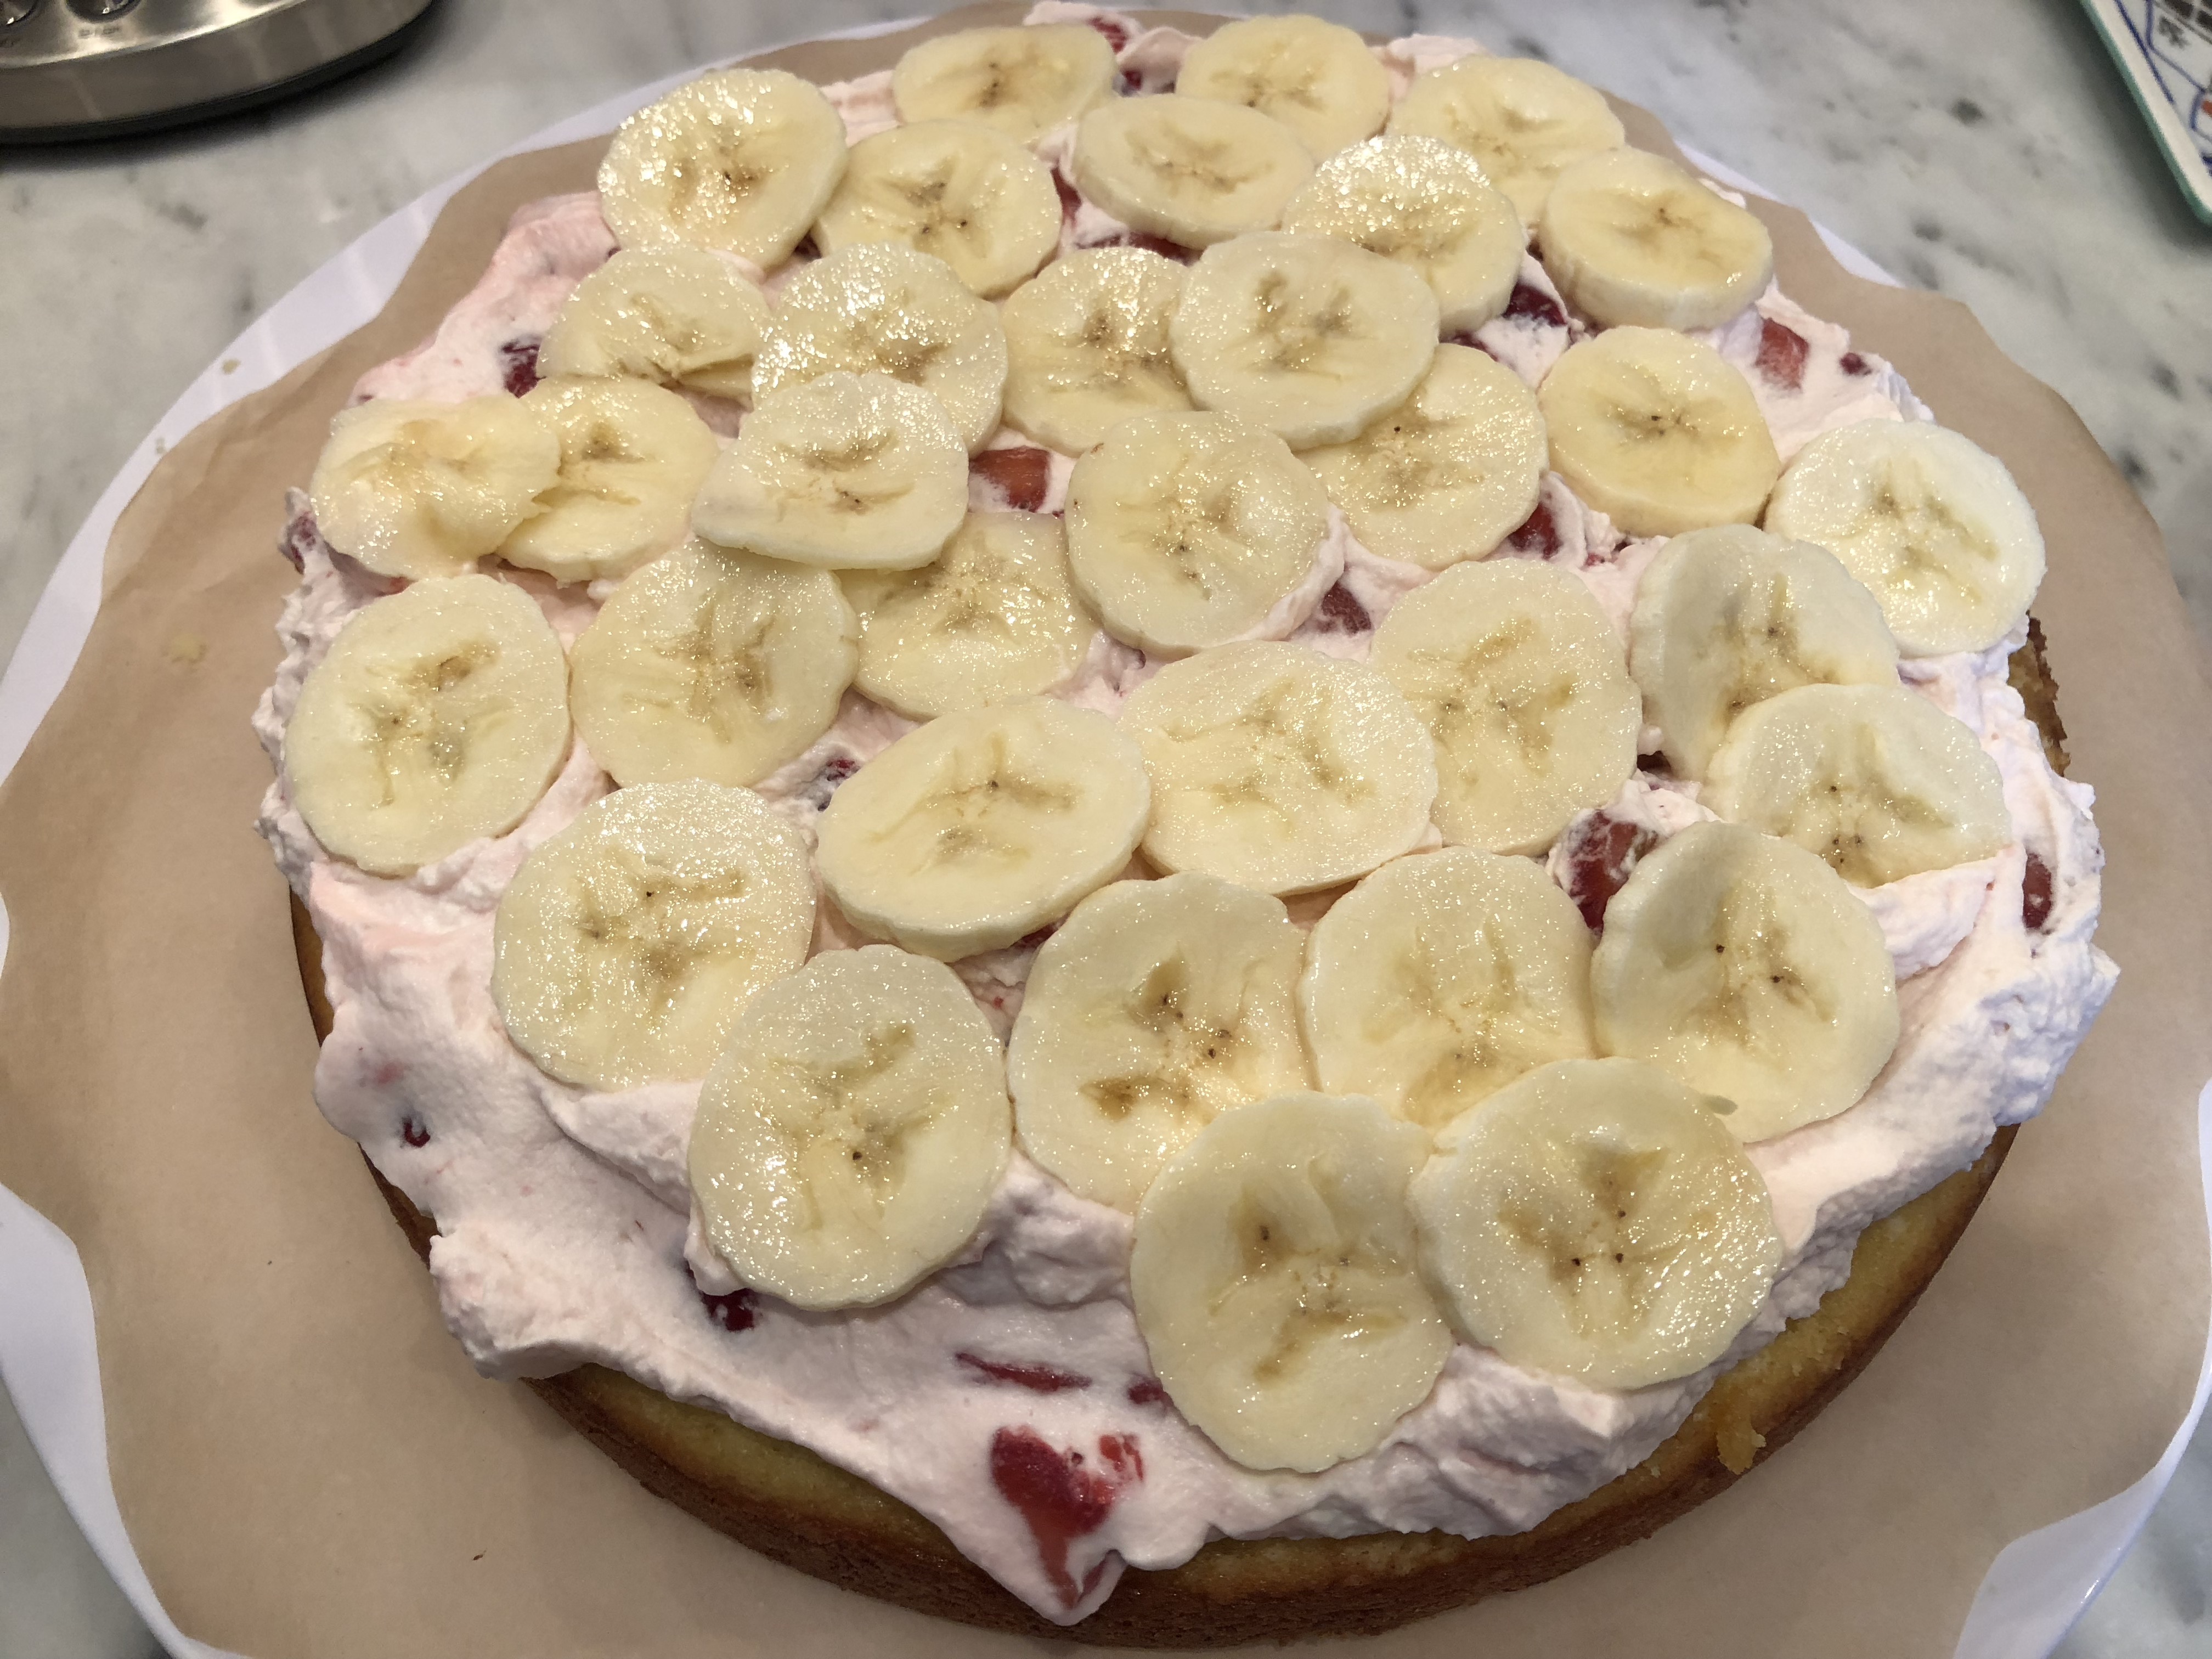
I added another cup or so of the strawberry whipped cream on top of the banana slices and then the other layer went on top and I pressed it down to try and even out the filling.
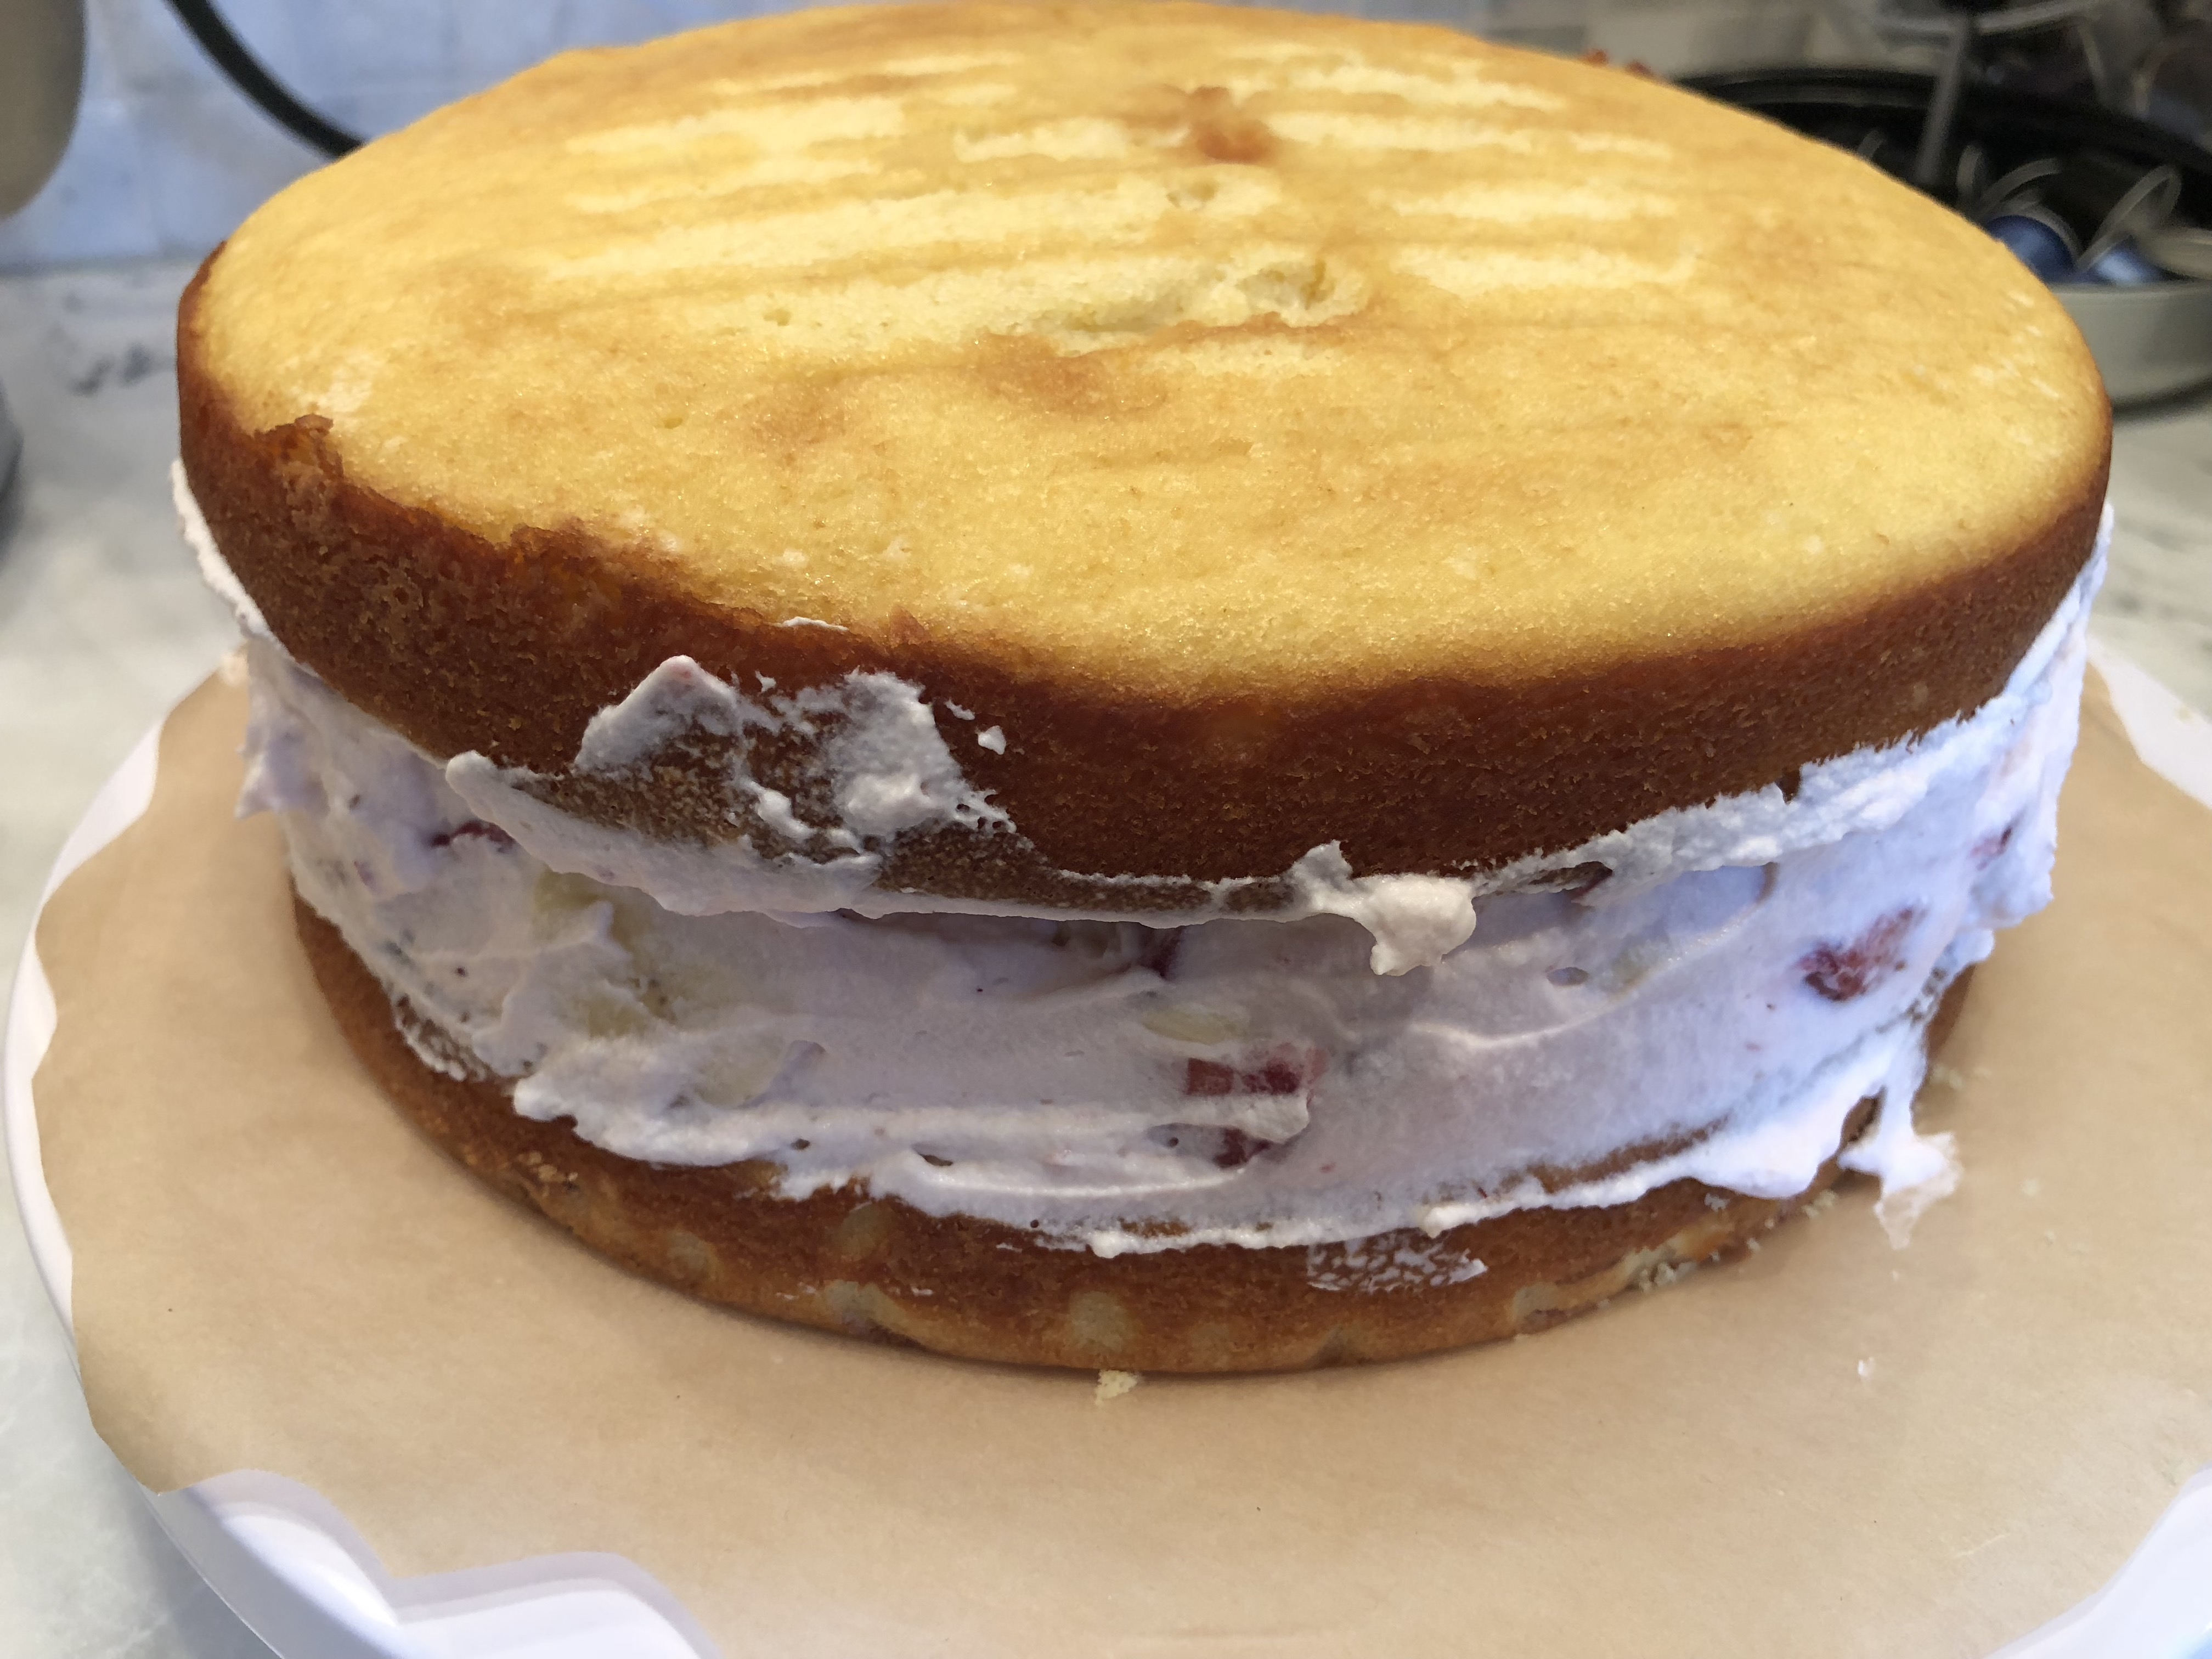
I refrigerated the cake until just before serving to keep the freshly made whipped cream firm.
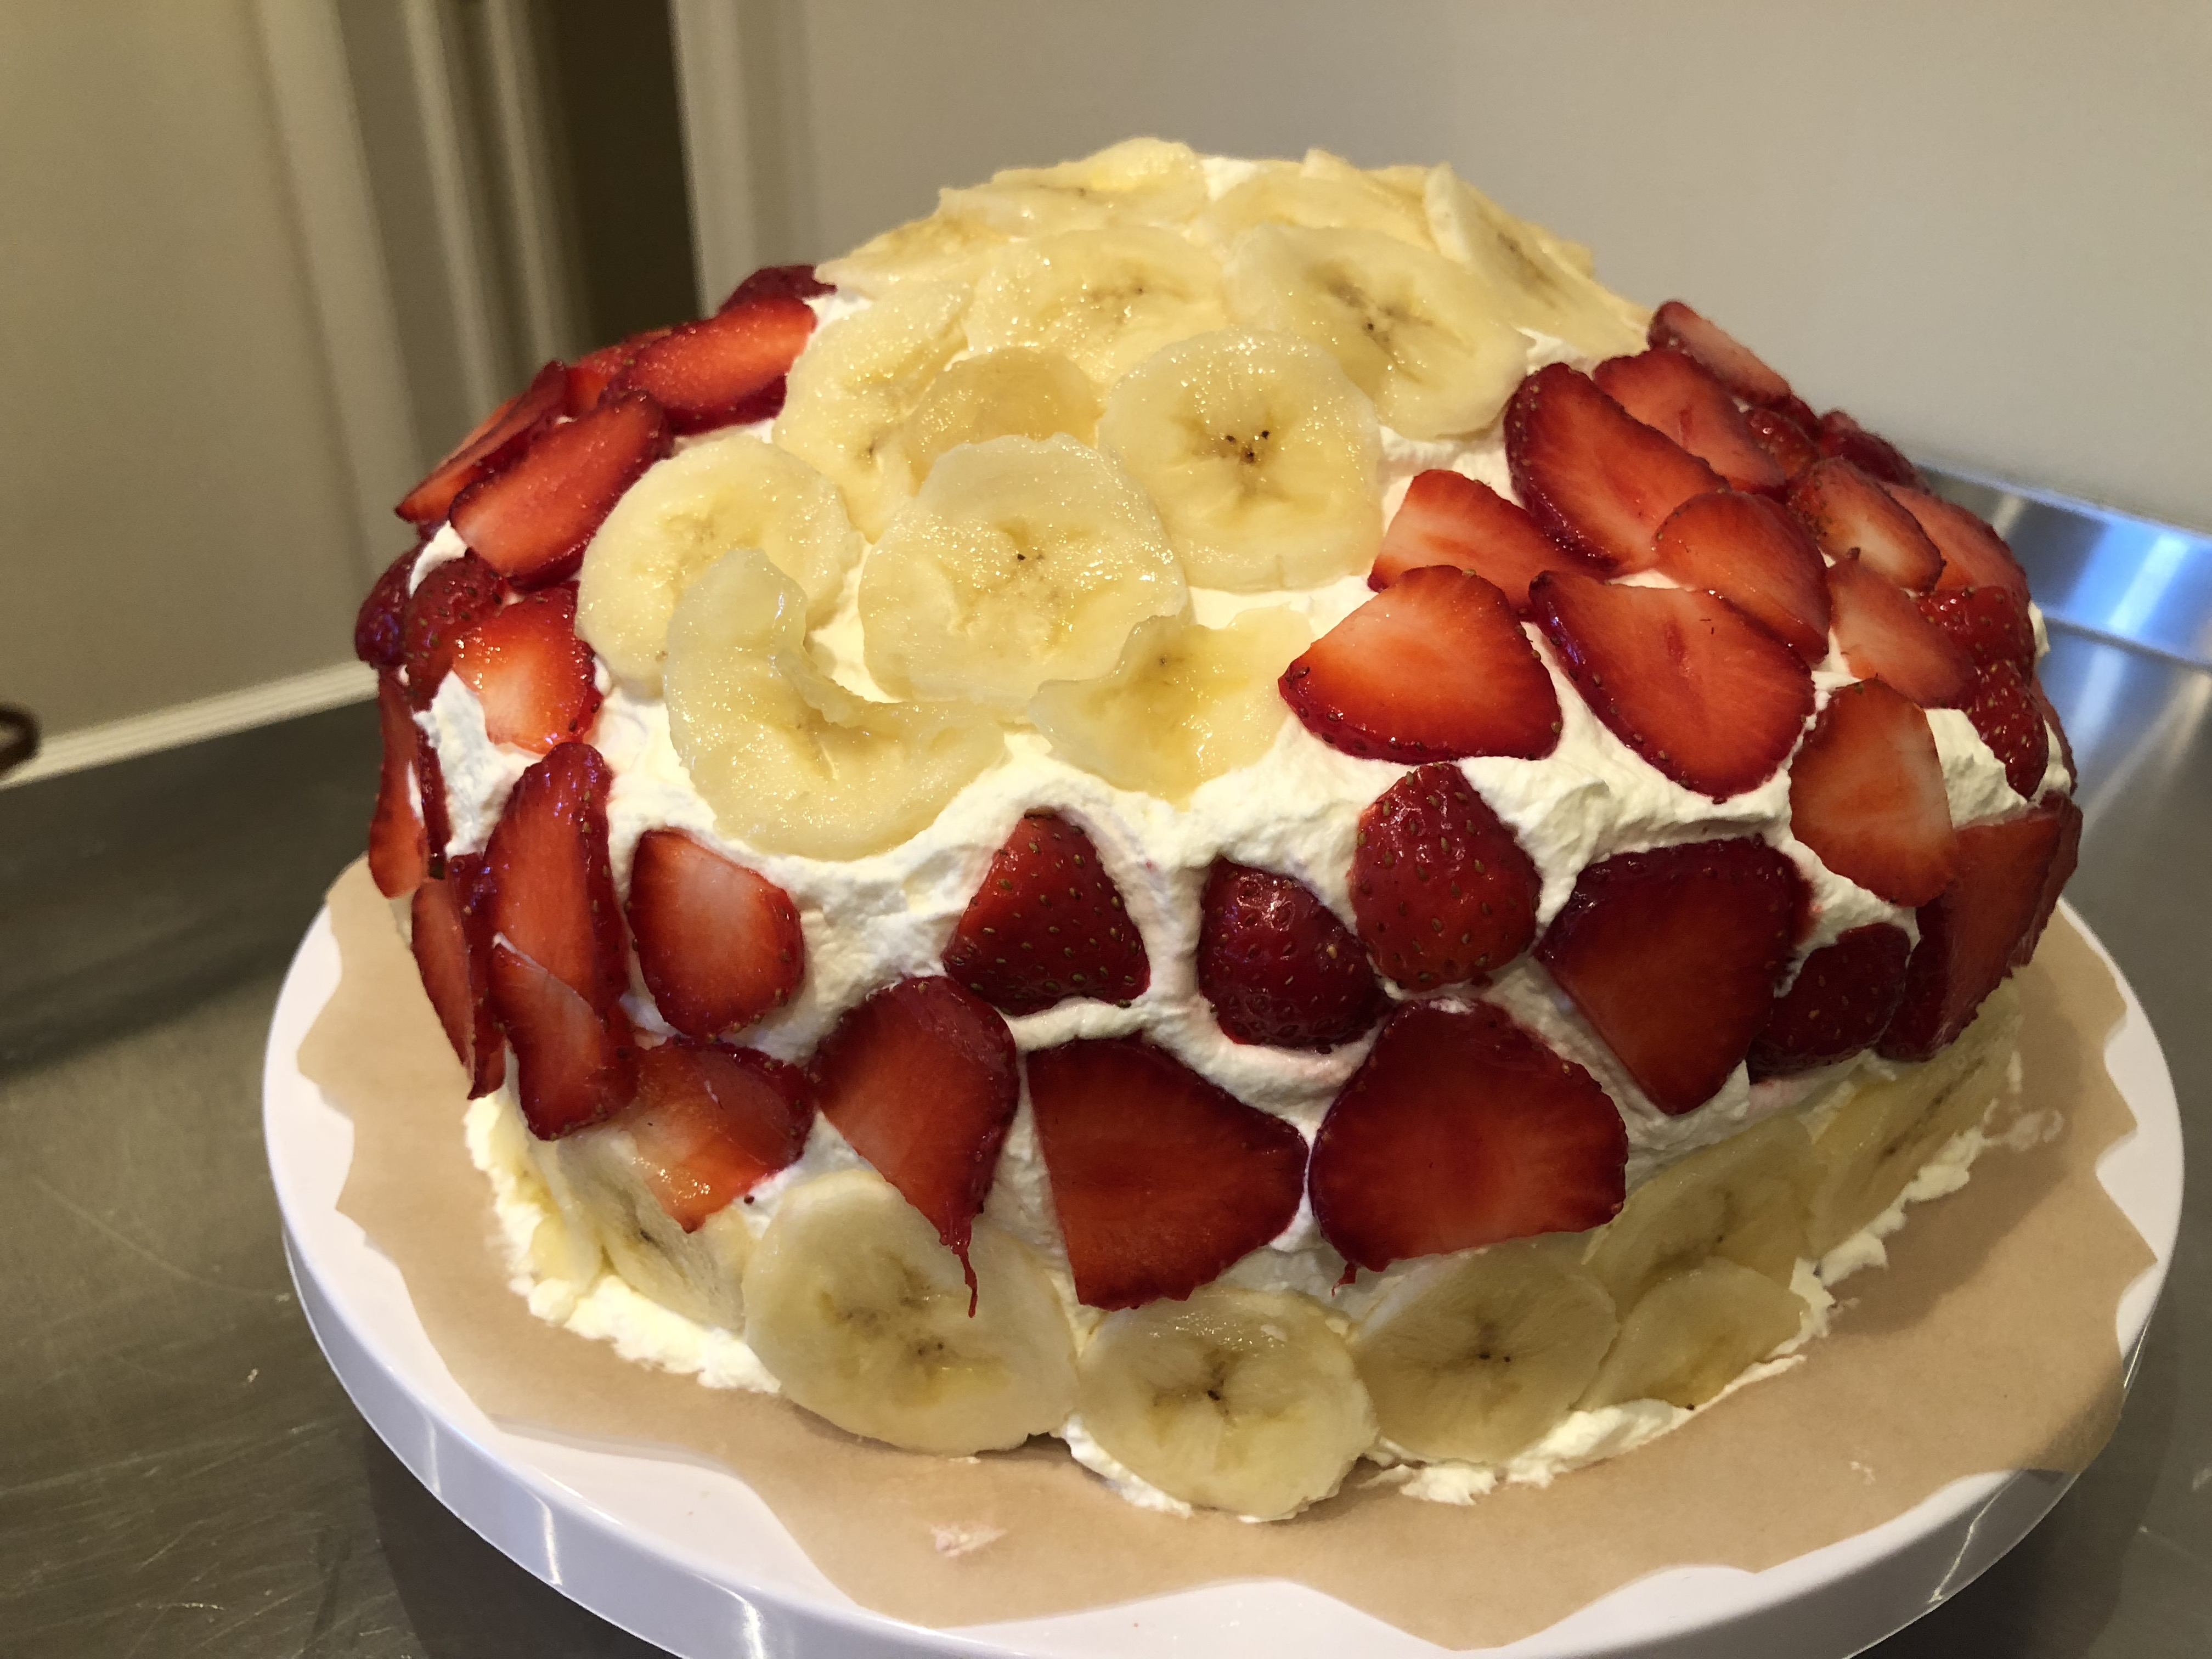
I whipped the rest of the heavy cream with about a tablespoon of maple syrup, and then spread it all over the cake. There’s a bit of a mound in the center because that’s the way I remember it being as a child. Thinly sliced bananas and strawberries adorned the cake to make sure you get a serving of fruit with your cake.
Enjoy!
Cranberry Poundcake Bread Pudding
- At November 18, 2017
- By megan
- In cake, cranberries, dessert, favorites, Recipes, Sean Smith, strawberries, thanksgiving
- 0
One of my favorite desserts that Sean makes is pound cake. It’s a simple cake that tastes just like childhood to me as I ate Entenmann’s pound cake by the pound whenever my parents bought it. This twist on bread pudding using home made pound cake as the “bread,” though really labor intensive, is a winner. Especially for holiday parties.

There are three main steps:
1- make a pound cake
2- make a cranberry compote
3- make the poundcake bread pudding
I’ll walk you through these three steps.
Pound Cake
Ingredients-
- 1 cup unsalted butter
- 1 cup sugar
- 2 tsp vanilla extract
- 2 cups all purpose flour
- 4 large eggs
- 1/2 tsp salt
Directions-
Preheat oven to 350 degrees. Butter and flour a six cup loaf pan.
In a KitchenAid stand mixer, cream the butter and sugar together on a high speed. Add eggs one at a time, vanilla, and salt and mix until well combined. Turn the mixer to low and slowly add the flour until it’s all combined.
Pour the batter into the loaf pan and bake for an hour or so until a toothpick inserted in the center comes out clean. Let it cool in the pan for 15 minutes before removing it from the pan to cool on a wire rack.
Cranberry Compote
The next step is to make a cranberry compote. Sean added a couple bags of frozen cranberries to a pan on medium heat like you’d start to make a cranberry sauce. He then added a little water, approximately 1/2 cup of sugar, a handful of frozen strawberries, a handful of frozen blueberries, and some frozen raspberries. This will turn into a sauce if you let it simmer for 30-40 minutes. He added some orange zest at the end.
This part of the recipe can be adjusted to your likes. The addition of sweeter berries allows for a little less sugar and still makes the cranberry sauce really sweet.

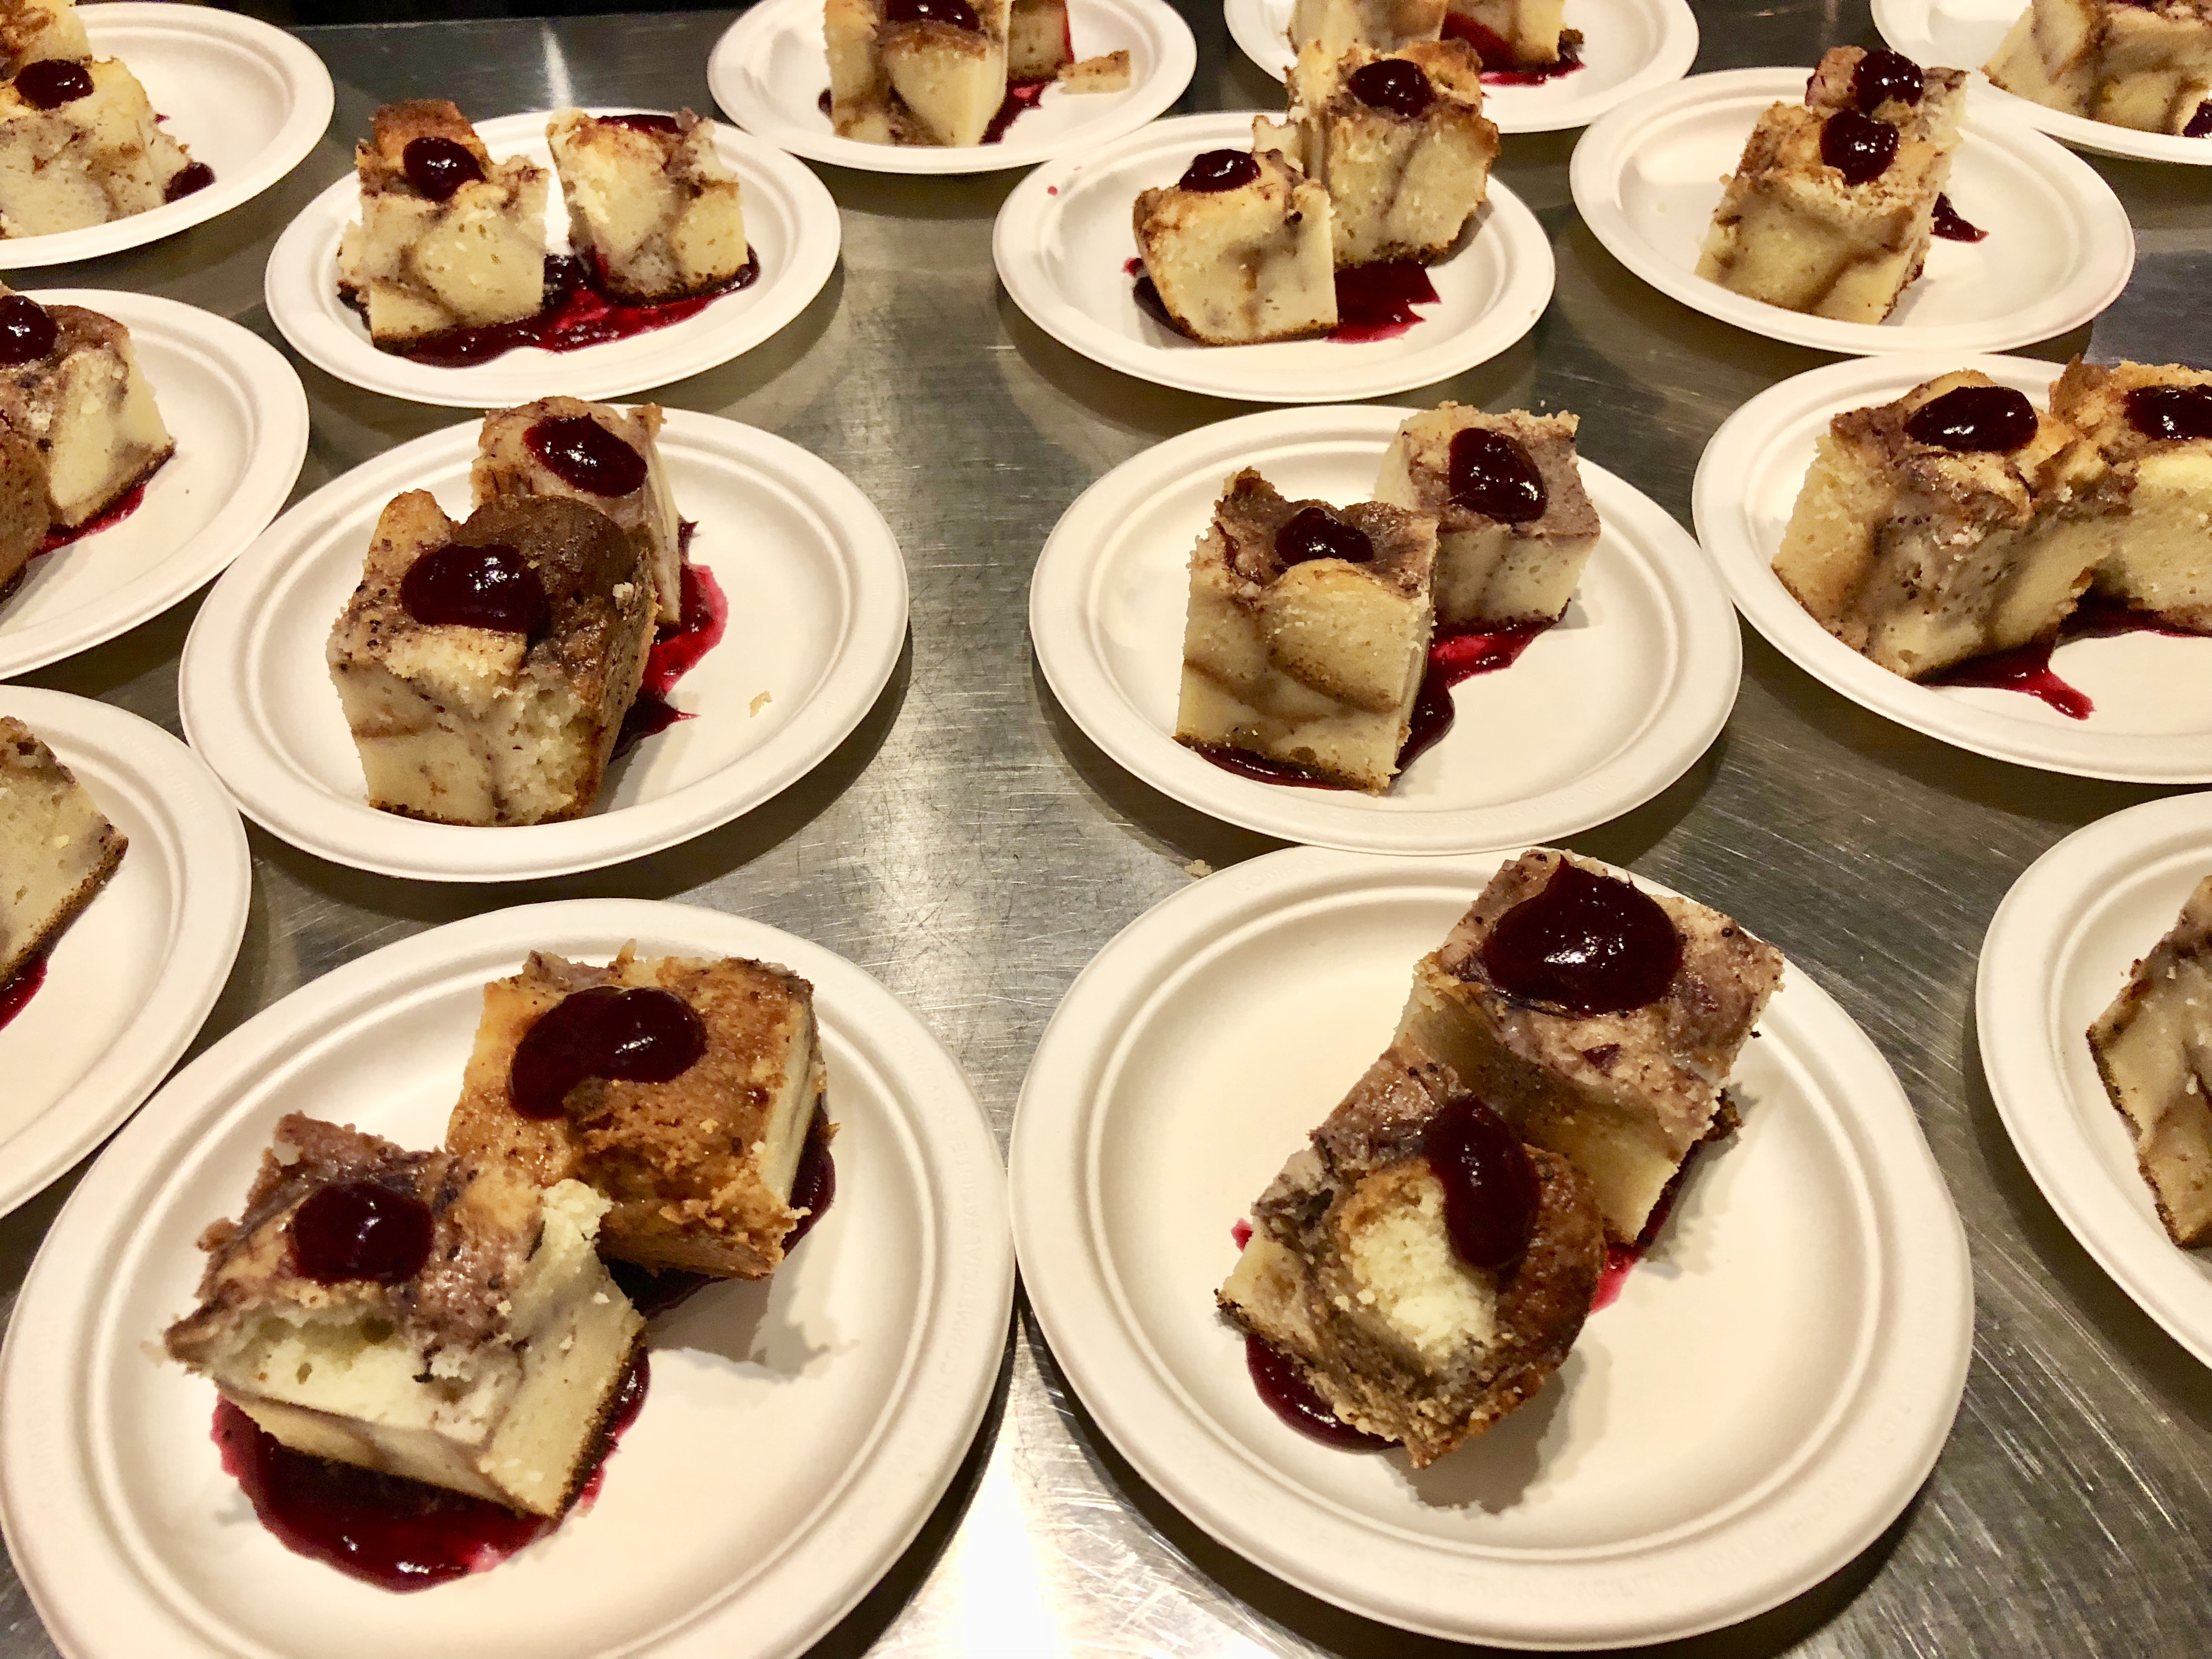
The final step is to assemble the bread pudding.
Cut the poundcake up into cubes and let it sit out at room temperature over night to get a little dry.
Cranberry Poundcake Bread Pudding
Ingredients:
- 1 loaf poundcake cut into cubes
- 2 TB melted butter
- 4 eggs
- 2 cups milk
- 1/2 cup sugar
- 1 tsp ground cinnamon
- tsp vanilla extract
- 1.5 cups cranberry compote
Preheat oven to 350.
Put the pound cake cubes in a square pyrex baking dish and drizzle melted butter over the top.
In your KitchenAid stand mixer, combine the eggs, milk, sugar, cinnamon, vanilla, and cranberry compote and mix until well combined. Pour over the pound cake and lightly push down on it with a fork to be sure the bread is covered and soaking it all up. Let this sit on the counter for 45 minutes or so to be sure it has soaked up the mixture before baking for 45 minutes and has cooked through.
Chef Sean served food to Opera on Tap Colorado at Upslope Brewing Company, and he served this dessert paired with their Christmas Ale. Smear a little extra compote on the plate and a dollop on top and shove a fork in it!
Enjoy!
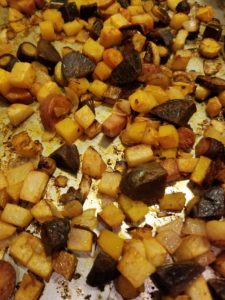
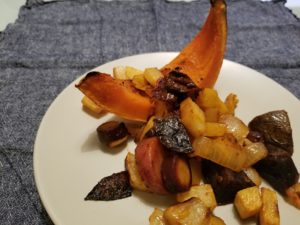
Chipotle Roasted Fall Vegetables
So summer is over, but that doesn’t mean that there still isn’t amazing local produce to cook up. A few things I love doing this time of year, especially when the temperature drops down, is roasting what I can still get from the farmers market. One of my favorites is combining root vegetables with the slightly spicy chipotle pepper. There is something about the earthiness of root vegetables and the smoked flavor that chipotles bring that are a match made in heaven. Turnips and rutabagas work best for this but a few other choice fall veggies help to round out the side dish. This dish compliments most proteins, especially turkey which of course is going to be on everyone’s plate in a few weeks!
ROASTED FALL VEGTABLES WITH CHIPOTLE
1 Medium Turnip
1 Medium Rutabaga
1 Large Parsnip
2 Large Carrots
1 Large Yellow Onion
1 Can of Chipotle in Adobo Sauce
Set oven to 375. Peel and dice the root vegetables. I like to leave them a little chunky but as long as they’re uniformly cut they should roast up just fine. Next, toss the vegetables in a high heat cooking oil. You want enough oil to coat them but not to much where they get soggy. Then, and this is where the recipe can be changed depending on your affinity for spicy foods, toss the vegetables with at least 2 chipotle peppers and about a tablespoon of the adobo sauce. Don’t worry if you think you’ve added to much, once the natural starches in the veggies convert to sugars while roasting in the oven it will taste delicious. And if you like things with some heat, add in a couple more peppers and sauce. Give a quick toss with some salt and spread out on a baking sheet. Bake until fork tender, about 30 minutes, mixing occasionally.
I also roasted a Kabocha Squash seasoned with Black Dust Coffee & Spice Rub from Savory Spice Shop.
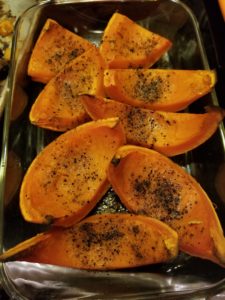
These two together make for a unique Thanksgiving side dish.
Let’s get Social