How to Make Eggplant Rollatini
- At March 31, 2020
- By Sean Smith
- In Eggplant, favorites, Grilled, Recipes, Spinach
 0
0
I grew up in Massachusetts and there a few random things I miss about New England. Red Sox baseball, pizza, and eggplant parmesan. I still get to watch the Sox occasionally, so that’s fine. The two food items though are a bit underwhelming, in my opinion, to eat out here in the West. While there are a couple of amazing pizzerias in the high country, most fall flat. Yes there are styles of pizza that rival a classic East coast by the slice such as: Frank Pepe’s Original New Haven Style Pizza, Chicago deep dish and thin crust, Detroit-style, I won’t get into that here today. Eggplant Parm is something I basically lived on in high school, along with the aforementioned pie. Usually in the form of a nice and warm sub although depending on where you come from it could be a “grinder” a “hero” or a “hoagie.” As much as I love the dish, I seldom make it at home for two reasons; it’s super labor intensive and super messy to make. By the time you’ve spent half the afternoon cutting, breading and frying the eggplant, the kitchen is a destroyed and half your kitchenware is dirty. That’s before it even bakes!
So my at-home go-to is a distant cousin of eggplant parmesan and perhaps also had Manicotti or stuffed shells in it’s family. Eggplant Rollatini has very similar flavor profiles and takes half the time to make. Also clean up is way easier than trying to scrub all the spilled breading ingredients off the kitchen counter for an eternity.
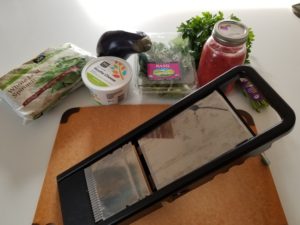
So lets get down to it. Now I highly recommend using a mandoline for this project, it cuts down on the amount of time slicing the eggplant. There are two kinds, a French variation and what is more commonly used in the food service industry, the Japanese style. I picture the former because that’s what most people have and is more readily available in kitchen stores. If you don’t have one you can still make this dish but I implore you to use a sharp (!!) knife and try to make all your cuts as uniform as possible. This will help them evenly cook in the baking process.
Ingredients-
1 Large Globe Eggplant
1 C Frozen Spinach, thawed to room temp
1/4 C Chopped Parsley
1/4 C Fresh Basil
8 oz Ricotta Cheese
1/2 C Shredded Italian Blend Cheese (or Mozzarella or Grated Parmesan)
Jar of Pasta Sauce
1 Lemon
1 Egg
Salt and Pepper
These portion sizes listed are to make a dish that serves 2ish people since that’s generally what I’m cooking for at home. I made my own red sauce from a batch of local tomatoes that I canned last summer but a nice quality store bought one would work just as well and saves some time. Feel free to add some ground meat to the sauce to turn this from a veggie dish into a meat lovers delight.
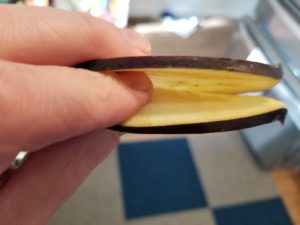
The first step is slicing the eggplant. You want to have the eggplant thin enough so that it will roll with out breaking but thick enough so that it doesn’t fall apart in the baking process. If you have a cooling rack, place it over a sheet tray, if not use a large plate. Heavily salt the eggplant and let sit for 10 minutes, rinse and pat dry.
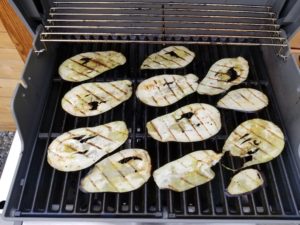
Meanwhile fire up your grill to medium heat and if you’re lacking a grill turn your broiler on to low setting. Season the eggplant with olive oil, just a sprinkle of salt and pepper. Whether you’re grilling or broiling, you are not shooting for a fully cooked slice. More of a par cook, just enough to make the eggplant pliable to roll up. Once done remove from grill/oven and set aside.
Next up is the assembly of the filling, which is wicked easy. Combine ricotta, spinach and parsley in a small bowl and fold together. Season with salt and a few squeezes of lemon. You don’t want the lemon to be overpowering but brighten up the mixture. Take the egg, beat it and fold into filling.

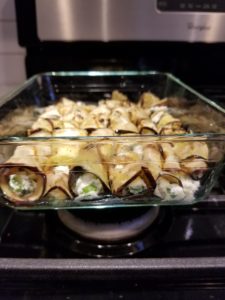
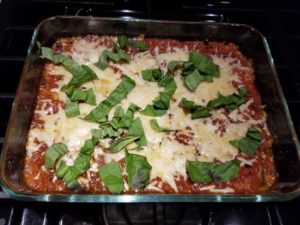
The home stretch is assembling the baked dish. Preheat the oven to 350. Grease a baking dish, I used extra virgin olive oil but butter or cooking spray would work too. Lay out the eggplant slices, spread some of the filling near the top (the side furthest away from you) and roll each slice towards you. Place in greased pan, right next to the previous roll. If you end up with extra rolls try and cram them in, this recipe is very forgiving and it won’t affect the end product. Pour your sauce over the rolls. The eggplant should be covered but not drowning as it will still release some liquid while baking. Bake at 350 for 20 minutes, sprinkle with cheese and bake for another 20/30 minutes or until eggplant can be easily pieced with a knife. Remove from oven and let sit for 10 minutes. Garnish with basil, either roughly chopped, torn by hand or if you’re trying to impress someone, finely julienned. Enjoy!!
Grapefruit & Vanilla Marmalade
- At March 20, 2020
- By Sean Smith
- In canning, Grapefruit, marmalade, Recipes, vanilla
- 0
It may be the first day of spring, but here in Denver it’s a cold snowy day. Perfect for spending a couple hours making one of my favorite marmalades! While it may not seem like it, bitter citrus and vanilla are a winning combo. It really doesn’t take that much effort to make, but it does require a constant eye for when to stir the marmalade. Especially as it is almost finished cooking.
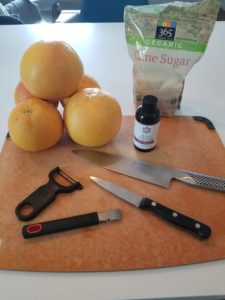
Here’s what you’ll need to make this marmalade:
5 Large Ruby Red Grapefruits
(you can use other varietals but I found these to be the best)
3 Cups Raw Sugar
3 T Vanilla Extract or 2 Vanilla Beans
(I use Savory Spice’s Madagascar Vanilla Extract. It’s cheaper than raw beans and has great flavor)
Start by washing and drying the grapefruit. I like to have two kinds of zest- a finer zest that breaks down with the fruit while still maintaining some structure, and a thicker zest that holds up through the cooking process and has some texture left in the end product. You can’t have marmalade without zest!
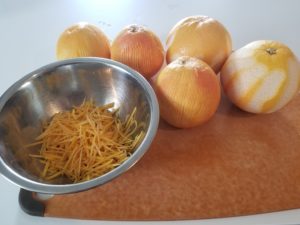
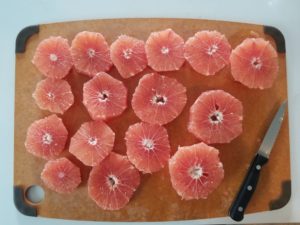
Zest 3 grapefruits and reserve it. Using a peeler, peel the other two taking care not to remove any of the white pith. If you have a sharp peeler, like this Kuhn Rikon, you don’t need to press too hard to remove the rind. If some pith comes off then turn the rind over and using a pairing knife trim off the pith. Once complete, julienne the rind and combine with the other zest. Remove the rind and pith from the grapefruit and slice into wheels, removing any seeds.
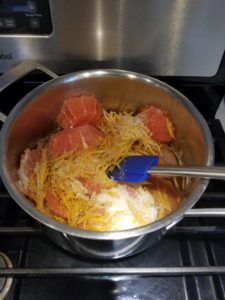
Combine the grapefruit, zest & sugar in a non reactive pot. Depending on wether or not you bought extract or beans the next measurement will vary. I used 3 T of the Savory Madagascar Pure Vanilla Extract. If you have something that is of a lesser quality, you may need more. If you have vanilla beans, scrape 2 whole beans into the pot. Regardless of which you use, you can always add in more before the marmalade is set. Stir in a couple of tablespoons of water to the mixture, place it on the stove, cover, and heat on medium.
At first you need to stir this somewhat frequently. Once the mixture starts to bubble, remove the lid and turn down the heat to a simmer. As the grapefruit cooks and breaks down, mash the wheels so they break up into smaller pieces. As the fruit cooks down the heat is going to have to be adjusted down several times. The mixture should never be above a low simmer. It will take about 2 hours for the marmalade to set and needs to be stirred occasionally. Any white foam that rises to the top should be skimmed off and discarded.
There are several ways to check when the marmalade is ready. If you have a candy thermometer, 222F is perfect but not higher. If you place a small plate in the freezer and add a dollop on to the plate, wait a couple of minutes and drag a spoon through it. The sample should crinkle. The last method is if you dip a spoon into the mixture and then turn the spoon horizontally, the liquid dripping off should be in one steady stream.
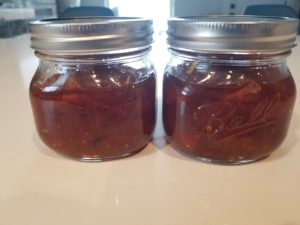
I jar my marmalade and if you do follow proper canning techniques which can be found HERE. If you choose to skip the processing and put it in the fridge, there is enough sugar in the marmalade to last a couple of weeks, but hopefully you enjoy it before then!
Apple Pie Filling & Cabbage Stew
- At November 4, 2018
- By Sean Smith
- In Apples, cabbage, Farm to Table, pie, Recipes, Soup
- 0

Everyone has their favorite fruit, or at least should. Some people go gaga for watermelon. Others say bananas are the best. Oranges may rank at the top for just about anyone. Me, I really can’t say I have a favorite. I know which ones I don’t care to consume unless they are presented in a interesting way, which would be melons and figs. Something about the mustiness flavor of both throws me off. But a few slices of watermelon with ricotta, cracked pepper and a drizzle of extra virgin olive oil is divine. A fig compote topped on a nicely grilled pork chop is a party in your mouth. Having the diverse palate that I have I swing from the strange, exotic stuff like say horned melon to the more basic items like strawberries. Oh wait that’s not a fruit technically.
Which leads me to this post. I don’t know if it’s being born and raised in New England or the fact that there are so many culinary ways of using them but apples place at the top of my favorites. I can’t even begin to to list how this humble group can transform an ordinary dish to something stellar. Not to mention if you find yourself at a farmers market they should have heirloom varieties that will fit any which way your mouth desires. Of course, an American tradition, especially this time of year, is Apple Pie. Now the recipe that follows is for canning the filling, saving that fall flavor for later in the winter. If you’re in dire need of a recipe for a pie that needs to go in the oven ASAP, message me and I’ll be happy to give you one. Otherwise, get out there, pick your own from a local farm, stop buy a booth at a farmer’s market, which may be ending this time of year, or head to grocery store to snag some. Just remember, don’t buy “Red Delicious” as they are never delicious and they are definitely not the apple of my eye.

APPLE PIE FILLING
- 5 #’s Apples
- 6 C water
- 1 1/2 C sugar
- 3 sticks Cinnamon
- 1 T freshly ground Nutmeg
- 3 T Corn Starch
- 3 T Citric Acid
- 1 t Salt
- juice of 1/2 Lemon
You’re going to want to start the “brine” before you start peeling the apples. Apples will brown quickly due to oxidation so peeling and slicing them should be the last step. Combine the water, sugar, cinnamon and nutmeg and bring to a boil. Reduce heat and simmer for 15 minutes. This will really help the aromatics infuse into the liquid. Mix the corn starch into just enough water to make it pourable. When the timer goes off, pour the slurry into the pot, whisk and bring back to a boil. Cook for a minute or two whisking to make sure there is no clumps and remove from heat.
Next up is peeling and cutting the apples. Firstly, combine the citric acid with the salt and lemon juice, if you can’t find citric acid, increase the amount of lemon juice to a whole lemon. If you feel good about using a paring knife to peel the apples, you should as the ribbon of skin will come in handy for the next recipe. If not, a regular peeler will work but save the skins of either! Don’t peel all the apples at once, do it in several batches to avoid them turning brown before being cut. In my experience, most everyone who’s eating apple pie is just happy to be eating apple pie and not looking to see how pretty it is between shoveling it down their throat. Add the apple to the citric and lemon, give them a gentle toss and repeat until apples are gone.
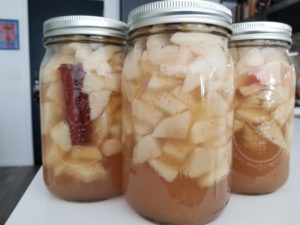
Split the apples between 3 quart jars, packing them in but not mushing the fruit. Any remaining pieces set aside for later. Pour the spiced liquid over the apples, remembering to leave enough head space. If you like, save any leftover liquid to make an alcoholic beverage with later. It would be an excellent mixer for a warmed whiskey drink but would also be fantastic thinned out with some hot water for a relaxing drink on a cold Autumn night.
Follow the general guidelines for canning for your altitude.
Now if you’re still reading this, thank you firstly and secondly, you deserve a bonus recipe. “Cabbage Stew” may not sound that sexy but it’s a really tasty dish. Not to mention it’s hearty, quick to make and freezes well for future use. So let’s get to it!
CABBAGE STEW
- 1 medium Yellow Onion, diced
- 3 Carrots, diced
- 2 stalks Celery, diced
- 4 cloves Garlic, sliced
- 1 medium to large head of Green Cabbage
- 28oz can diced tomatoes
- 3 T dried Oregano
- 2 T dried Parsley
- 2 Bay Leaves
- leftover apple pieces and skins
- 3 T olive oil
- water
- salt to taste
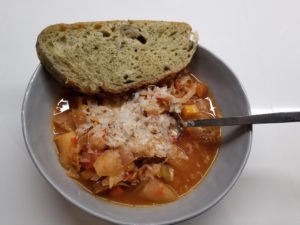
If you’re using leftover apple pieces, give a quick rinse to get off the citric acid & lemon juice. Over medium high heat in a large pot warm the olive oil in a large pot. Add the onion, carrot, celery and garlic and stir frequently for a few minutes. Add in a about a cup of water and bring mixture down to a simmer. Now I should say that if you’d like to use stock instead of water, feel free to but I would stay away from anything except vegetable stock as the flavors of others may not work with this stew. While your mirepoix is softening, cut your cabbage into quarters, removing only the thickest part of the stem. Using the slicer blade on the food processor, add each quarter. If your cabbage is especially large, there may need to be some more downsizing done to fit in the chute. In between each segment, shred a handful of apple peels and mix with the cabbage. Once this part is done add in the cabbage/apple mixture, apple pieces, tomatoes and herbs to the pot. Follow that with enough water (or stock) to cover the stew. You don’t want too much liquid as the cabbage is going to kick out some juice as it cooks and you can always add in more during the cooking process. Turn heat up and depending on how much time you have, or really how hungry you are, simmer or low boil until the cabbage is al dente. Serve with a nice piece of crusty bread and maybe a little bit of grated parmesan on top.
Salsa Verde & Slow Cooked Spicy Onions & Peppers
- At October 10, 2018
- By Sean Smith
- In Recipes, salsa, Tomatillo
- 0
So today felt for the first time like a fall day. The sun was shining bright but had that slanted not so direct feel to it. It was warm but there was a brisk breeze blowing the leaves off the trees. I love this time of year but it is always bittersweet because I know the local farmers will soon be packing up their goods and won’t be seen again until spring. That said, there was a bumper crop of summer’s end peppers at the market. All kinds of sweet and hot peppers, running the gamut from green bell peppers to habañero. I, being the spicy fiend that I am, scooped up a ton of hot chillies. I also happened to come across some tomatillos which put a batch of Salsa Verde into motion. There are several ways of preparing this delicious sauce, you can grill the jalapeños and tomatillos, you can roast the garlic or you can keep it simple like my recipe does. In my opinion, simple is preferred because that way the Salsa Verde can be used for multiple dishes. With chips? Check. As a topping for roasted chicken? Check. Mixed into eggs for chilaquiles? Check and yes please!
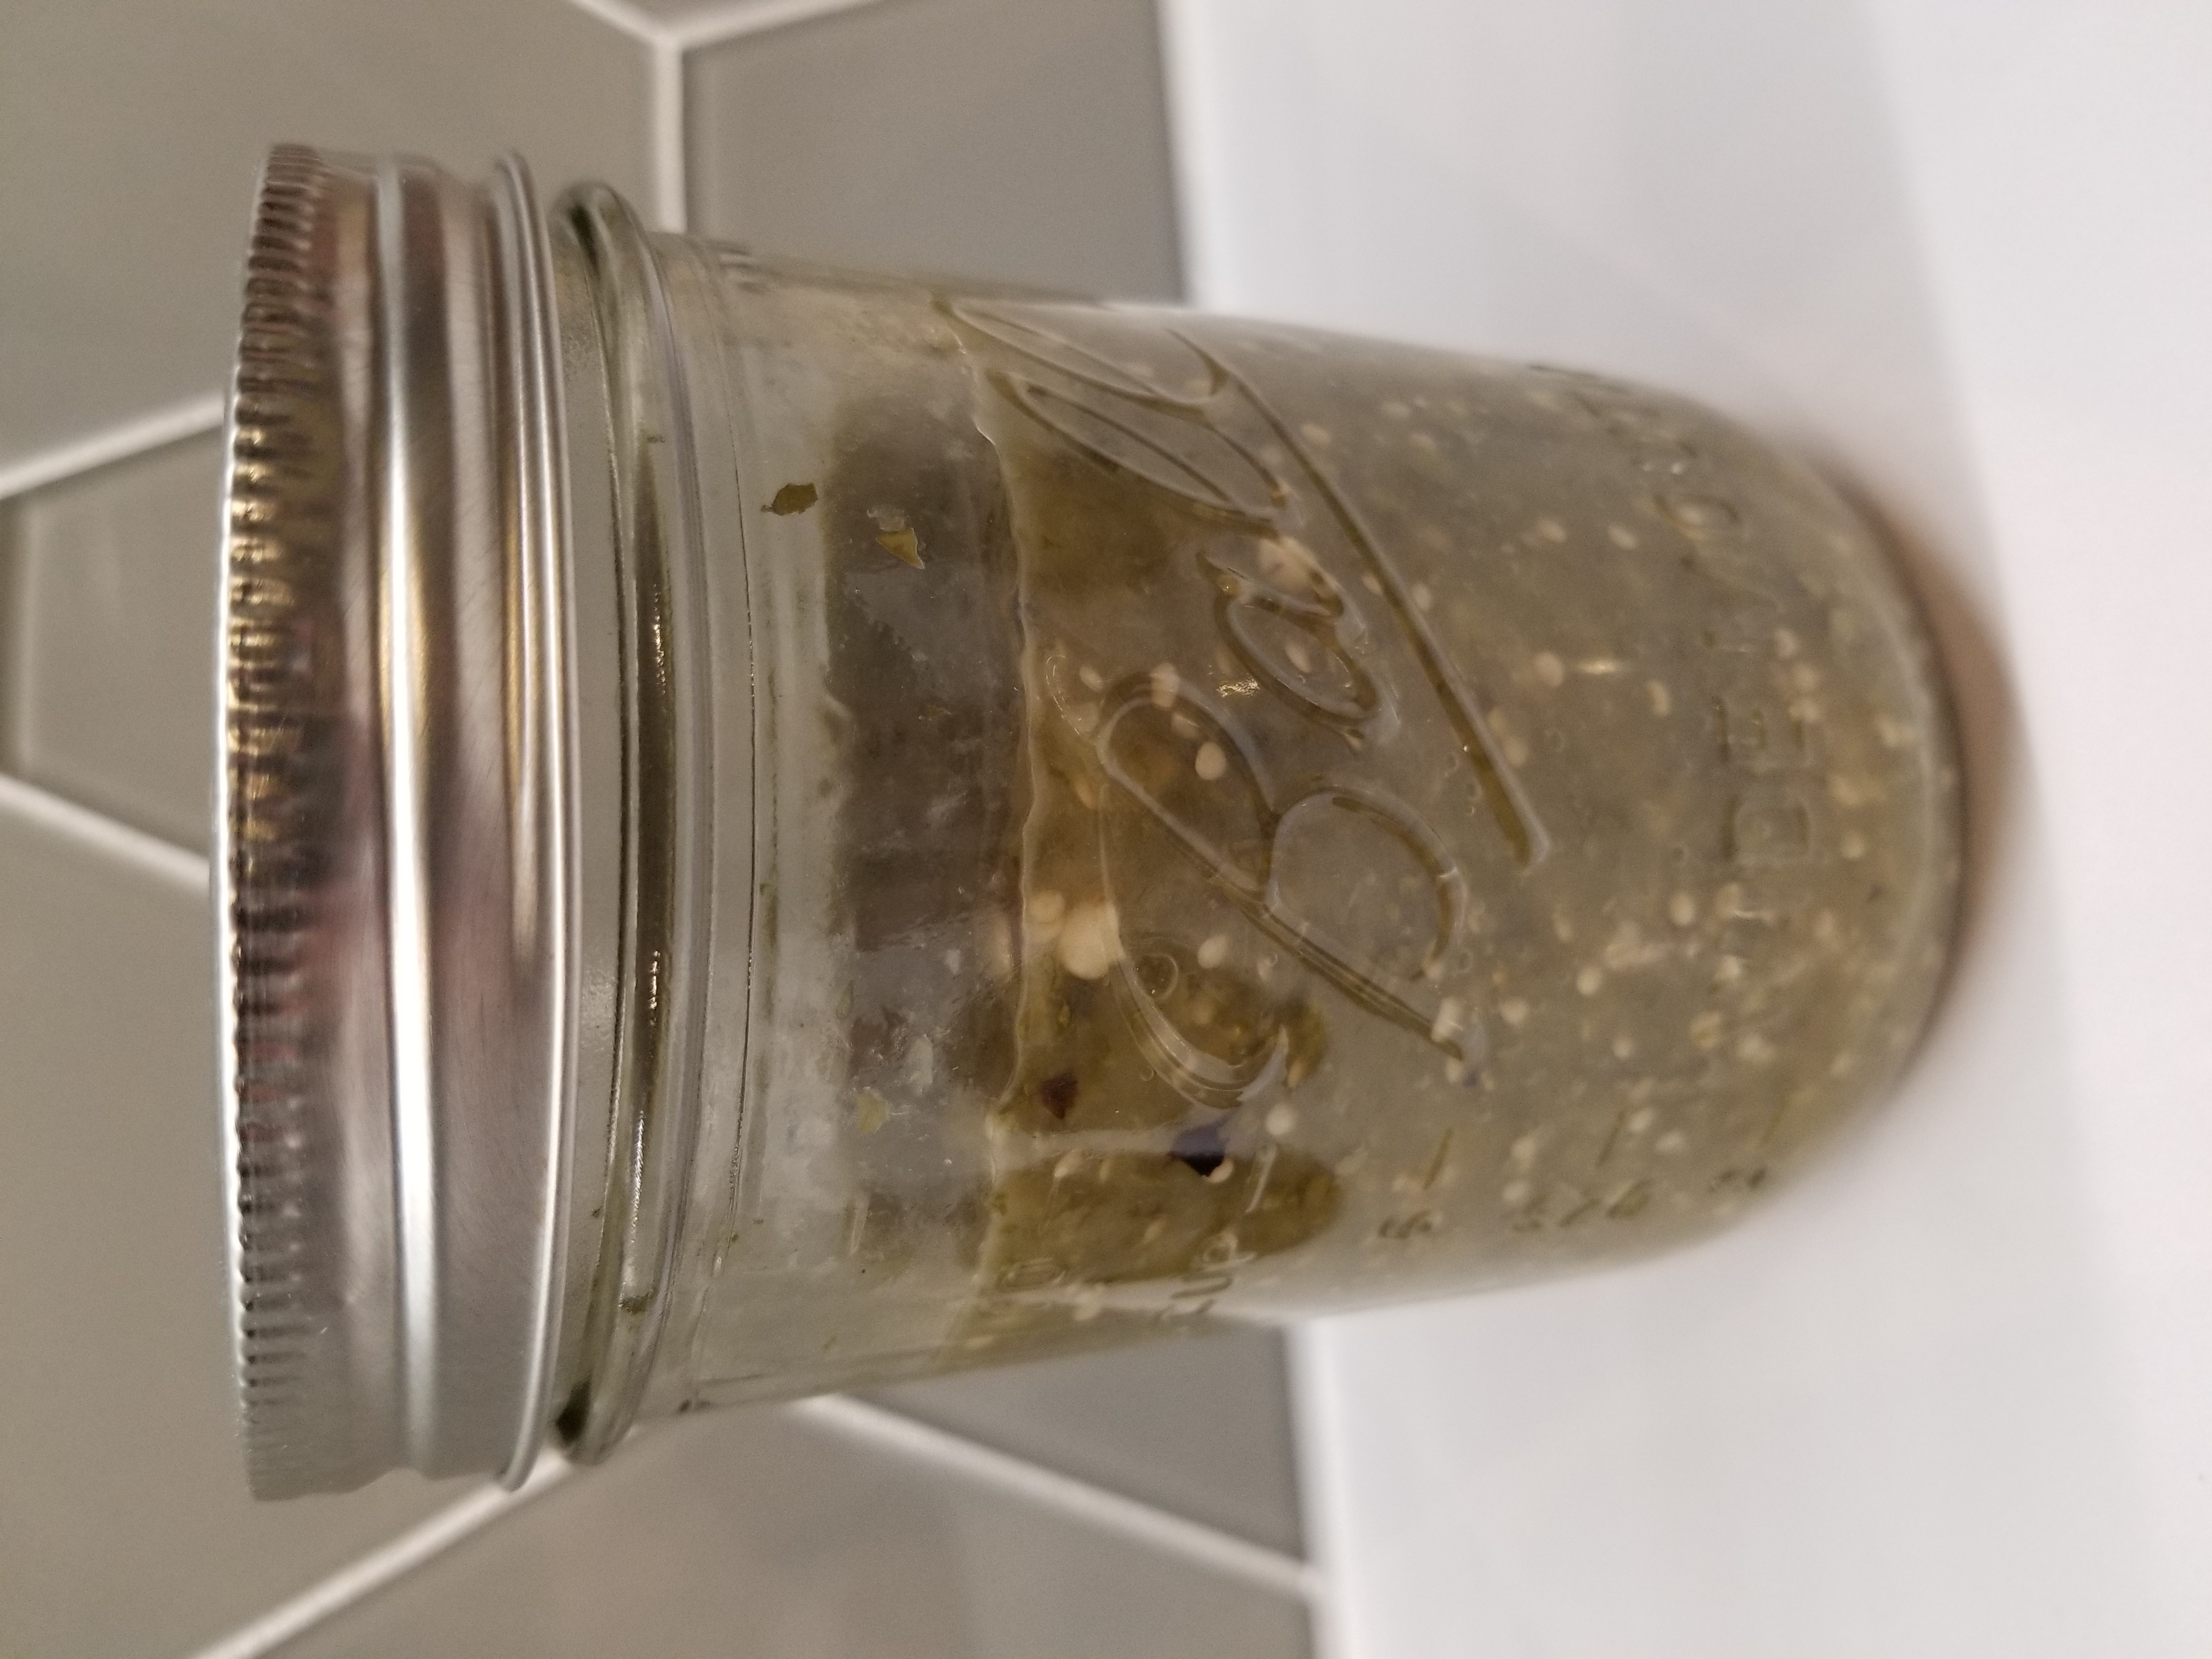
SALSA VERDE
2 pounds tomatillos, peeled and washed
1 C chopped cilantro
5 cloves of garlic, smashed
1/4 cup fresh squeezed lime juice
16oz can of green chilies
Salt to taste
Combine tomatillos, cilantro, and garlic in a small pot. Barely cover with water and bring to a simmer. Cook until tomatillos have split their sides and transfer to a high powered blender.
Add in lime juice and pulse until chunky. Do not over-blend! Transfer to a mixing bowl and add chilies. Mix well to incorporate.
Now, a couple of side notes on this recipe. As I stated, this is keeping it easy peasey. Feel free to use this as a base and go from there. You can use canned chilies, or grill/roast your own! Poblanos would work well. Hatch would be where it’s at. The key part is not over pureeing that final product. It shouldn’t be chunky like a regular salsa but shouldn’t be smooth like say a tomato sauce.
I also was tasked with trying to help my mother-in-law who is an avid gardener, but sometimes grows things that she won’t necessarily consume. In this case it was jalapeños and anaheim peppers. So racking my brain trying to figure out how to tame the heat of those guys led me to create a recipe for those of us that like spicy and those of us that can only handle a little. Which led me to this…
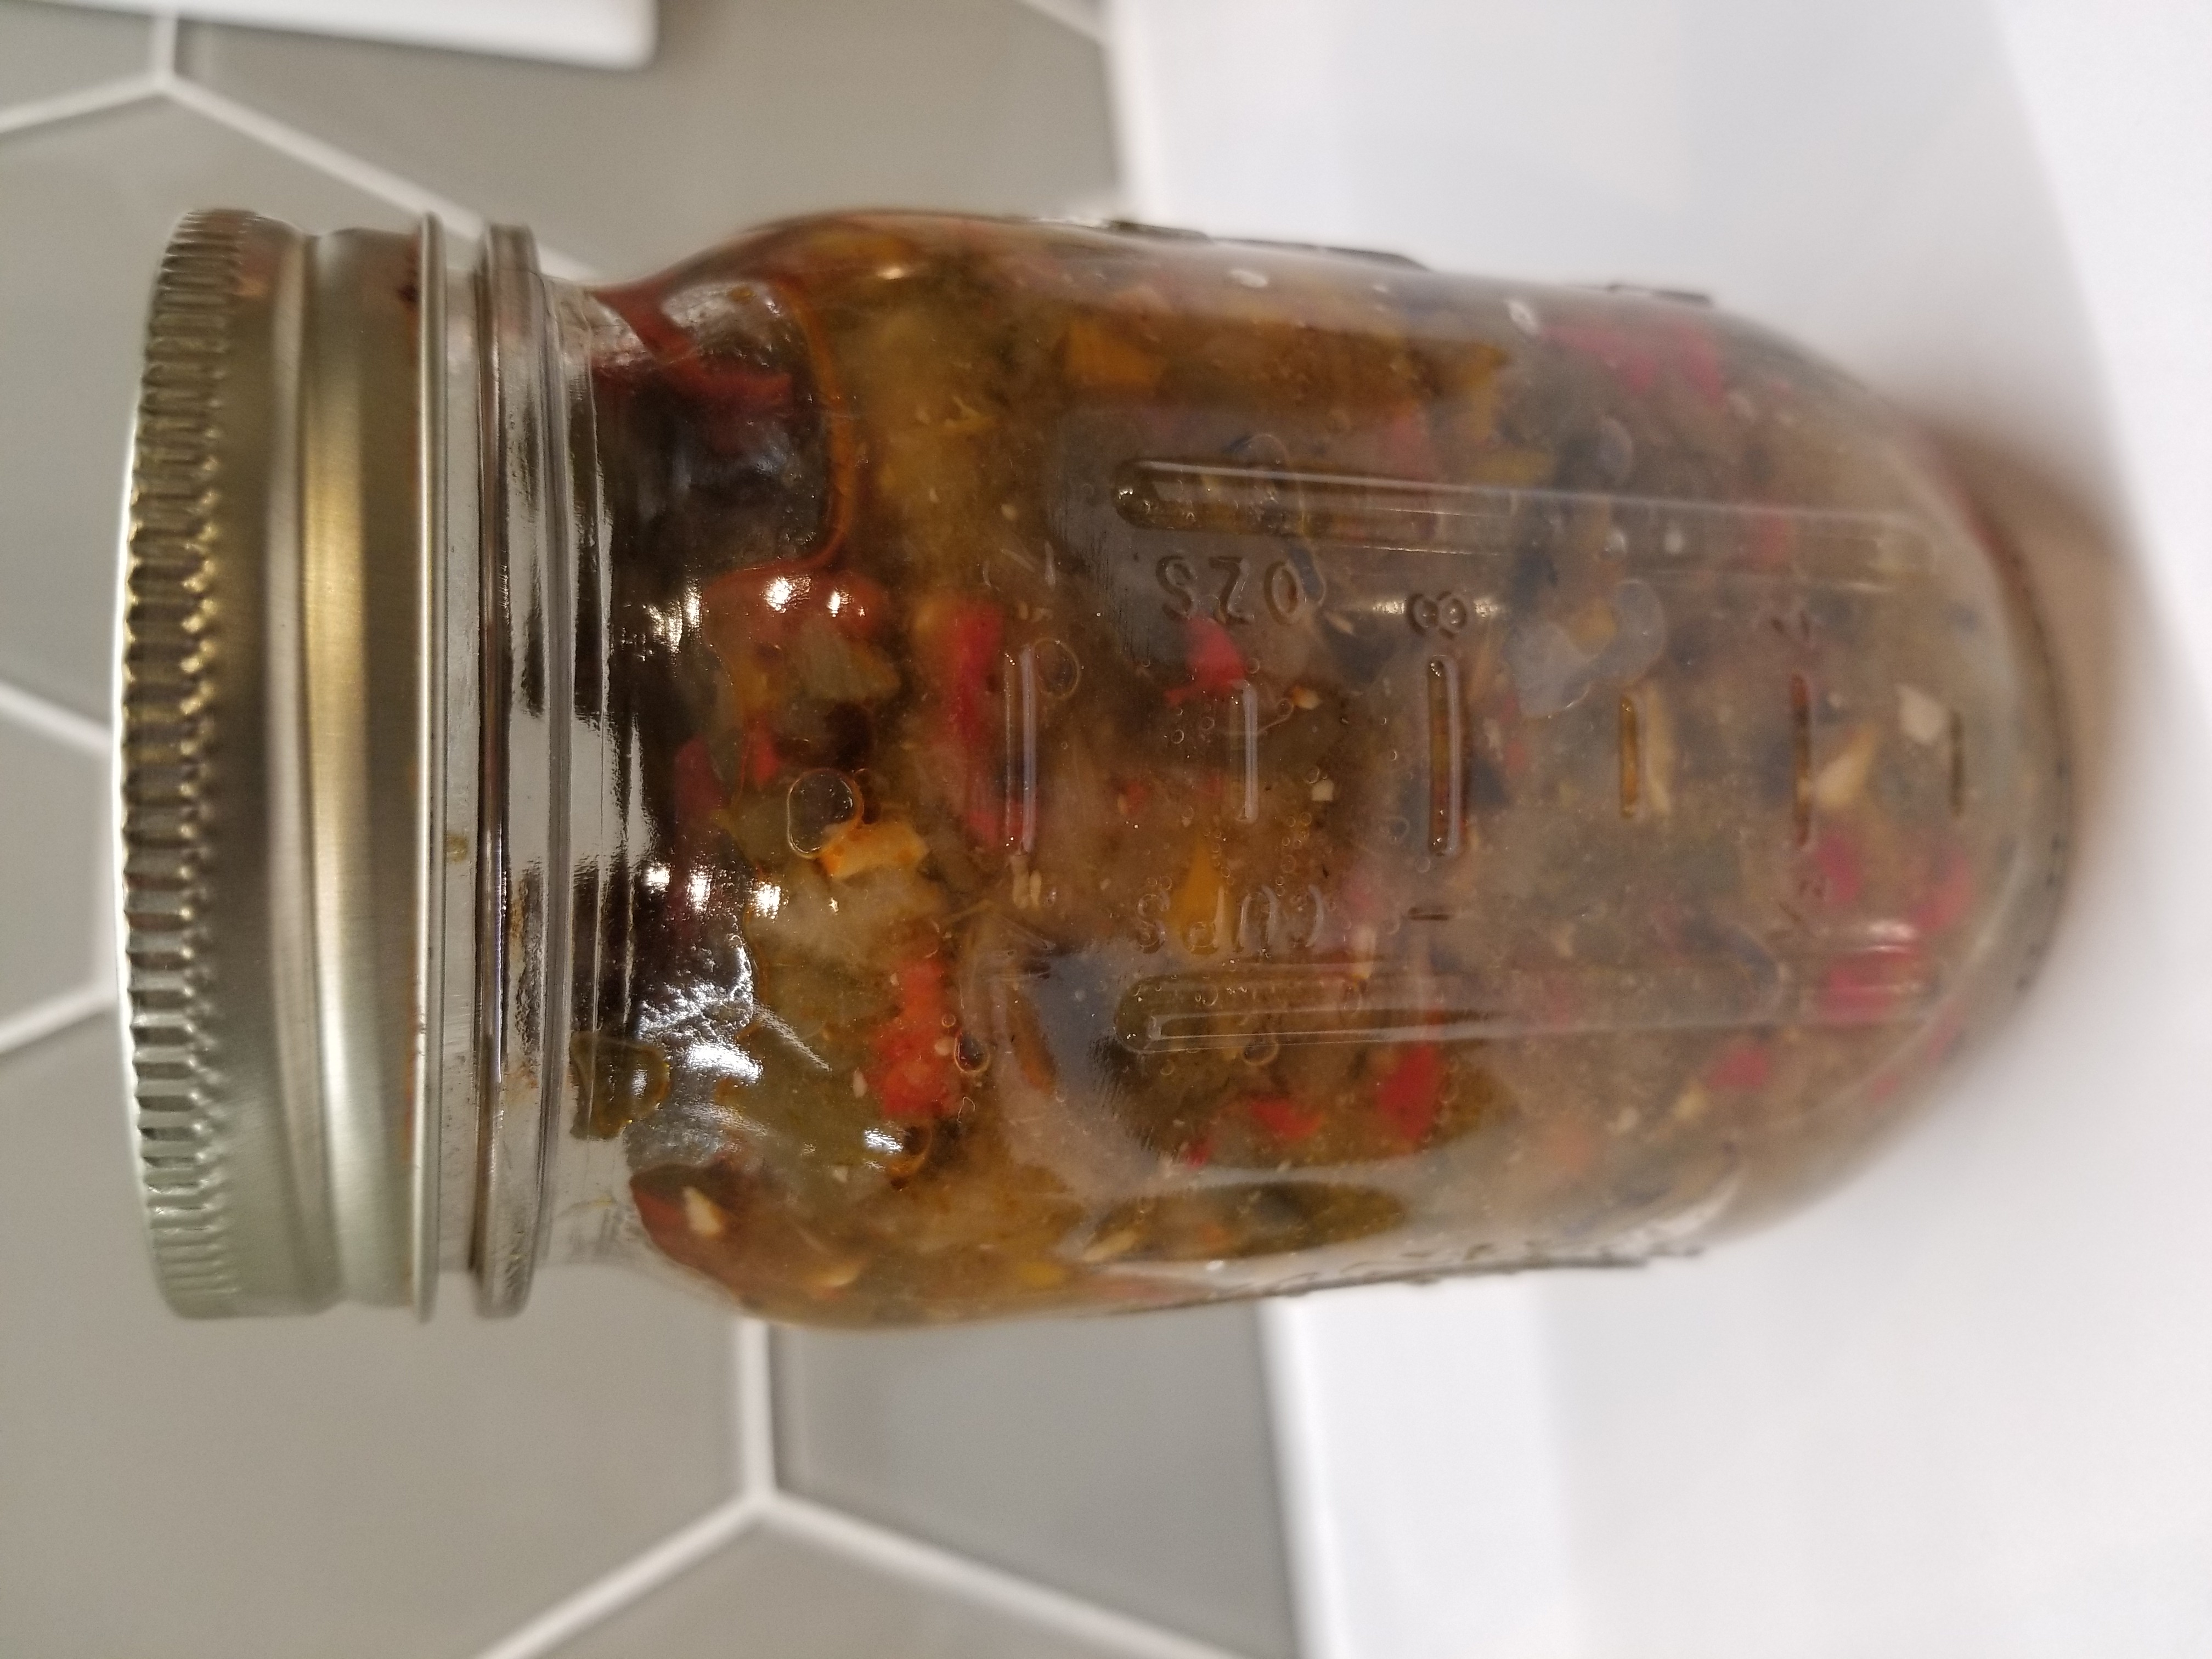
SLOW COOKED SPICY ONIONS AND PEPPERS
2 Large Sweet Onions, julienned
2 Large Yellow Bell Peppers, julienned
6 Cloves Garlic, sliced
8-10 Jalapenos, seeded and rough chopped
3 Roasted Red Peppers, chopped
3 T Olive Oil
Salt to taste
In a medium sauce pan that has a lid that fits, heat olive oil over medium low heat. Add onions, bell peppers and garlic. Stir constantly to avoid getting any color. Once mixture begins to soften, reduce heat to low and cover. The lid I used has a setting to allow some moisture to escape, if yours doesn’t keep it slightly (!!) cracked. You want to keep the majority of moisture circulating in the pan. Stir the mixture frequently and when removing the lid, make sure the moisture that condensed on the lid drips back into the pan. Not only will that water help slow cook the veggies but now it’s infused with flavor. Cook for about 30 minutes, until the mixture has fully cooked down. The onions should be soft and stringy, the peppers should almost be mush. Add in jalapeños and roasted red peppers. Cook for another 15 minutes with the lid off, stirring frequently. You may have to add in a tablespoon of water here and there to make sure the mixture doesn’t brown. When most of the water from the additional peppers has cooked off, remove from heat and allow to cool to room temperature. Working in batches, add mixture to a food processor and pulse to a chunky consistency.
There are many ways to use this dish. You could smear it on bread as a little zesty snack, try adding some sharp cheddar for a mind bendingly good grilled cheese. As an additional condiment for Taco Tuesday. Or use it like a bouillon cube and add it in for a base to a soup or sauce. Really the world’s your oyster, or in this case your chili!
~Chef Sean
Let’s get Social