Coconut Dates for Taste & Create
- At January 24, 2011
- By megan
- In coconut, dessert, gluten-free, taste and create
 0
0
For this month’s Taste & Create I was paired with Corina from Searching for Spice, a blog I had never heard of. It’s always fun to discover a new food blog through Taste & Create, and then search through the recipe archives to decide what to re-create. Making a decision was easy for me- I love dates and coconut and had never made coconut covered dates before, though I had considered it many times. Now that I’ve made them and see how easy they are, I can guarantee dates will be stocked in my kitchen from now on.
Here’s a link to the original recipe, and here’s what I did-
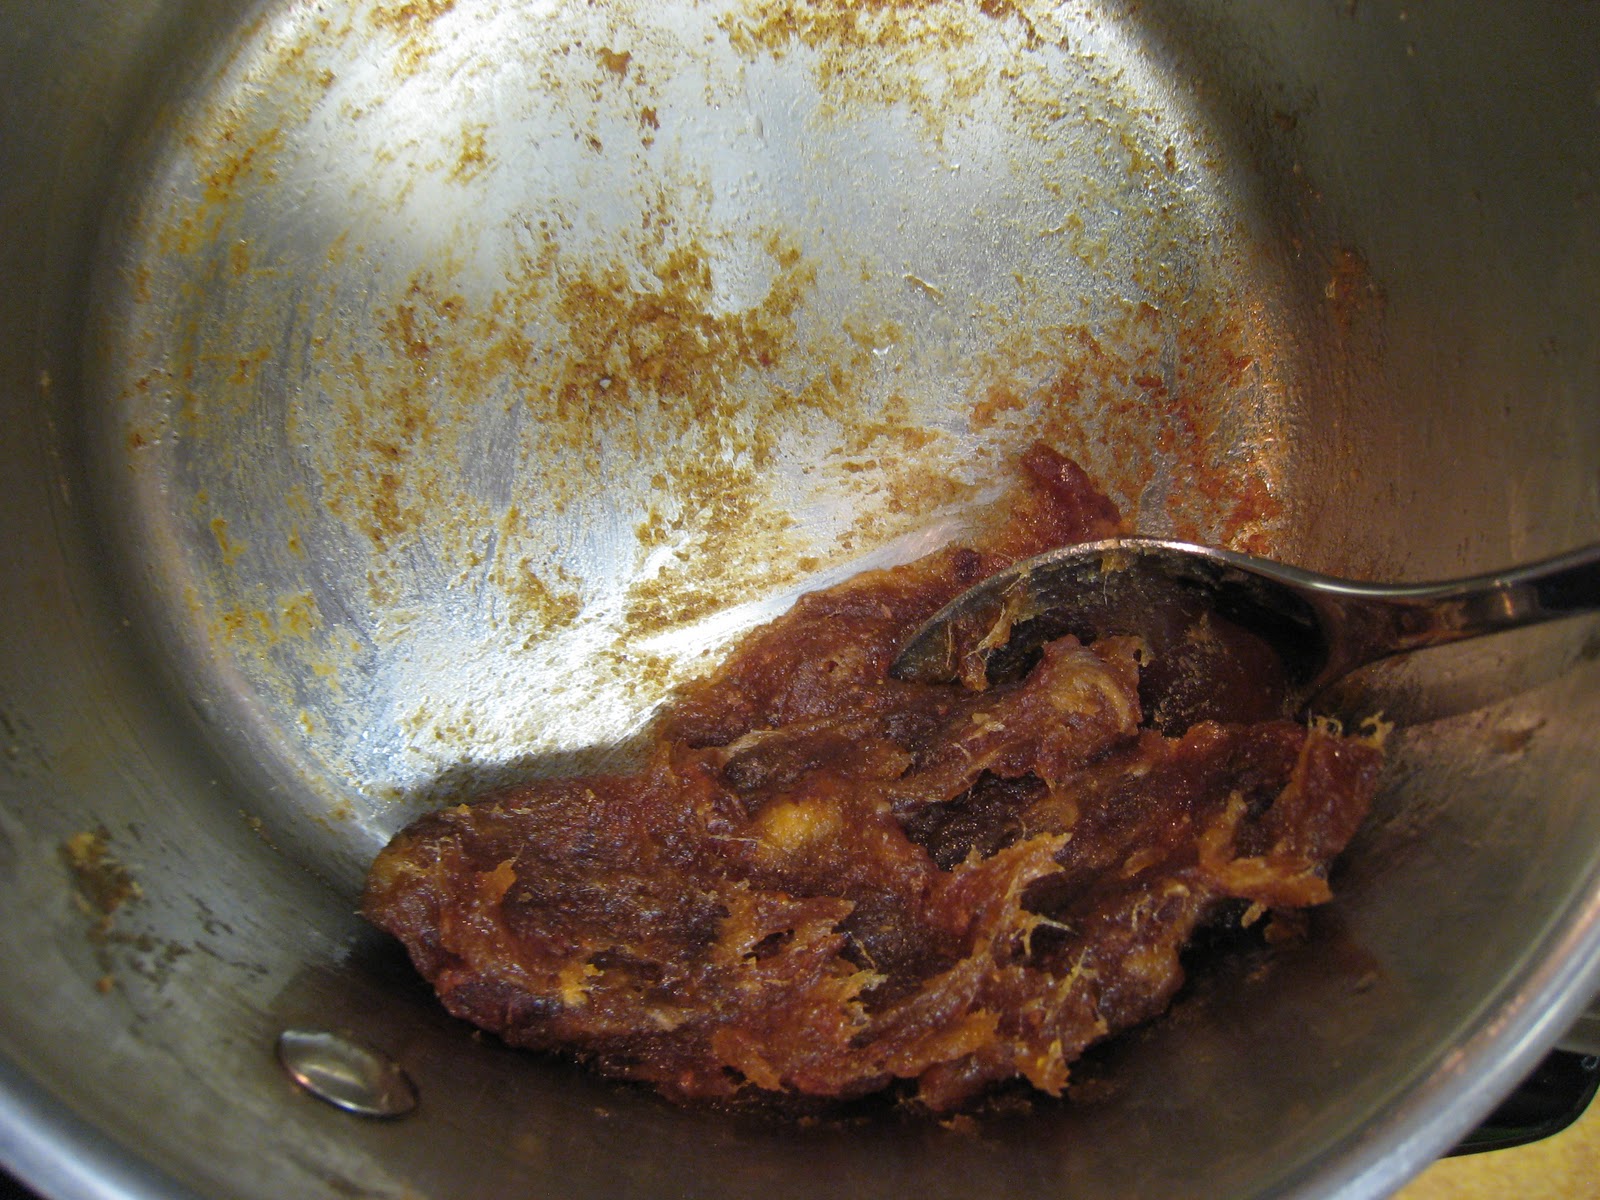
I coarsely chopped 8 large Medjool dates (my favorite kind of date) and put them in a small sauce pan with 1 TB unsalted butter. Keep an eye on this and mix it every now and then to make sure the dates start to “melt” evenly. You’ll see the texture change and it really does seem like the dates are melting at first. Add a little cardamom- I opened 2 cardamom pods in my mortar and pestle and then crushed the seeds from the pods, added them to my heated mixture, and stirred for another few minutes.

Remove the dates from the heat when they look like a sticky dough. Let it cool for 10-15 minutes so you can handle it with your fingers.
While the dates cooled, I dry toasted some cashews on medium heat for a few minutes on the stove. The original recipe calls for almonds, but I substituted with cashews this time since I had them in the kitchen.

When the date mush cools, take approximately 1TB in your hand, flatten it into a pancake, put a cashew inside, and roll the date mixture around the nut, forming a ball. Roll the date ball in unsweetened, dehydrated coconut, and try to finish rolling them all before you start to eat them. They are really delicious, very easy to make, and somewhat “healthy” if you think about the ingredients. I plan to make many different versions of coconut dates, so I’m glad I found Searching for Spice and the inspiration to make them for the first time!
Pickled Radishes with Thai Chilies for Taste & Create
For this month’s Taste & Create, I was paired with My Green Mouth. It was perfect timing, because just as I was looking at the recipe archive to find one I wanted to re-create, I got some radishes from my CSA. I am not a fan of radishes, but My Green Mouth had a recipe for pickled radishes that struck my interest.
Here is the recipe from My Green Mouth.
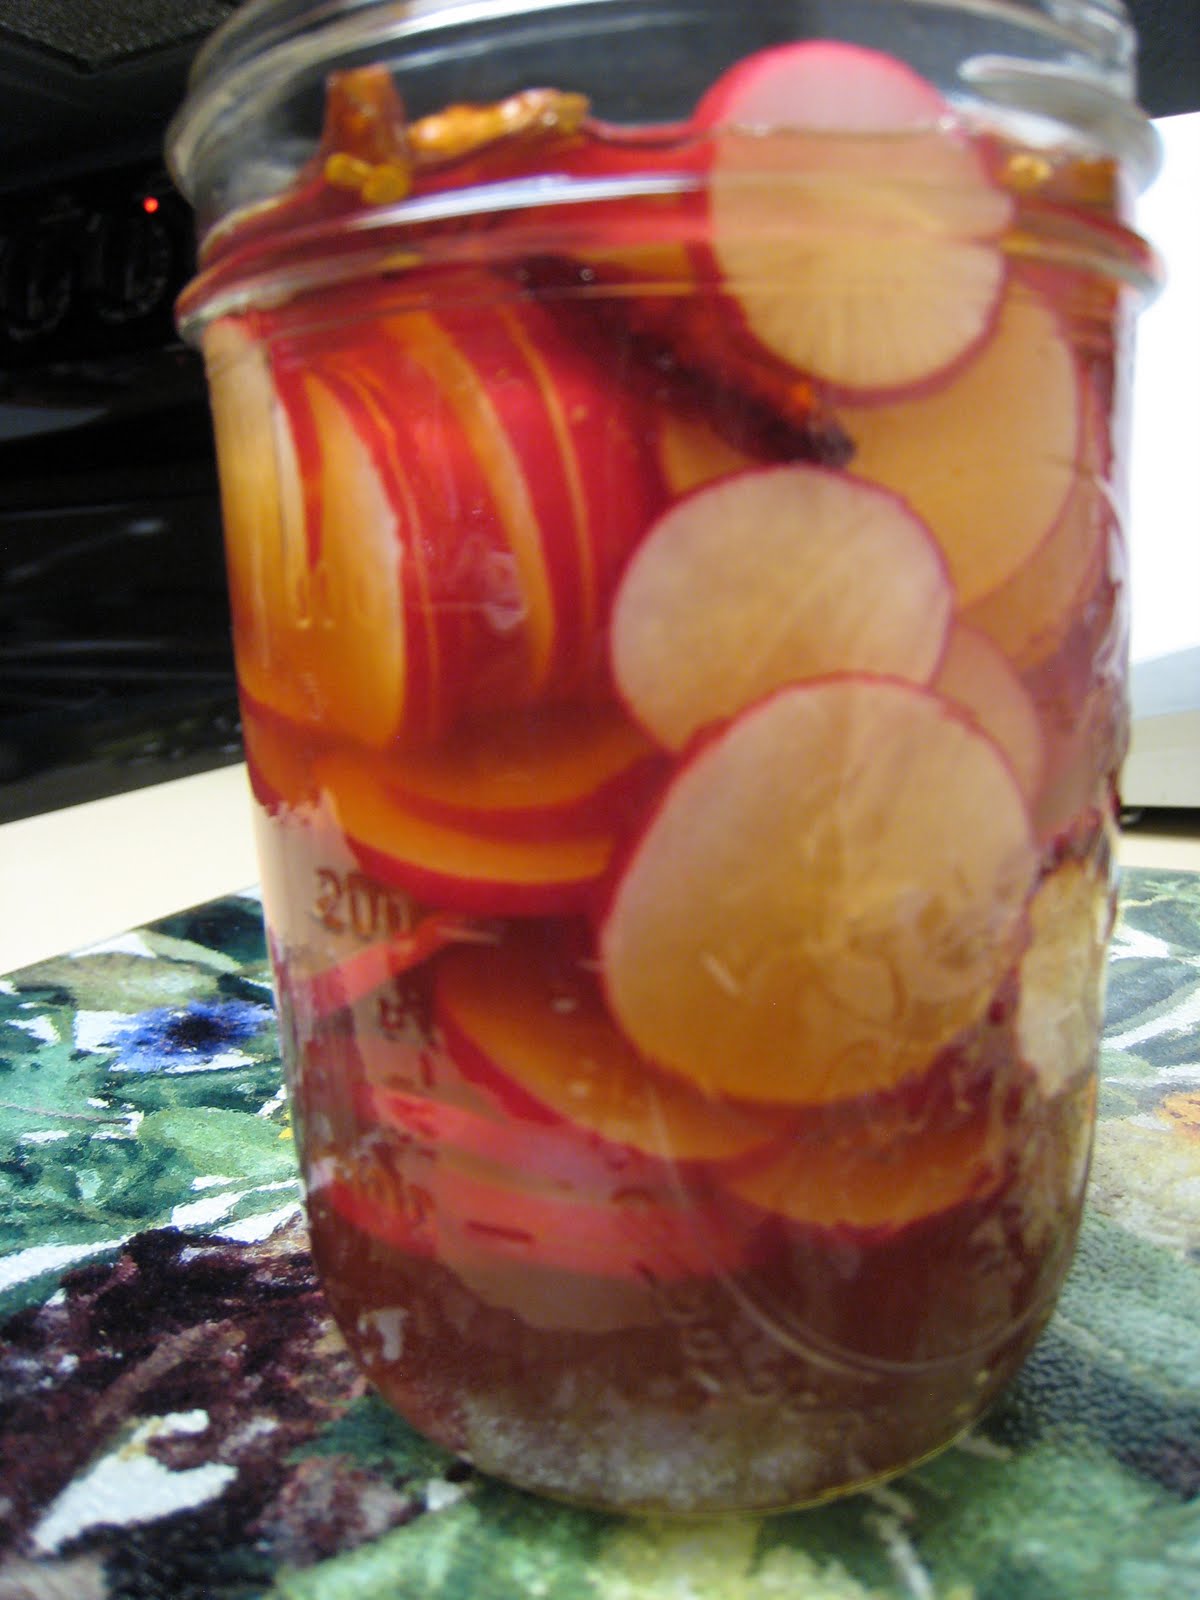
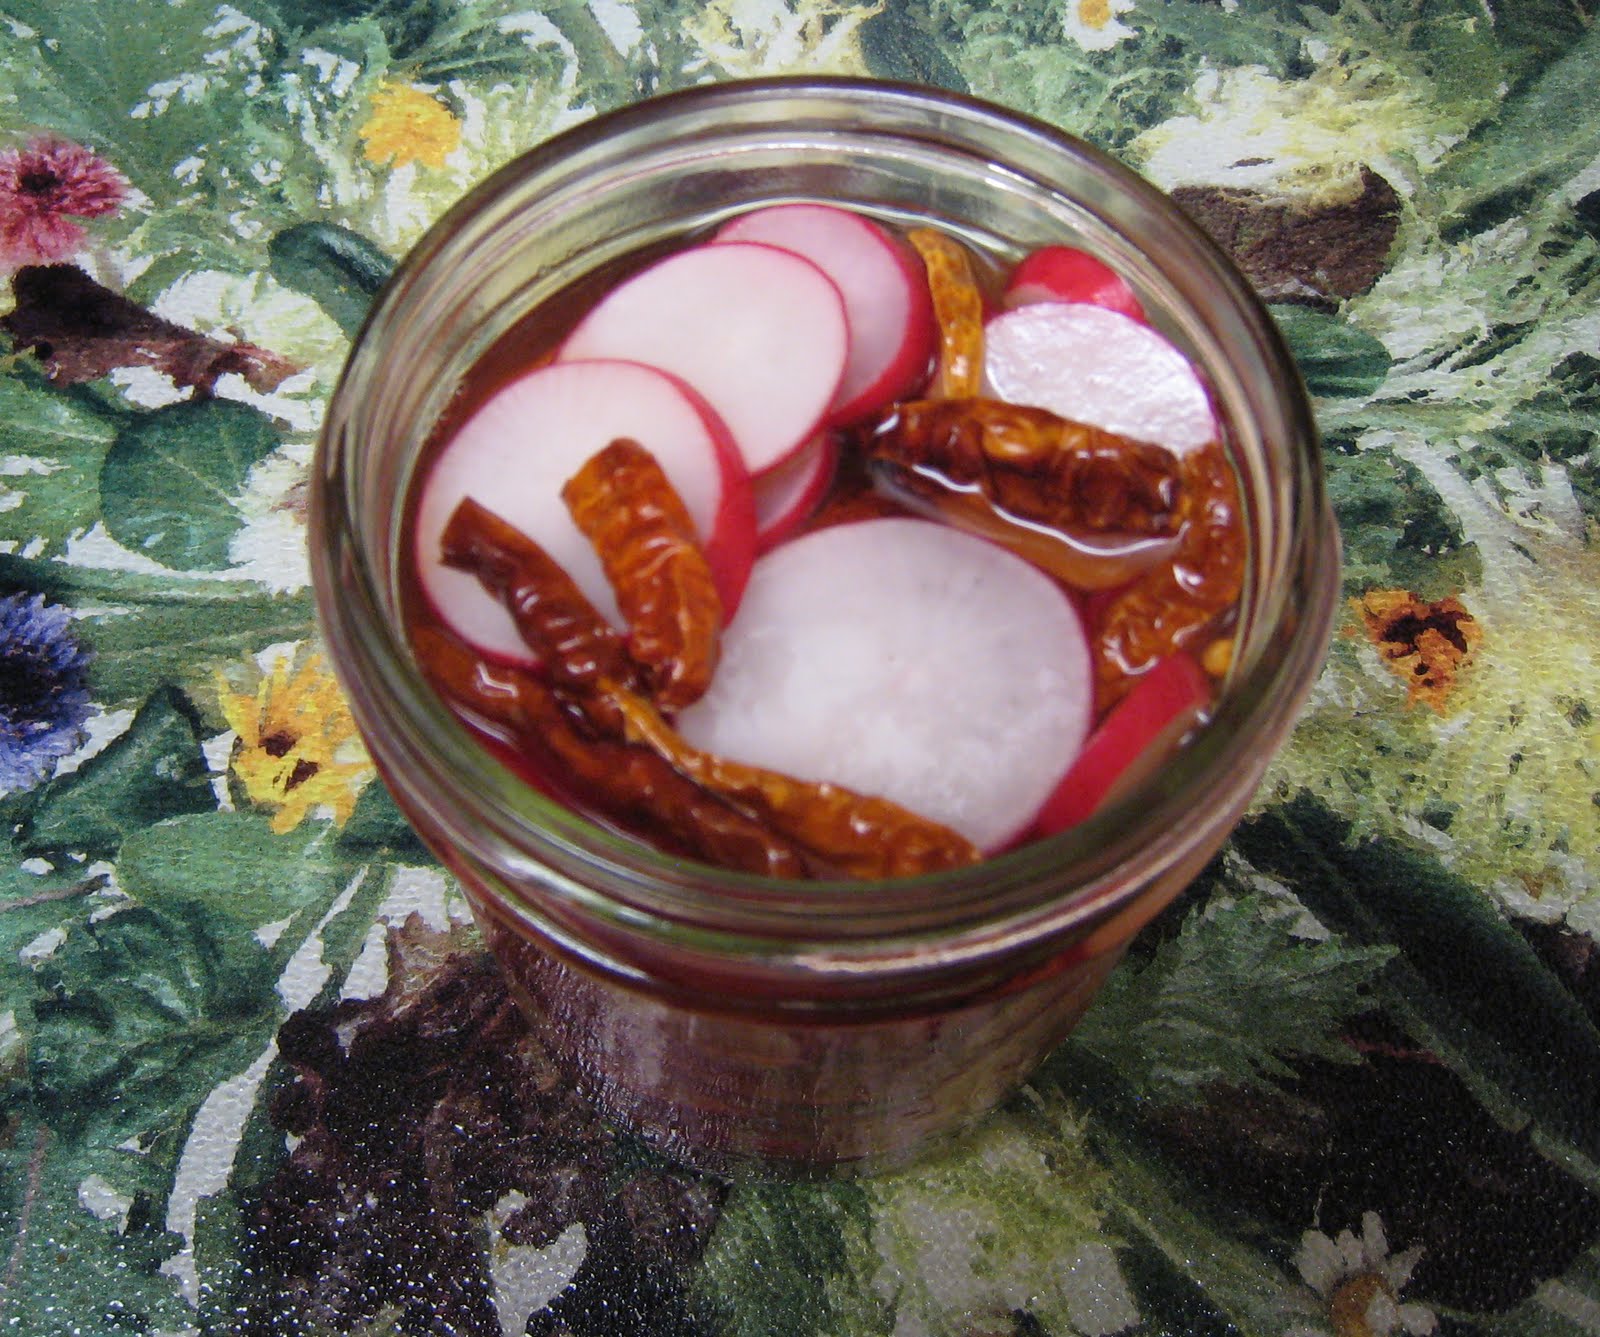
I washed and sliced a bunch of freshly picked radishes. These went in a Ball jar with a few (or more… how spicy do you like it?) dried thai chili peppers.
I a Pyrex measuring cup, I dissolved 1/2 cup evaporated cane juice and 1 TB pickling salt into 1 cup red wine vinegar. Then I poured the vinegar mixture over the radishes and put a lid on it. My Green Mouth suggests that these radishes are ready to eat after 24-hours in the fridge. I, unfortunately, will be going out of town, so I’ll let you all know how they turned out in a few days when I return.
Banana Orange Bread
- At May 25, 2010
- By megan
- In banana, bread, coconut, ginger, orange, taste and create
- 0
This month’s Taste & Create inspired me to tweak my Best Walnut Banana Bread recipe just a bit, thanks to Tamy and Always Eat On the Good China. It took me a few tries to perfect my own banana bread recipe, and now I’m ready to start creating a few new variations. Here is a new one for me.
But, first things first: Here is the link to the recipe that inspired my new creation.

I immediately went to my Best Banana Walnut Bread Recipe. Then I realized I was out of some ingredients. Good planning on my part (smile). So I altered the flour in my recipe as follows: 1/2 cup whole wheat flour, 1/2 cup unbleached white flour, and 1/2 cup crushed rolled oats.
Other than the flour substitutions, I followed my banana walnut bread recipe and added some great ideas from Tamy, such as 1/3 cup shredded coconut (unsweetened), 2 teaspoons granulated ginger, 2 crushed cloves, 1/8 tsp nutmeg, 1/2 tsp cinnamon, and zest from one large navel orange. I added some chocolate chips to half of my batch to mix it up a little.
I baked muffins. I just now realized that I baked Aussie bites (also muffins) for last month’s Taste & Create. What’s up with me and muffins lately? Are all of my Vita-Mix smoothies making me crave muffins?
A Bolder Table’s Aussie Bites for Taste & Create
- At April 23, 2010
- By megan
- In coconut, cranberries, cream, muffins, oats, raisins, taste and create
- 2
I was really glad to stumble upon this recipe posted on The Bad Girl’s Kitchen for this month’s Taste & Create because I had some of these famous Aussie Bites a couple years ago. I liked them so much that I wrote down the ingredients from the package and that little piece of paper has been in my kitchen drawer ever since.
So, I took out that paper, compared it to the recipe posted, and adapted it a little according to what I had in stock. I think they turned out nicely.
Here is the link to the Aussie Bites recipe from The Bad Girl’s Kitchen.
Here is my ingredient list:
- 1 cup whole oats (I toasted mine for 10-15 minutes on a baking sheet while preheating the oven)
- 1 cup oat bran
- 1 cup whole wheat flour
- 1 cup unbleached white flour
- 1 cup grated coconut (unsweetened)
- 1/3 cup sunflower kernels
- 1/3 cup dried cranberries, coarsely chopped
- 1/3 cup dried apricots (I had some California apricots) coarsely chopped
- 1/4 cup raisins, coarsely chopped
- 12 TB ground flax seeds
- 1/2 cup evaporated cane juice
- 1 TB cinnamon
- 1 cup heavy whipping cream
- 1/2 cup honey
- 3 eggs, beaten
- 1 cup warm water
- 1 tsp baking soda (I live at high altitude, so I used 3/4 tsp baking soda)

Combine all of the dry ingredients in a bowl except the baking soda.
In a large measuring cup, measure 1 cup of cream, add the honey, and slowly mix with a wire whisk until well combined. Then add the eggs and mix until combined. In a separate measuring cup, combine the warm water and baking soda. Let this cool a few minutes before adding it to the cream, honey, and egg mixture. Mix well, add to the dry ingredients, and pour into muffin pans.
I don’t have mini-muffin pans…yet… so I used regular muffin pans and lined them with unbleached baking cups from If You Care. My Aussie Bites took 20 minutes to bake.
They came out delicious, and I will play with this recipe in the future to make a few variations.

Let’s get Social