How to Make Eggplant Rollatini
- At March 31, 2020
- By Sean Smith
- In Eggplant, favorites, Grilled, Recipes, Spinach
 0
0
I grew up in Massachusetts and there a few random things I miss about New England. Red Sox baseball, pizza, and eggplant parmesan. I still get to watch the Sox occasionally, so that’s fine. The two food items though are a bit underwhelming, in my opinion, to eat out here in the West. While there are a couple of amazing pizzerias in the high country, most fall flat. Yes there are styles of pizza that rival a classic East coast by the slice such as: Frank Pepe’s Original New Haven Style Pizza, Chicago deep dish and thin crust, Detroit-style, I won’t get into that here today. Eggplant Parm is something I basically lived on in high school, along with the aforementioned pie. Usually in the form of a nice and warm sub although depending on where you come from it could be a “grinder” a “hero” or a “hoagie.” As much as I love the dish, I seldom make it at home for two reasons; it’s super labor intensive and super messy to make. By the time you’ve spent half the afternoon cutting, breading and frying the eggplant, the kitchen is a destroyed and half your kitchenware is dirty. That’s before it even bakes!
So my at-home go-to is a distant cousin of eggplant parmesan and perhaps also had Manicotti or stuffed shells in it’s family. Eggplant Rollatini has very similar flavor profiles and takes half the time to make. Also clean up is way easier than trying to scrub all the spilled breading ingredients off the kitchen counter for an eternity.
So lets get down to it. Now I highly recommend using a mandoline for this project, it cuts down on the amount of time slicing the eggplant. There are two kinds, a French variation and what is more commonly used in the food service industry, the Japanese style. I picture the former because that’s what most people have and is more readily available in kitchen stores. If you don’t have one you can still make this dish but I implore you to use a sharp (!!) knife and try to make all your cuts as uniform as possible. This will help them evenly cook in the baking process.
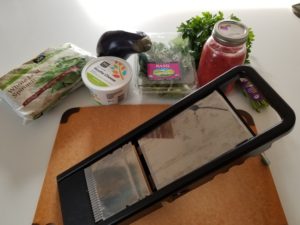
Ingredients-
1 Large Globe Eggplant
1 C Frozen Spinach, thawed to room temp
1/4 C Chopped Parsley
1/4 C Fresh Basil
8 oz Ricotta Cheese
1/2 C Shredded Italian Blend Cheese (or Mozzarella or Grated Parmesan)
Jar of Pasta Sauce
1 Lemon
1 Egg
Salt and Pepper
These portion sizes listed are to make a dish that serves 2ish people since that’s generally what I’m cooking for at home. I made my own red sauce from a batch of local tomatoes that I canned last summer but a nice quality store bought one would work just as well and saves some time. Feel free to add some ground meat to the sauce to turn this from a veggie dish into a meat lovers delight.
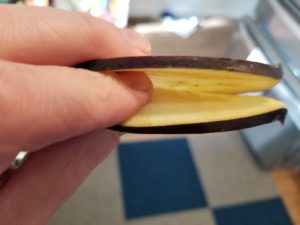
The first step is slicing the eggplant. You want to have the eggplant thin enough so that it will roll with out breaking but thick enough so that it doesn’t fall apart in the baking process. If you have a cooling rack, place it over a sheet tray, if not use a large plate. Heavily salt the eggplant and let sit for 10 minutes, rinse and pat dry.
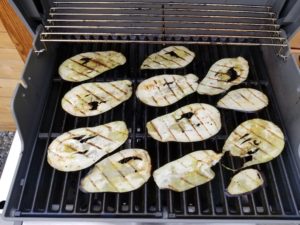
Meanwhile fire up your grill to medium heat and if you’re lacking a grill turn your broiler on to low setting. Season the eggplant with olive oil, just a sprinkle of salt and pepper. Whether you’re grilling or broiling, you are not shooting for a fully cooked slice. More of a par cook, just enough to make the eggplant pliable to roll up. Once done remove from grill/oven and set aside.
Next up is the assembly of the filling, which is wicked easy. Combine ricotta, spinach and parsley in a small bowl and fold together. Season with salt and a few squeezes of lemon. You don’t want the lemon to be overpowering but brighten up the mixture. Take the egg, beat it and fold into filling.
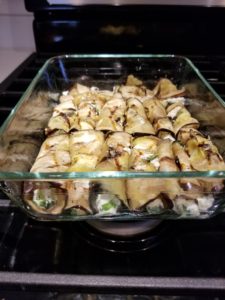
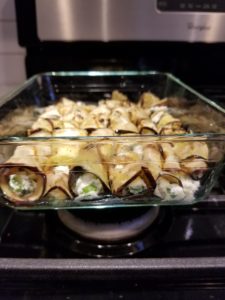
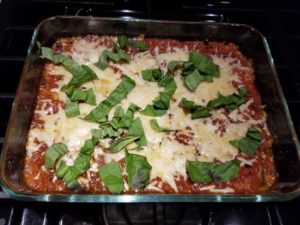
The home stretch is assembling the baked dish. Preheat the oven to 350. Grease a baking dish, I used extra virgin olive oil but butter or cooking spray would work too. Lay out the eggplant slices, spread some of the filling near the top (the side furthest away from you) and roll each slice towards you. Place in greased pan, right next to the previous roll. If you end up with extra rolls try and cram them in, this recipe is very forgiving and it won’t affect the end product. Pour your sauce over the rolls. The eggplant should be covered but not drowning as it will still release some liquid while baking. Bake at 350 for 20 minutes, sprinkle with cheese and bake for another 20/30 minutes or until eggplant can be easily pieced with a knife. Remove from oven and let sit for 10 minutes. Garnish with basil, either roughly chopped, torn by hand or if you’re trying to impress someone, finely julienned. Enjoy!!
Grilled Peaches and Grilled Watermelon: Yes, it’s dinner.
- At August 17, 2019
- By megan
- In BBQ, Cheese, Farm to Table, Grilled, local foods, peach, Recipes
 0
0
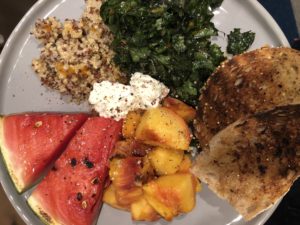
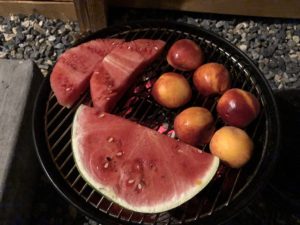
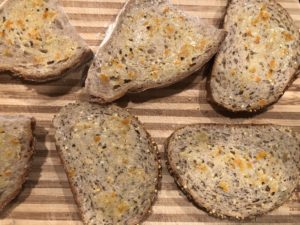
Peach season is upon us and despite eating them at almost every stop on my food tours with Local Table Tours, I still can’t get enough of them! Palisade peaches and Rocky Ford watermelon are in my house and so they wound up on the grill for a simple dinner of grilled peach and grilled watermelon with massaged (local) kale, quinoa with ancient grains, and toast… but not just any toast- orange zest and honey butter toast. Top it off with a little chevre and you have dinner.
Here’s what I did for this super simple meal-
I cut kale into long, thin strips known as a chiffonade cut, drizzled it with olive oil and sea salt, and massaged it for a couple minutes. Then I set this aside to soften and didn’t come back to it until it was time to eat. On the stove I cooked a quinoa/ancient grain blend according to directions and let that sit to cool to room temperature as well.
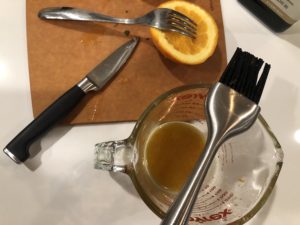
Next, I mixed a couple tablespoons of olive oil with a few teaspoons of honey, juice of 1/3 of an orange, and a nice heap of orange zest. I brushed this over the watermelon and peaches before grilling them.
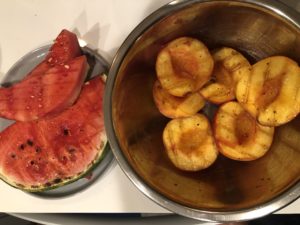
Peaches and watermelon only need to be grilled for a few minutes on each side since they’re delicate and full of water.
The grilling process brings out their sugars and makes them taste a little sweeter, but not too sweet that they can’t be the star of the show on the dinner plate.
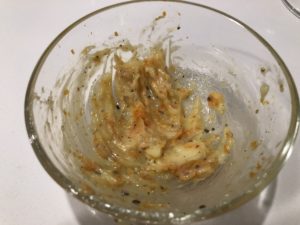
While the watermelon and peaches were grilling I mixed a little honey and orange zest with softened butter that I spread over both sides of my bread.
My tiny charcoal grill can only handle so much at a time, so when the watermelon and peaches were done, the bread went on for a few minutes on each side.
The texture of grilled watermelon will fool you into thinking you’re enjoying a steak. Well, not really. But it’s a hell of a lot healthier for you 🙂
Give it a try. Summer isn’t over yet!
Grilling on the Stove Top with a Himalayan Salt Brick
- At July 14, 2013
- By megan
- In Boulder Farmers Market, carrot, Grilled, local foods, Recipes, Savory Spice Shop, Sean Smith, tofu
 0
0
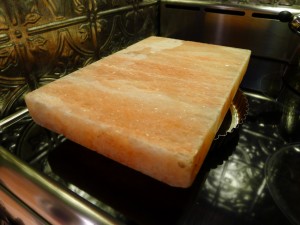
I bought a Himalayan Salt Brick from Savory Spice Shop to explore something new in my kitchen. Lucky for me, I’m dating a chef, so it turns out he took on the opportunity to try something new and let me drink wine and take photos. Not such a bad arrangement.
A Himalayan salt brick is a large slab of Himalayan crystal salt that you can heat up to high temps to bake, sauté, or grill; chill to serve cold foods; use to cure meats; and present as a serving platter. It’s a gorgeous slab of light pink marbled “stone,” and I’d wanted one ever since they were first for sale at Savory.
Sean and I used our brick once before in the oven, and I never got around to a blog post… been busy guiding food tours, you know.
Baking on the brick was similar to baking on a pizza stone. The stove top, however, was a new frontier.
Sean spent some time researching this one. If you have a gas range you can set the flame in a way that the stone isn’t directly in contact with fire, but heats up. An electric range, however, requires something to be positioned between the stove top and the brick. We used a tart shell, but a cake ring or wok ring would work also.
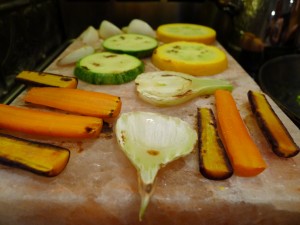
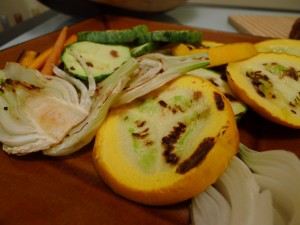
After a trip to the Boulder Farmers’ Market, we had carrots, onions, and squash for grilling.
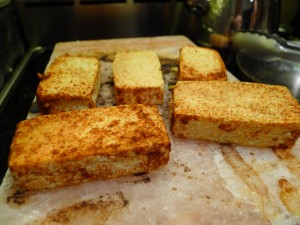
Sean sliced them and threw them on the hot salt brick while marinating some extra firm tofu that had been frozen, pressed, thawed, and marinated in a little peanut oil and Harissa Spice Mix from nowhere other than Savory Spice Shop.
Our meal was simple, yet took quite some time to execute since we spent forty minutes or so heating up the brick, which crackled and poped in ways that concerned us it was going to crack on the stove. The brick did impart a slightly salty taste to the veggies, which were grilled plain, but didn’t give off a flavor that stood up to the Harissa blend. In the end, the food was great and our dinner was fun, but it was a very long process to prepare what could have been a quick meal on the grill outside or the stovetop. But then, we wouldn’t have been able to say we grilled on a salt brick, now, would we?
Cheers!
Fennel Pollen Grilled Tempeh
- At June 8, 2011
- By megan
- In fennel, fennel pollen, Grilled, pickled things, Recipes, Savory Spice Shop, tempeh
 0
0
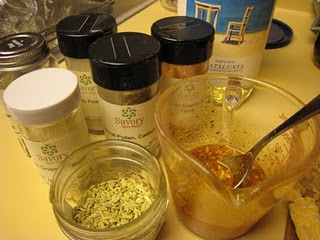
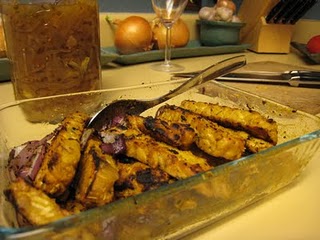
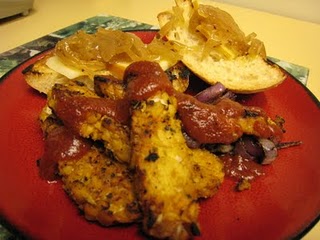
- 1 TB dehydrated onion
- 1/2 TB garlic powder
- 1/2 TB dried parsley
- 1/2 TB smoked Spanish paprika
- 1 tsp whole fennel seeds
- a pinch of fennel pollen
- 2-3 TB olive oil
- 1/4 cup white wine
- a splash of worcestershire
Let’s get Social