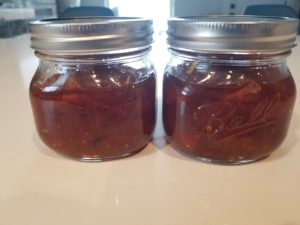
Grapefruit & Vanilla Marmalade
- At March 20, 2020
- By Sean Smith
- In canning, Grapefruit, marmalade, Recipes, vanilla
 0
0
It may be the first day of spring, but here in Denver it’s a cold snowy day. Perfect for spending a couple hours making one of my favorite marmalades! While it may not seem like it, bitter citrus and vanilla are a winning combo. It really doesn’t take that much effort to make, but it does require a constant eye for when to stir the marmalade. Especially as it is almost finished cooking.
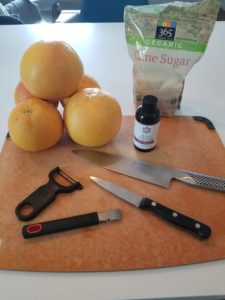
Here’s what you’ll need to make this marmalade:
5 Large Ruby Red Grapefruits
(you can use other varietals but I found these to be the best)
3 Cups Raw Sugar
3 T Vanilla Extract or 2 Vanilla Beans
(I use Savory Spice’s Madagascar Vanilla Extract. It’s cheaper than raw beans and has great flavor)
Start by washing and drying the grapefruit. I like to have two kinds of zest- a finer zest that breaks down with the fruit while still maintaining some structure, and a thicker zest that holds up through the cooking process and has some texture left in the end product. You can’t have marmalade without zest!
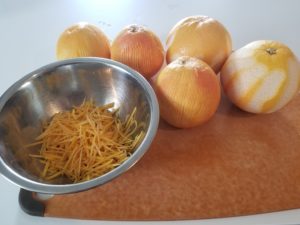
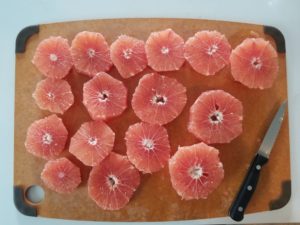
Zest 3 grapefruits and reserve it. Using a peeler, peel the other two taking care not to remove any of the white pith. If you have a sharp peeler, like this Kuhn Rikon, you don’t need to press too hard to remove the rind. If some pith comes off then turn the rind over and using a pairing knife trim off the pith. Once complete, julienne the rind and combine with the other zest. Remove the rind and pith from the grapefruit and slice into wheels, removing any seeds.
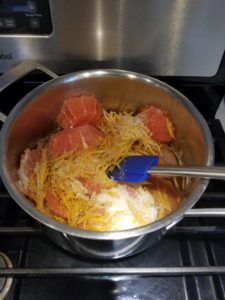
Combine the grapefruit, zest & sugar in a non reactive pot. Depending on wether or not you bought extract or beans the next measurement will vary. I used 3 T of the Savory Madagascar Pure Vanilla Extract. If you have something that is of a lesser quality, you may need more. If you have vanilla beans, scrape 2 whole beans into the pot. Regardless of which you use, you can always add in more before the marmalade is set. Stir in a couple of tablespoons of water to the mixture, place it on the stove, cover, and heat on medium.
At first you need to stir this somewhat frequently. Once the mixture starts to bubble, remove the lid and turn down the heat to a simmer. As the grapefruit cooks and breaks down, mash the wheels so they break up into smaller pieces. As the fruit cooks down the heat is going to have to be adjusted down several times. The mixture should never be above a low simmer. It will take about 2 hours for the marmalade to set and needs to be stirred occasionally. Any white foam that rises to the top should be skimmed off and discarded.
There are several ways to check when the marmalade is ready. If you have a candy thermometer, 222F is perfect but not higher. If you place a small plate in the freezer and add a dollop on to the plate, wait a couple of minutes and drag a spoon through it. The sample should crinkle. The last method is if you dip a spoon into the mixture and then turn the spoon horizontally, the liquid dripping off should be in one steady stream.
I jar my marmalade and if you do follow proper canning techniques which can be found HERE. If you choose to skip the processing and put it in the fridge, there is enough sugar in the marmalade to last a couple of weeks, but hopefully you enjoy it before then!
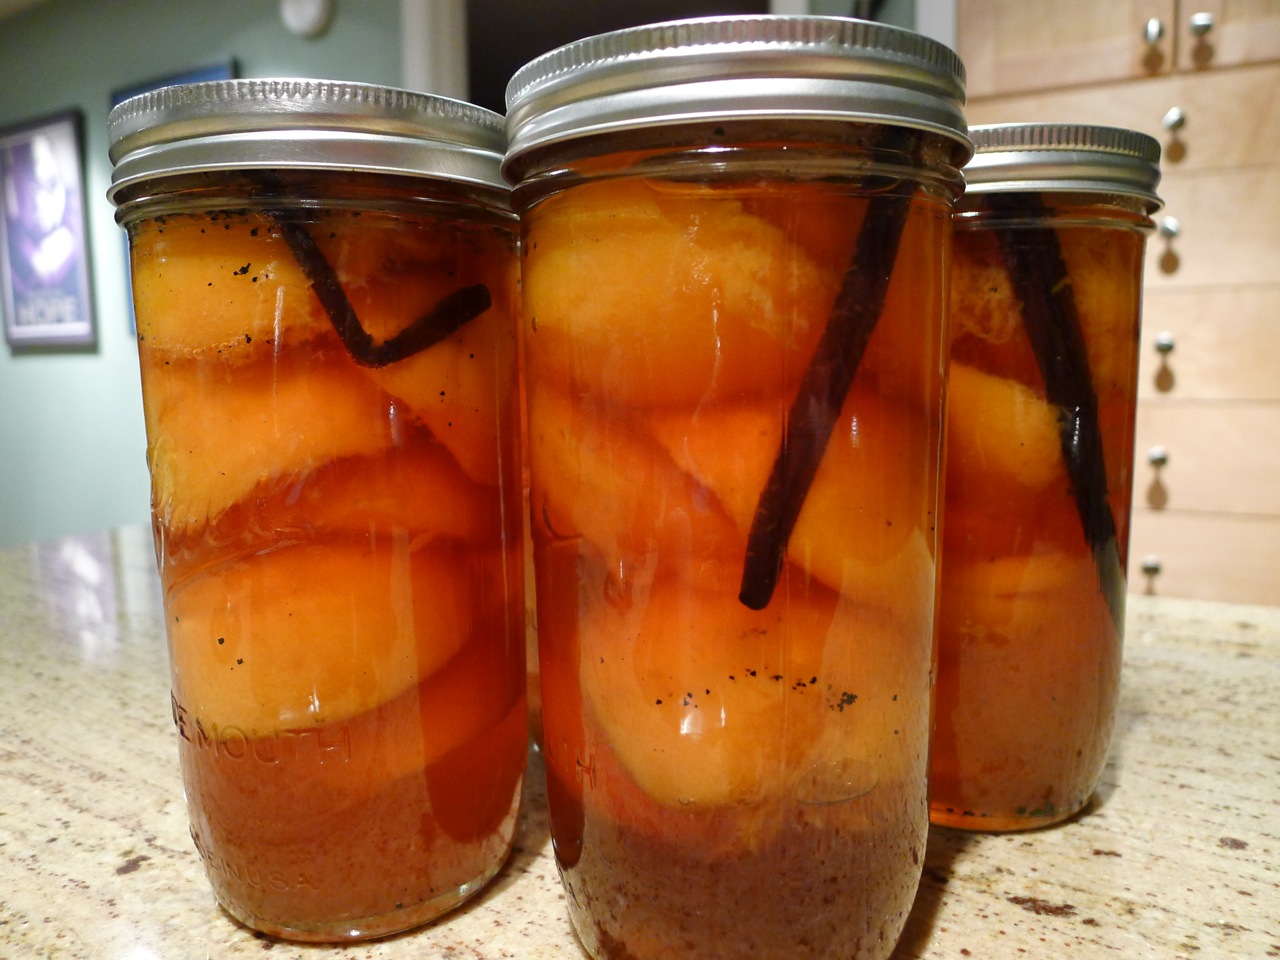
Palisade Peaches in Vanilla Bean Syrup
- At August 27, 2015
- By megan
- In Boulder Farmers Market, local foods, peach, Recipes, Sean Smith, vanilla
- 0
August is here and Palisade Peaches are in their prime. Last year Chef Sean made some vanilla bean syrup for his canned peaches, and they were some of our FAVORITE jars to open in the winter. Looks like we’ve now started a yearly tradition.
These peaches are pretty easy to make. This post here isn’t the place to learn the basics of canning, so be sure to familiarize yourself with sterilizing jars, water baths, etc. if you’ve never canned before. I also don’t have ratios and proper measurements… it’s more of an idea for you home canners to try.
First, Sean made a vanilla bean syrup by boiling equal parts sugar and water with a couple vanilla beans that he sliced in half long-ways and scraped out the beautiful caviar-like black beads. He let this reduce and cool completely.
Next, the peaches were blanched, which means boiled for a few minutes and then plunged into an ice bath. This allows the skins to be easily removed.
When cool to the touch, he sliced them in half and removed the pits, stacked them in jars, covered them in syrup, and processed them in a water bath for 15-20 minutes. After removing the jars from the boiling water, set them somewhere and allow them to cool. You’ll hear the pop of the lids after a little while, letting you know they’re properly sealed. Store in a cool place until winter.
Enjoy!
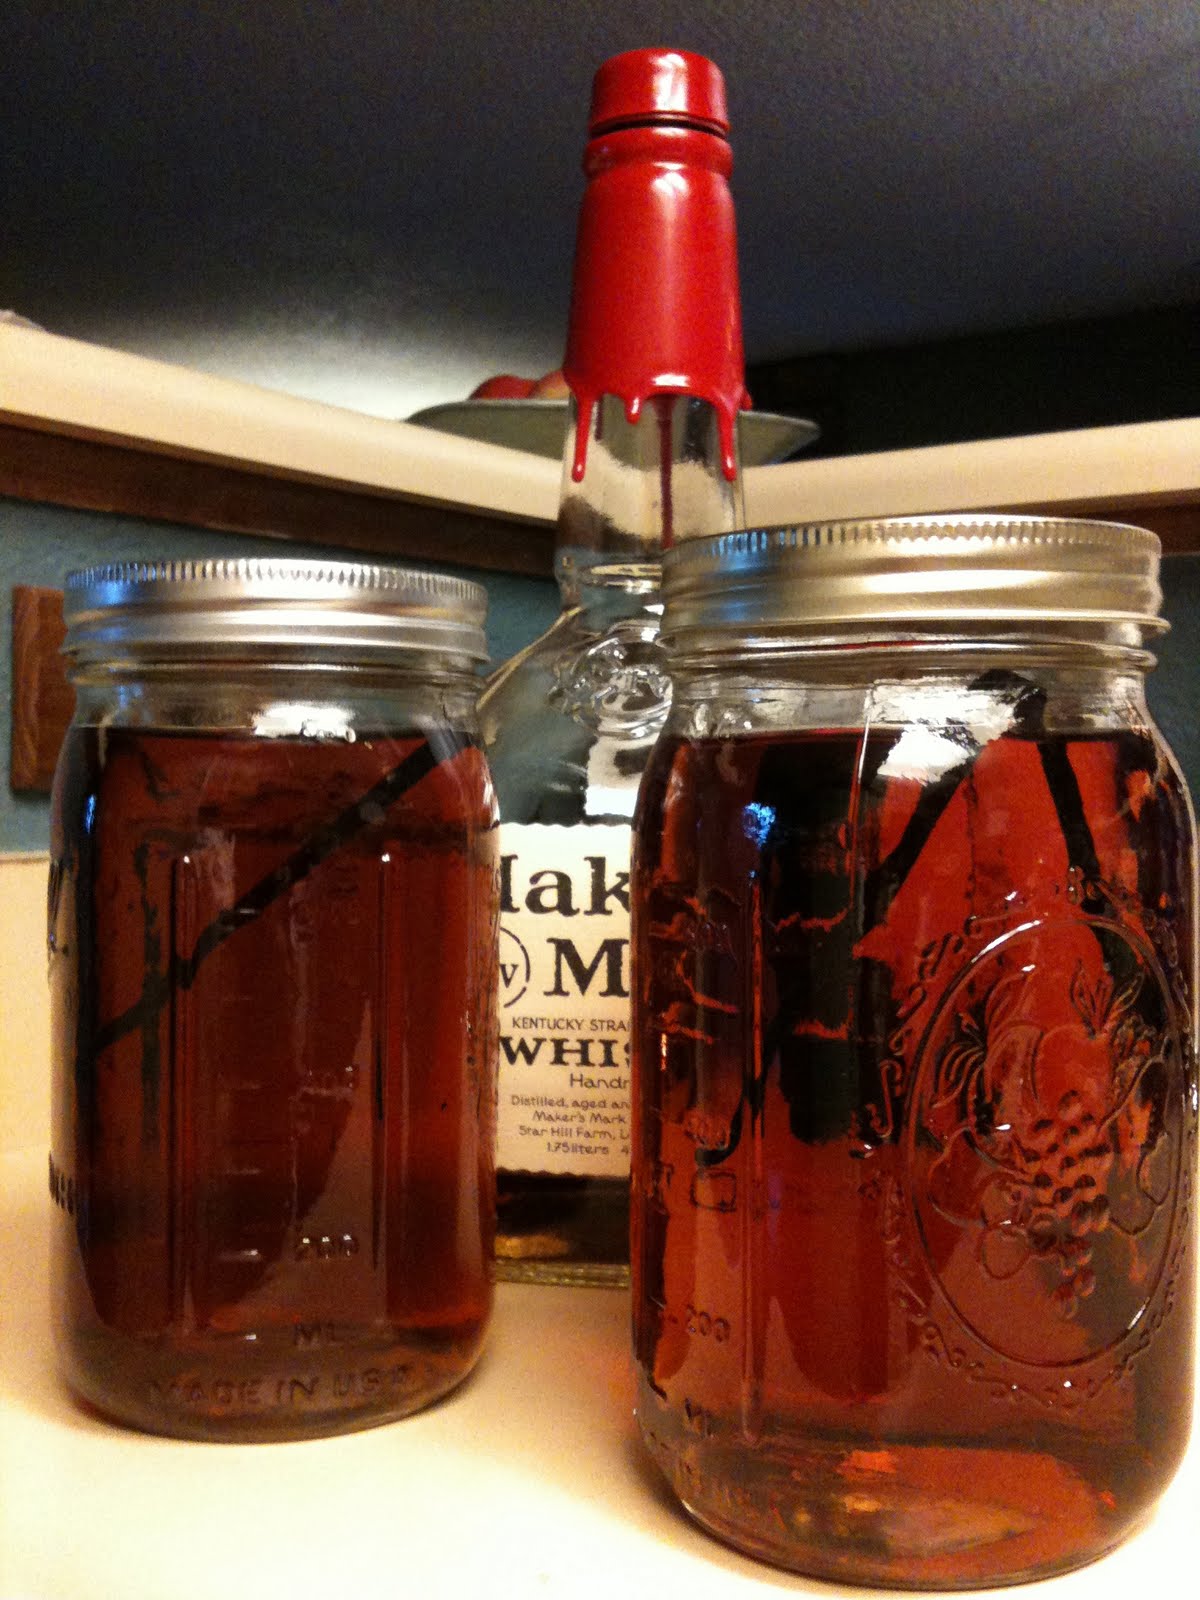
Vanilla Bourbon
- At June 4, 2011
- By megan
- In bourbon, Recipes, SALT, Savory Spice Shop, The Cocktail Element, vanilla
- 0
If you read my blog, you’ll know that I have been having a pretty intense love affair with cocktails lately. They’re fun. I like to be around them… get to know them… explore their flavor profiles.
And since it all seems to boil down to flavor profiles at this stage in my cocktail affair, it’s only right to explore the flavor profiles of this spring’s Cocktail Element, created by my esteemed sommelier/mixologist friend, Evan Faber of SALT. Last month I infused some Chipotle Tequila. This month it is Vanilla Bourbon.
Homemade Vanilla Extract
- At March 15, 2011
- By megan
- In Recipes, Savory Spice Shop, vanilla, Vodka
- 1


Let’s get Social