Banana Chocolate Chip Coconut Walnut Muffins
Could it get any better than banana chocolate chip coconut walnut bread? Or, in this case, muffins? I made muffins because they bake so much more quickly than a loaf, and in the summer heat, that makes a big difference. Muffins are also more manageable… you can easily count how many you’ve eaten. That might not be a good thing, but this recipe is.
Ingredients:
- 1/2 cup heavy whipping cream
- 1/2 cup honey
- 1 egg
- 1 tsp vanilla extract
- 2 very ripe bananas, mashed
- 1/2 cup whole wheat pastry flour
- 1/2 cup whole wheat flour
- 1/2 cup unbleached all purpose flour
- a pinch of sea salt
- 1 tsp baking soda (a little less if at altitude)
- 1 TB cinnamon
- 1/2 cup toasted and coarsely chopped walnuts
- 1/2 cup unsweetened shredded coconut
- 1/2 cup chocolate chips
Preheat the oven to 350 (375 if at altitude).
As with all of my baking recipes lately, start by whipping the cream into butter. Pour the cream into your KitchenAid stand mixer and whip on speed 10 with the wire whisk attachment for 3 minutes. Then scrape down the bowl, switch to the paddle blade, and add the honey. Cream that, add the egg and vanilla, mix well, add the banana, and mix again. Easy.
Combine the dry ingredients in a bowl (except for the nuts, coconut, and chocolate). With the mixer on a slow speed, add the dry ingredients and mix until combined. Finally, mix in the nuts, coconut, and chocolate chips.
I poured mine into muffin pans lined with If You Care baking cups. I like this brand because they are more environmentally friendly than your average baking cups.
My delicious muffins were done in about 20 minutes. But, make sure to check them by sticking them with a skewer or knife to be sure they’re baked all the way through. Cool on a wire rack and try to enjoy in moderation.
CSA Veggies
- At July 9, 2010
- By megan
- In CSA Challenge, Ollin Farms
 2
2
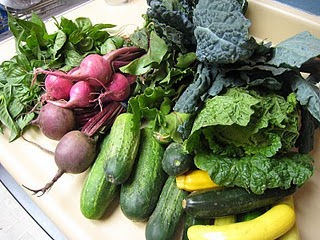
This is my current CSA Challenge. I have lots of genovese basil, scarlet queen turnip, beets, zucchini, squash, alibi cucumbers, napa cabbage, and lacinto kale.
I need to be more creative with turnips!
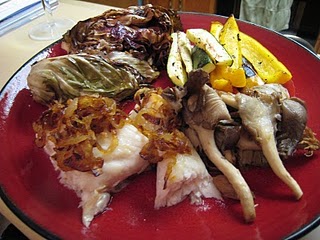
Halibut with Caramelized Onions, Sauteed Tree Oyster Mushrooms, Grilled Radicchio, Zucchini, and Pepper
- At July 8, 2010
- By megan
- In caramelized onion, CSA Challenge, Fish, Grilled, Hazel Dell, Mushrooms
 0
0
It all started with some mushrooms. My friend Chad from Hazel Dell suggested I try these tree oyster mushrooms last week at the Boulder Farmers Market, so I had to figure out what to do with them.
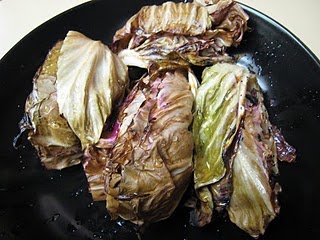
Also, I had a beautiful head of radicchio from Ollin Farms, which was an ingredient in my CSA Challenge. I knew I wanted to grill it, which is easy. Just slice it, drizzle with olive oil and sea salt, and grill for a few minutes. Turns out great.
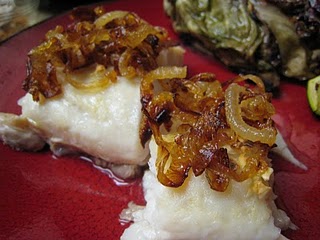
Then we decided to buy some halibut. Now I knew what to do with my meal. Halibut with caramelized onions, grilled radicchio, zucchini, and yellow pepper, and sauteed tree oyster mushrooms. A perfect combination.
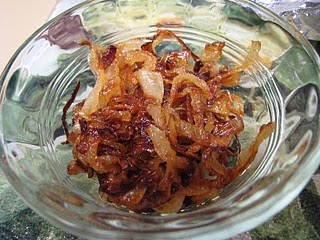
It is easy to caramelize onions. It just takes a little while, so that usually needs to be done first. I had a beautiful little walla-walla onion from the market, so I sliced it and added it to a hot saute pan with a little olive oil and let that start to turn golden brown. You need to watch your onions and turn down the heat if they start to burn. The idea is to let them slowly release their sugars and caramelize into sweet, delicious, heavenly-brown goodness.
As I said before, the radicchio and veggies were grilled. I baked the halibut with a little olive oil at 350 until is was just cooked through. All ovens are a little different, so watch your fish. Mine took 15 minutes or so.
Meanwhile, a mushroom saute with a little butter, olive oil, shallots, sea salt and pepper was under way. Nothing too fancy because all of my produce came from local farms, so it was all super fresh and delicious.
I definitely enjoyed this one!
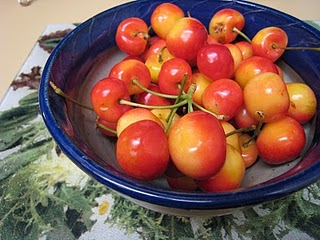
Ranier Cherries
- At July 7, 2010
- By megan
- In cherries
 0
0
How could I resist paying $6 for these cherries at the Boulder Farmers Market?
I couldn’t. We ate them all in one evening.
How to make homemade cream cheese (and separate whey)
This is definitely something I never thought of doing, but it actually intrigued me, so I gave it a try.
It all started because I wanted to try and lacto-ferment some cabbage, but you need whey to do that. In order to get whey, you can separate it from yogurt, which I always have at home. So, let the separation process begin!
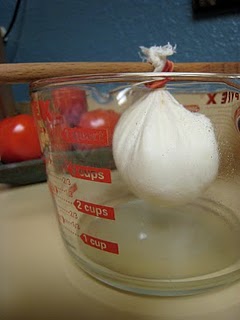
Cut some cheese cloth (8 inch square) and put 1/2 cup or so of yogurt in it. It doesn’t matter if it is fat free, low-fat, or whole milk yogurt. I used cow milk yogurt and have not yet tried this with goat milk yogurt.
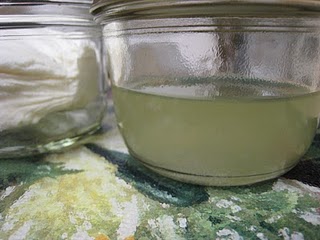
Anyway, put a fine metal sieve over a container, line it with the cheese cloth, and let the yogurt start to drain. The whey will be the liquid that drips into the container. After a bit has dripped out, tie the cheese cloth to a stick (here I used a wooden spoon) and let it sit for a few more hours until it stops dripping. Do not squeeze the ball, just be nice to it and let it drip.
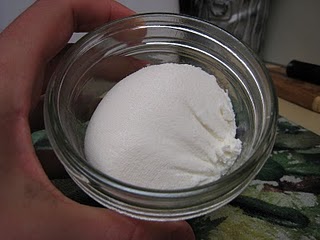
I let mine sit in the fridge over night and in the morning had some homemade cheese that rivals cream cheese. I had a lot of whey left over to use in lacto-fermenting foods.
Why should we lacto-ferment foods? I am going to answer that question later in another post.


Let’s get Social